

One tricky part of landscape photography, along with other genres such as architecture, is making sure that your nearest and farthest subjects are both as sharp as possible. We’ve written before about a few techniques to maximize front-to-back sharpness, and I thought it would be worth emphasizing one of the most important ones again: the “double the distance” method. Here’s how it works.
What Is the Double the Distance Method?
The double the distance method is a way to maximize a photo’s depth of field by focusing at the proper distance in a scene. Your goal is to equalize the photo’s foreground and background sharpness.
It is a relatively easy technique to apply in the field. To start, look at the closest object in your photo and ask yourself how far away it is (specifically from the plane of your camera sensor, which I’ll cover more in a moment). Then, focus at twice that distance.
So, if the nearest object in your photo is a patch of grass at the bottom of your frame, ask yourself how far away it is. If the grass is one meter away, all you need to do is focus on an object that is two meters away.
You can estimate these distances; they don’t have to be perfect. And you don’t need to use meters, or feet, or any other standard of measurement. If it’s easier, just visually double the distance. You can even walk into the scene and count paces for the same result.

When done right, you’ll capture a photo with equal sharpness between the foreground grass and the most distant horizon.
I’ll emphasize again that equal sharpness should be your goal when you use this technique. You won’t get perfect, maximum sharpness on the grass itself, because you’re not focusing on it. For the same reason, you also won’t get perfect sharpness on the horizon. But the horizon (infinity) sharpness and the rock (foreground) sharpness will be equal, neither sharper than the other, which maximizes the total front-to-back sharpness of your photo.
Of course, that’s not always what you’ll want. If there is one main subject in your photo, such as a person standing in the landscape, just focus on the person. The same is true if you’re photographing stars at night, in which case you probably want the sharpest possible stars even at the expense of the landscape. Sometimes, maximum subject detail outweighs maximum front-to-back detail.
But if you don’t want to prioritize sharpness anywhere in your scene, and instead want maximum definition throughout the image, focus at double the distance.
Take a look at the following photo. Here, I focused at the end of the foreground ice, since it was double the distance to the nearest object in my photo:
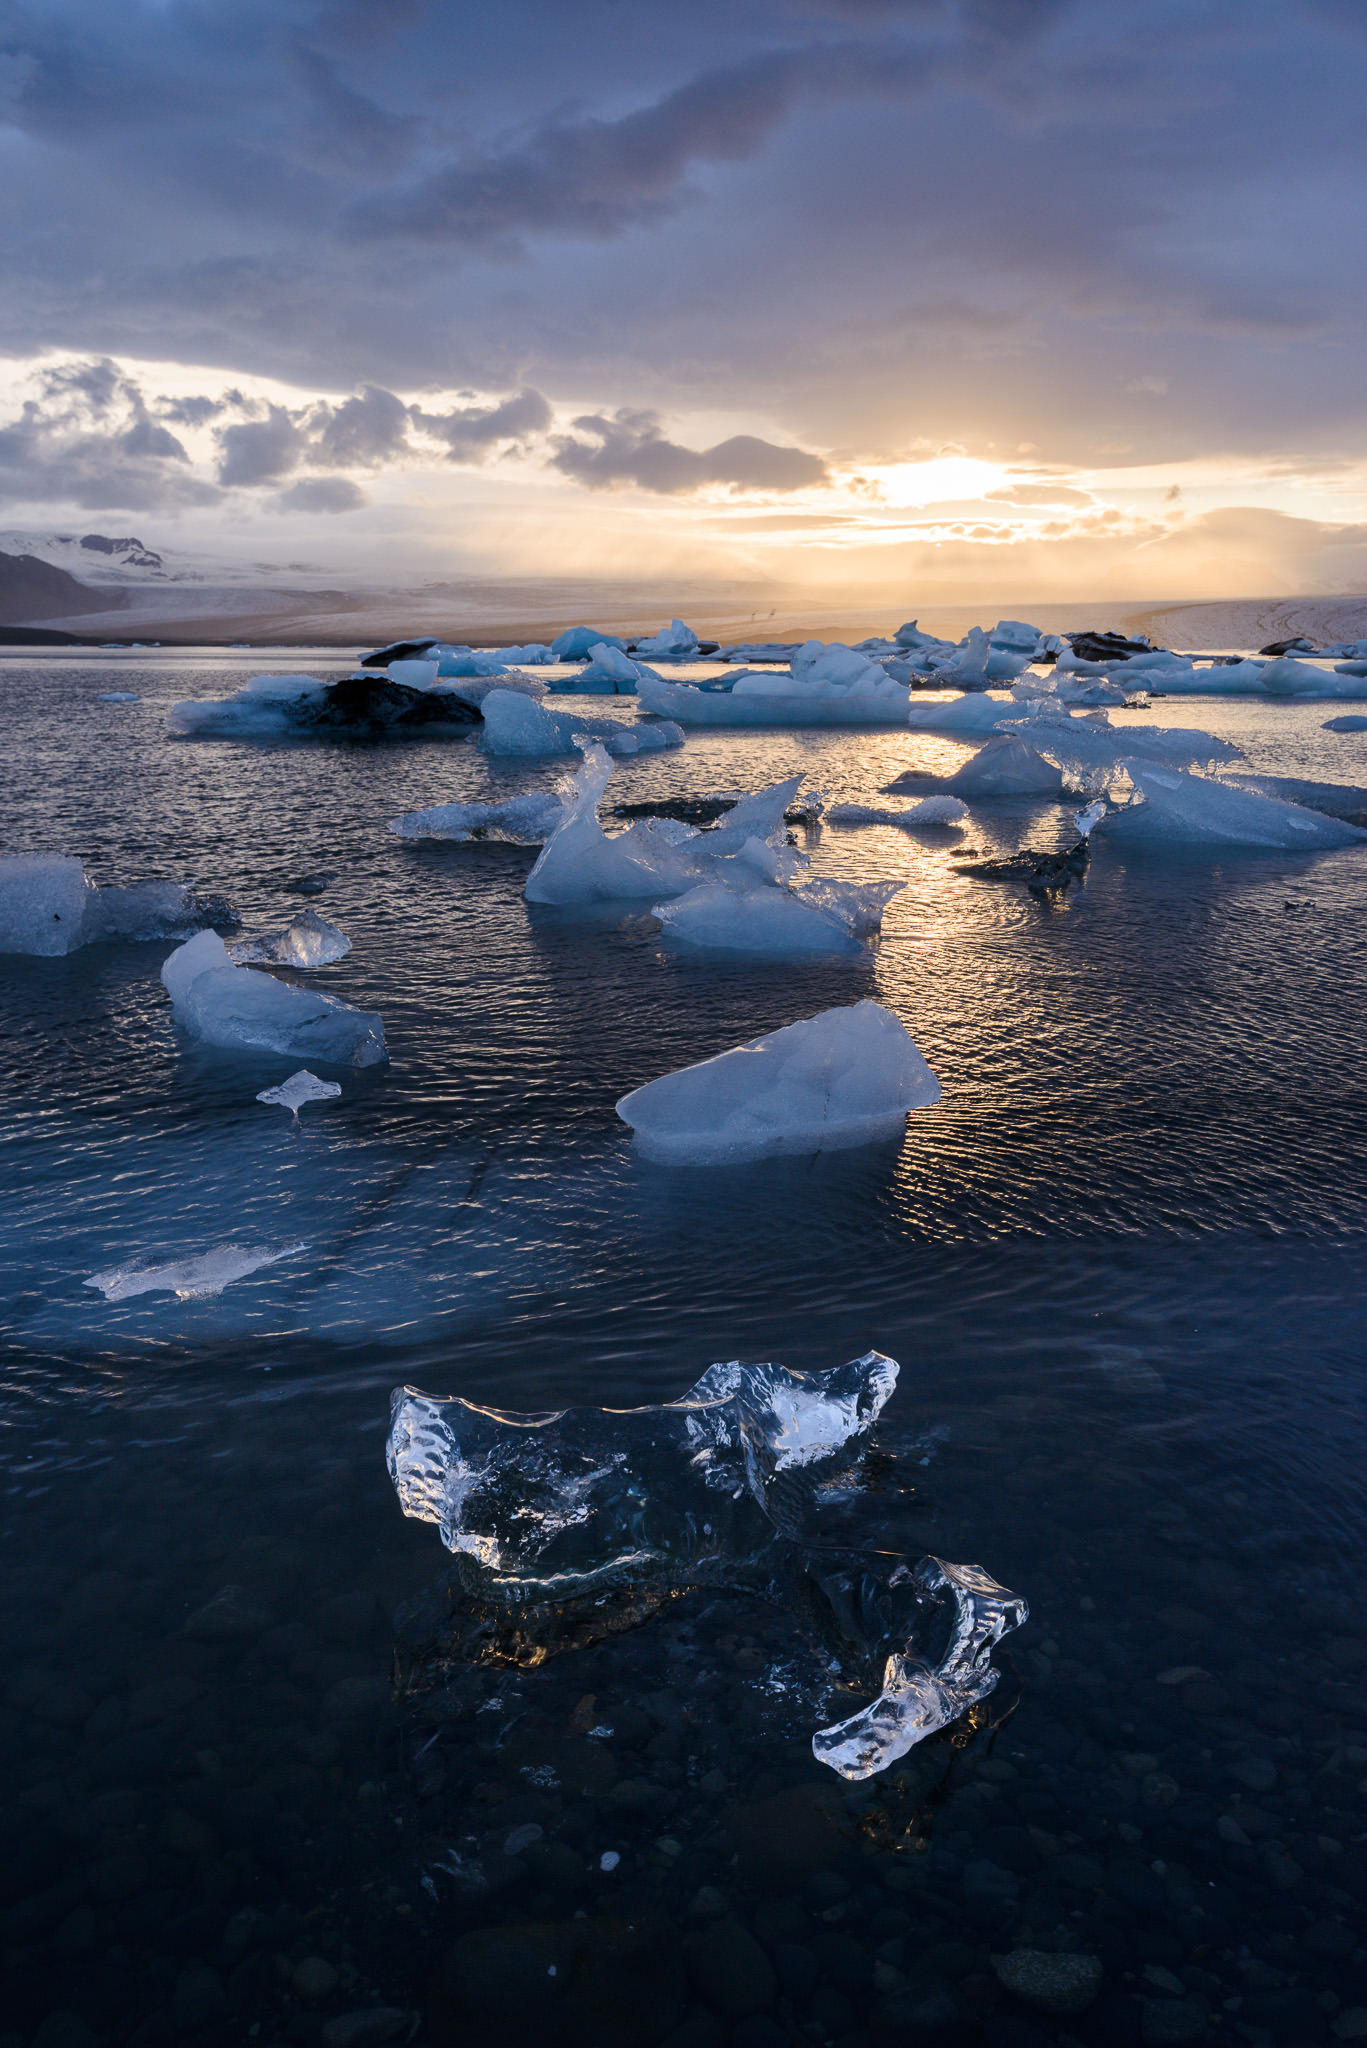
And then consider the following crops from the foreground and background of this image (click too see full size). Note that these are extreme 100% crops, and I didn’t focus on these exact regions, so sharpness isn’t perfect. But the important part is that sharpness is equal in both the foreground and background:


Putting It Into Practice
It is relatively easy to use the double the distance method. You certainly don’t need to bring a tape measure into the field and do all of this with perfect precision; even simple estimates are likely to give the results you want. However, there still are a few considerations you need to take into account.
To start, the first distance that you double is measured from the plane of your camera sensor to your subject. You can simplify this definition in many cases by just talking about the horizontal distance between your camera and your subject. And again, some imprecision here isn’t a big deal. If you’re off by a bit, you probably won’t notice in your photos.
However, keep in mind that the plane of your camera sensor tilts as you angle your camera. So, sharply angling your camera will affect which distance you double. Normally, this effect is minimal enough so as to be unimportant, but tilting at steep angles can make a difference.
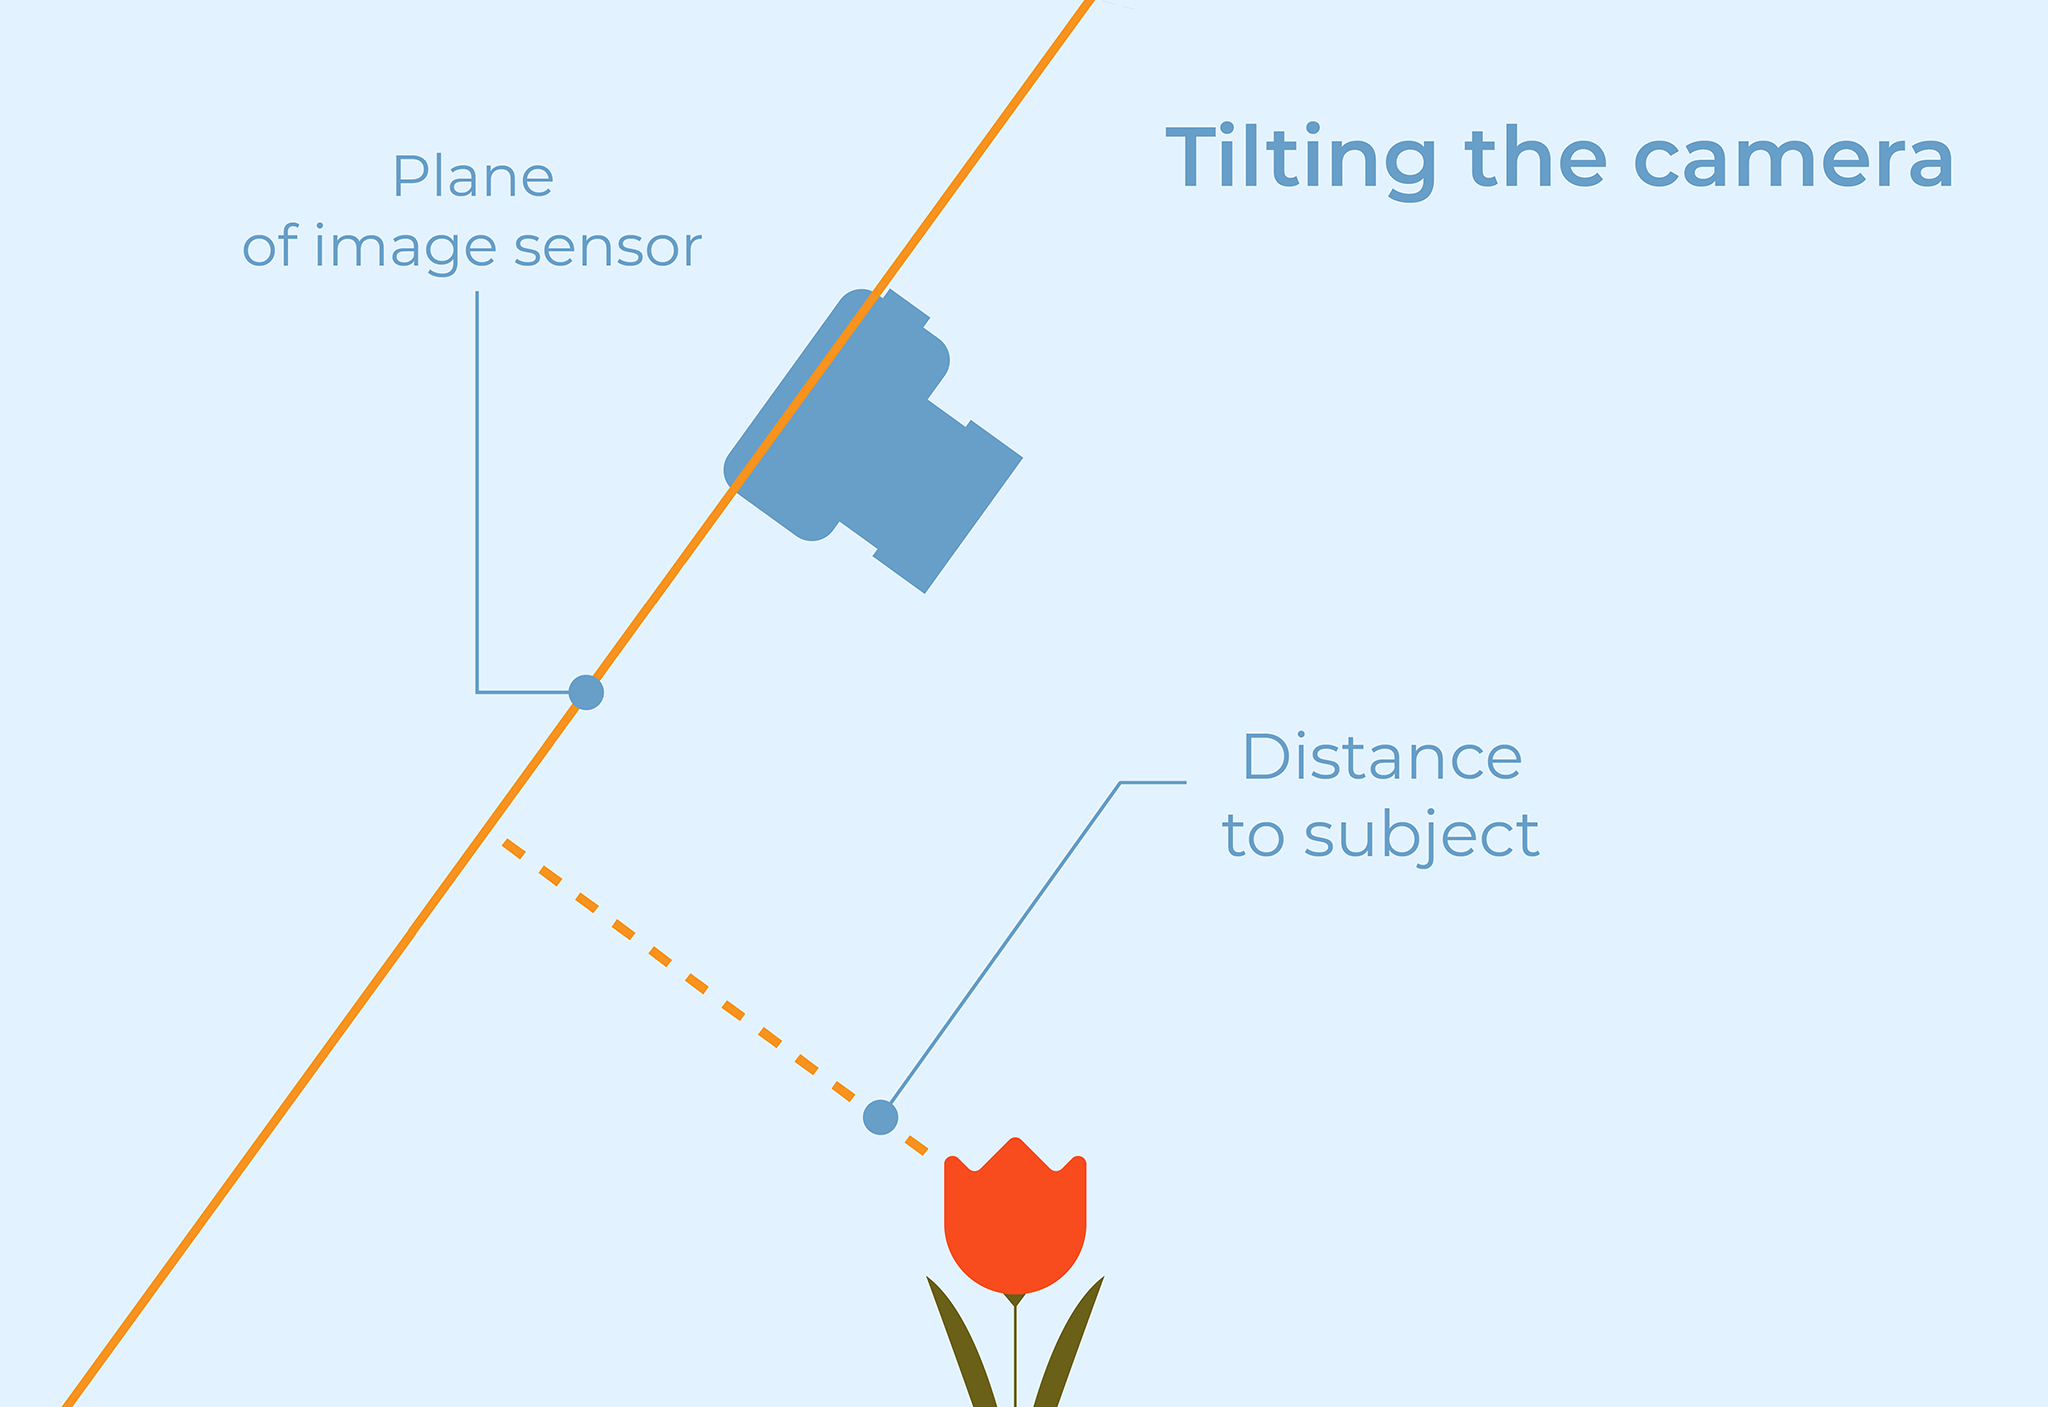
If you don’t tilt the camera at an extreme angle, the easiest way to put this method into practice is just to ask yourself how far away the subject is, horizontally, from your camera. You can even draw an imaginary line from your camera to the ground, and then measure from there to your nearest subject (that’s what I do a lot). You only need to worry about more complicated visualization when you tilt your camera significantly.
Which Aperture Should You Use?
By now, your nearest object and infinity are equally sharp. Excellent – but that’s just the first step. After all, you can have a very blurry foreground and very blurry background that are still technically “equal” in their sharpness. Your photo still won’t be sharp overall.
After you’ve made the foreground and background equally sharp, it is a bit trickier to make sure they are optimally sharp. To get there, you need to use the perfect aperture, balancing out aberrations (i.e. a blurry lens), depth of field, and diffraction. That’s not an easy process, although we’ve covered mathematically how to do it in the past if you want a detailed look.
However, if you don’t want to figure this out with depth of field charts (most photographers don’t), here’s a good rule of thumb:
- For distant landscapes at infinity, use f/8 or your lens’s sharpest measured aperture
- For landscapes with a wide lens and more of a foreground, use f/11
- For landscapes with a very nearby foreground, or when you’re using a telephoto lens, use f/16
- For landscapes where even f/16 isn’t enough, focus stack multiple photos instead
That guideline isn’t mathematically precise, but it will get your photos sharp enough overall for most any use.
In fact, even if you’re a full f-stop below optimal, you’ll only lose about 10% of the theoretical resolution in your nearest and farthest objects (according to calculations by George Duovos). That’s not ideal, of course, but it won’t ruin a photo. If it bothers you, just go through the more complex mathematically accurate technique we’ve covered before.
Combined with the double the distance method, choosing the optimal aperture is what maximizes your front-to-back sharpness, so it’s worth putting in the time to learn this technique – even the simplified version above. Memorize it if you have to; you’ll be glad you did!
NIKON D800E + 14-24mm f/2.8 @ 14mm, ISO 200, 1/50, f/16.0
Exceptions
So far, I have assumed that the farthest object in your photo is at infinity. That’s a fair assumption in many landscapes, but it doesn’t always apply. For example, on a very foggy day, the most distant object visible in a photo may not be very far away at all. Especially with a telephoto lens, the difference may be enough that the “infinity assumption” can get in the way of achieving maximum sharpness.
That’s also true for some architectural scenes, which may have a nearby foreground, but the farthest object is a wall 5-10 meters away. In that case, again, you’ll miss out on some foreground definition by still keeping infinity sharpness as one of your considerations.
What’s the solution? Although it is still possible to calculate the mathematically sharpest focusing distance – you barely need to change around the underlying equations at all – it’s rarely practical to do so in the field. Instead, I recommend simply focusing “a bit” closer than double the distance. No, this is not an objective way to describe it; there’s some trial and error, plus experience, involved in knowing how much closer to focus. But we’re already talking about “last 1%” gains; a bit of inaccuracy here won’t hurt you.
Another exception is if your lens has high levels of field curvature. In that case, your plane of sharpest focus could be more like a sombrero of sharpest focus, or a hemisphere. Most people don’t know whether their lens has very high field curvature. If that includes you, just don’t worry about it, since the results will not be vastly worse in most cases; chances are that you’ll just get a bit more foreground sharpness at the expense of background sharpness, but rarely enough to notice, all else equal.
However, if you are certain that your lens has a lot of field curvature, and you have a decent mental picture of the appearance of your lens’s field curvature, you can take it into account as well. Just visualize your sensor’s plane of focus as a hemisphere of focus instead, and double the distance from that instead. This requires pretty good visualization skills, though. The simpler method is just to focus a bit farther into the landscape than you otherwise would.
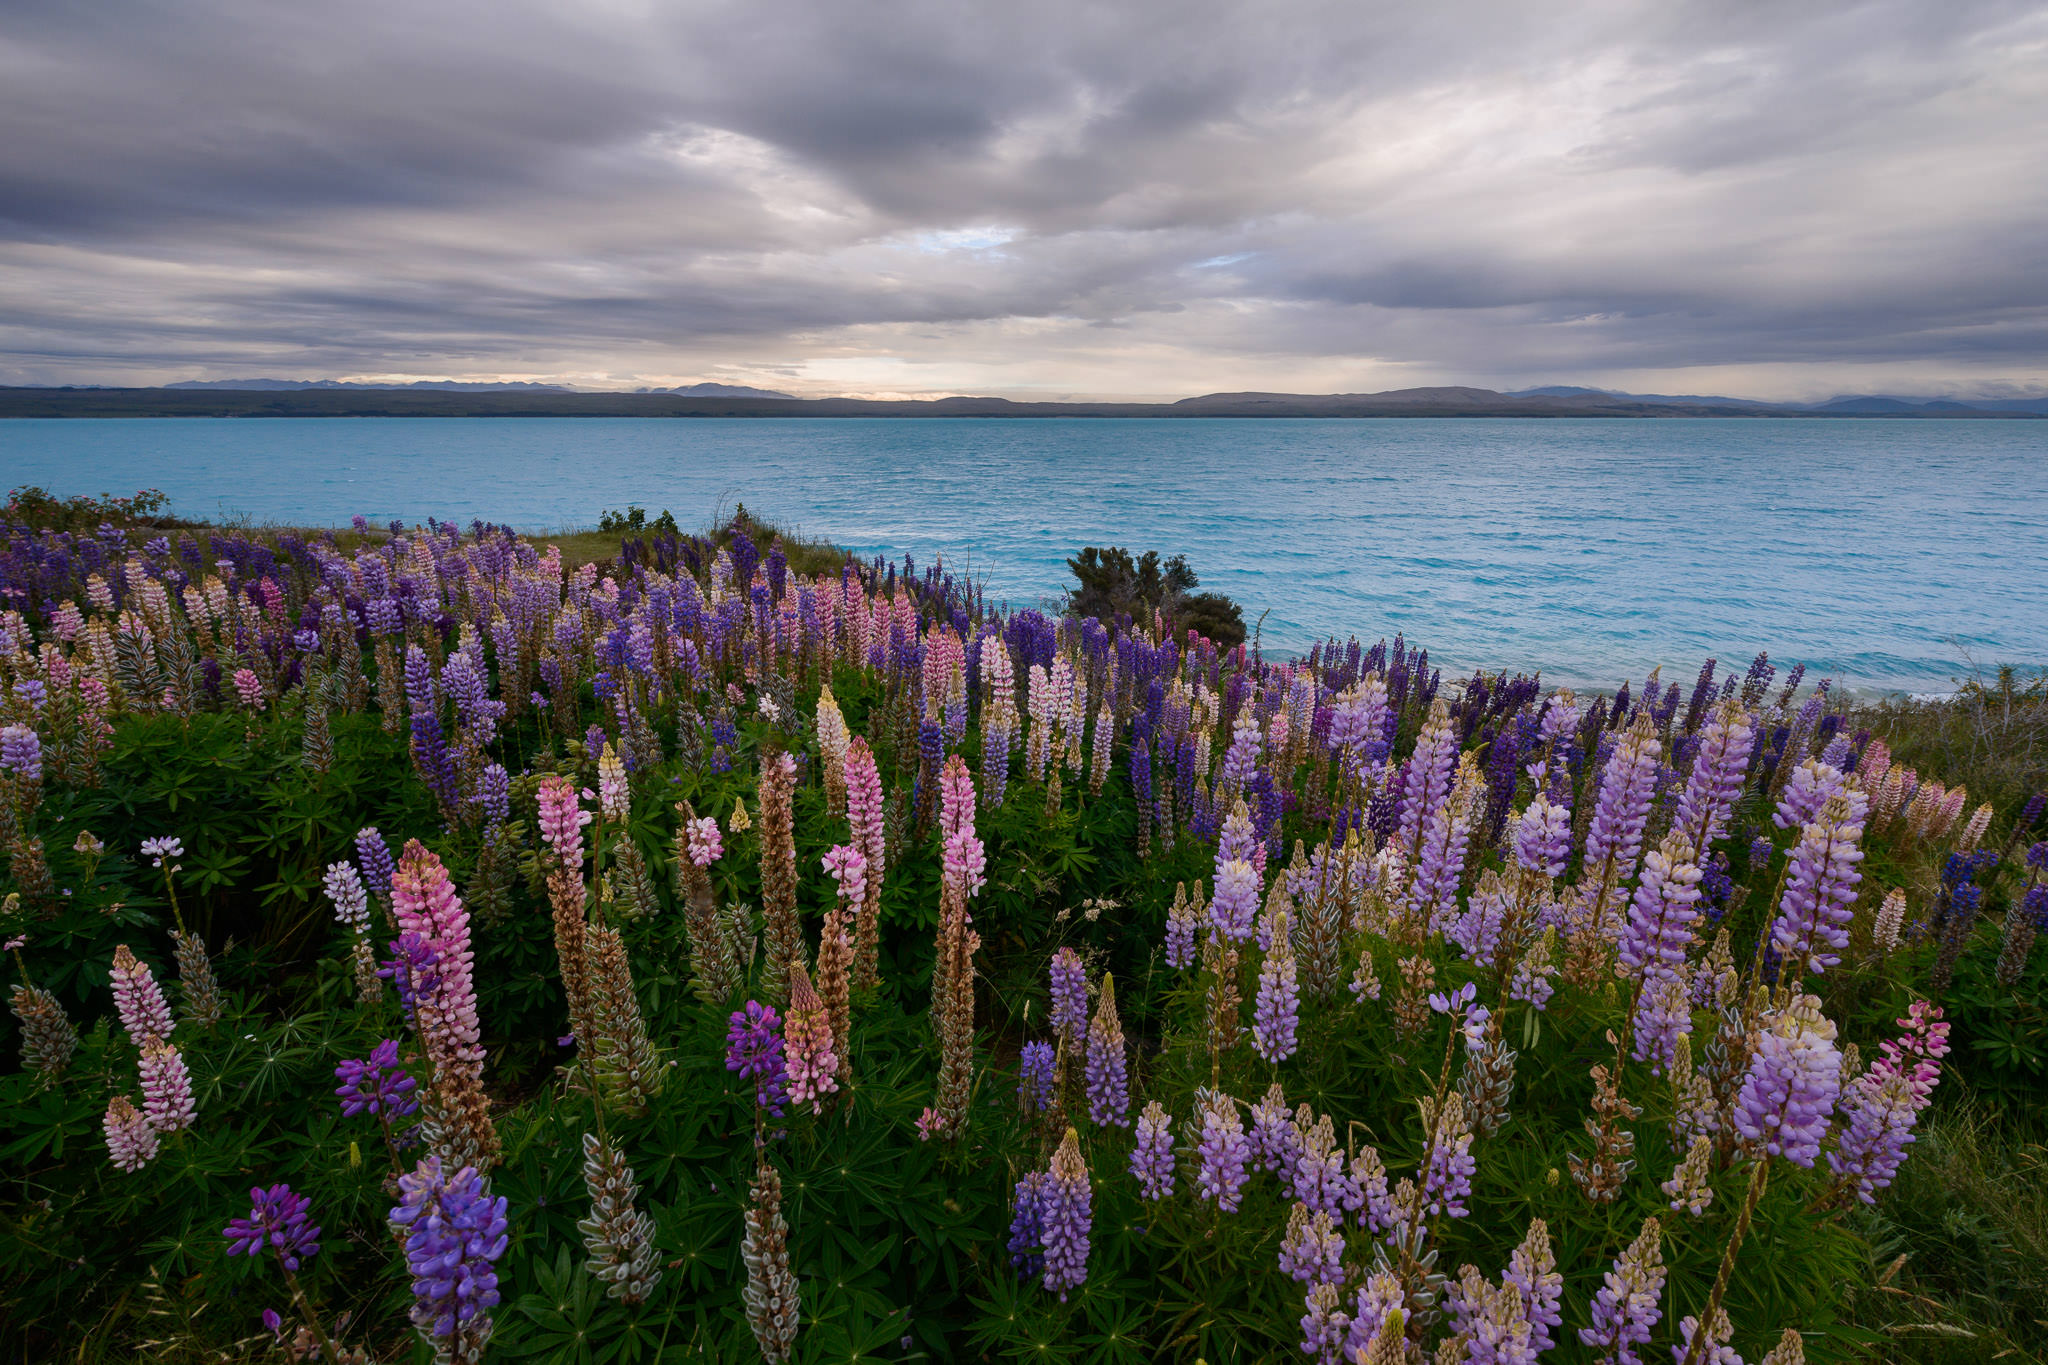
NIKON Z 7 + 20mm f/1.8 @ 20mm, ISO 400, 30/1, f/5.6
Conclusion
When I first started using the double the distance method, I realized that I had been focusing too far away in most of my landscape photos beforehand. This technique made me more aware of tiny details creeping into the corners of a photo – quite close to my lens – that I would have overlooked in the past.
The result? My photos became sharper overall. I also gained a more accurate understanding of my equipment’s capabilities. Some lenses that I thought were mediocre in the corners turned out to be quite good; the corners were just strongly out of focus more often than I thought. Perhaps you will find the same, and you’ll end up with photos with more detail from front to back.
Although sharpness is far from the most important part of landscape photography, a tack-sharp image can make a big difference for some photos and large prints. The double the distance method is just one part of that puzzle, but it’s an important one, particularly when you are dealing with extremes (landscapes with very near objects, or telephoto lenses with inherently lower depth of field). Hopefully, this article gave you a good idea of when and how to use it properly.

