


When photographing landscapes and including a bright source of light like the Sun, we often end up getting quite a bit of ghosting and flare in images. Although seeing lens flare is quite normal in both images and video (in fact, videographers and movie makers often purposefully add ghosting and flare to their footage to make the scene look more natural), sometimes the effect can heavily harm images.
Since every lens reacts differently to bright sources of light, with some having special coatings and optical optimizations in place to reduce such effects, the effect of ghosting and flare and its damage are not something that can be easily predicted – there are too many variables involved, like focal length, optical design, coating, light source angle and even dust within the lens. So what do you do when you have a beautiful sunrise / sunset moment and you want to capture it with the sun in the frame without traces of ghosting / flare? I have been using a “finger the sun” technique for many years and today I want to explain how this technique works and how you can use it to create stunning, dramatic landscape images.
Ghosting and Flare Damage
Let’s take a look at some image samples where I purposefully included the sun in the frame for artistic, composition and other reasons. Here is the first image where I put I put the sun right in the middle of the frame and stopped my aperture down to f/16 to create a “sunburst” effect:
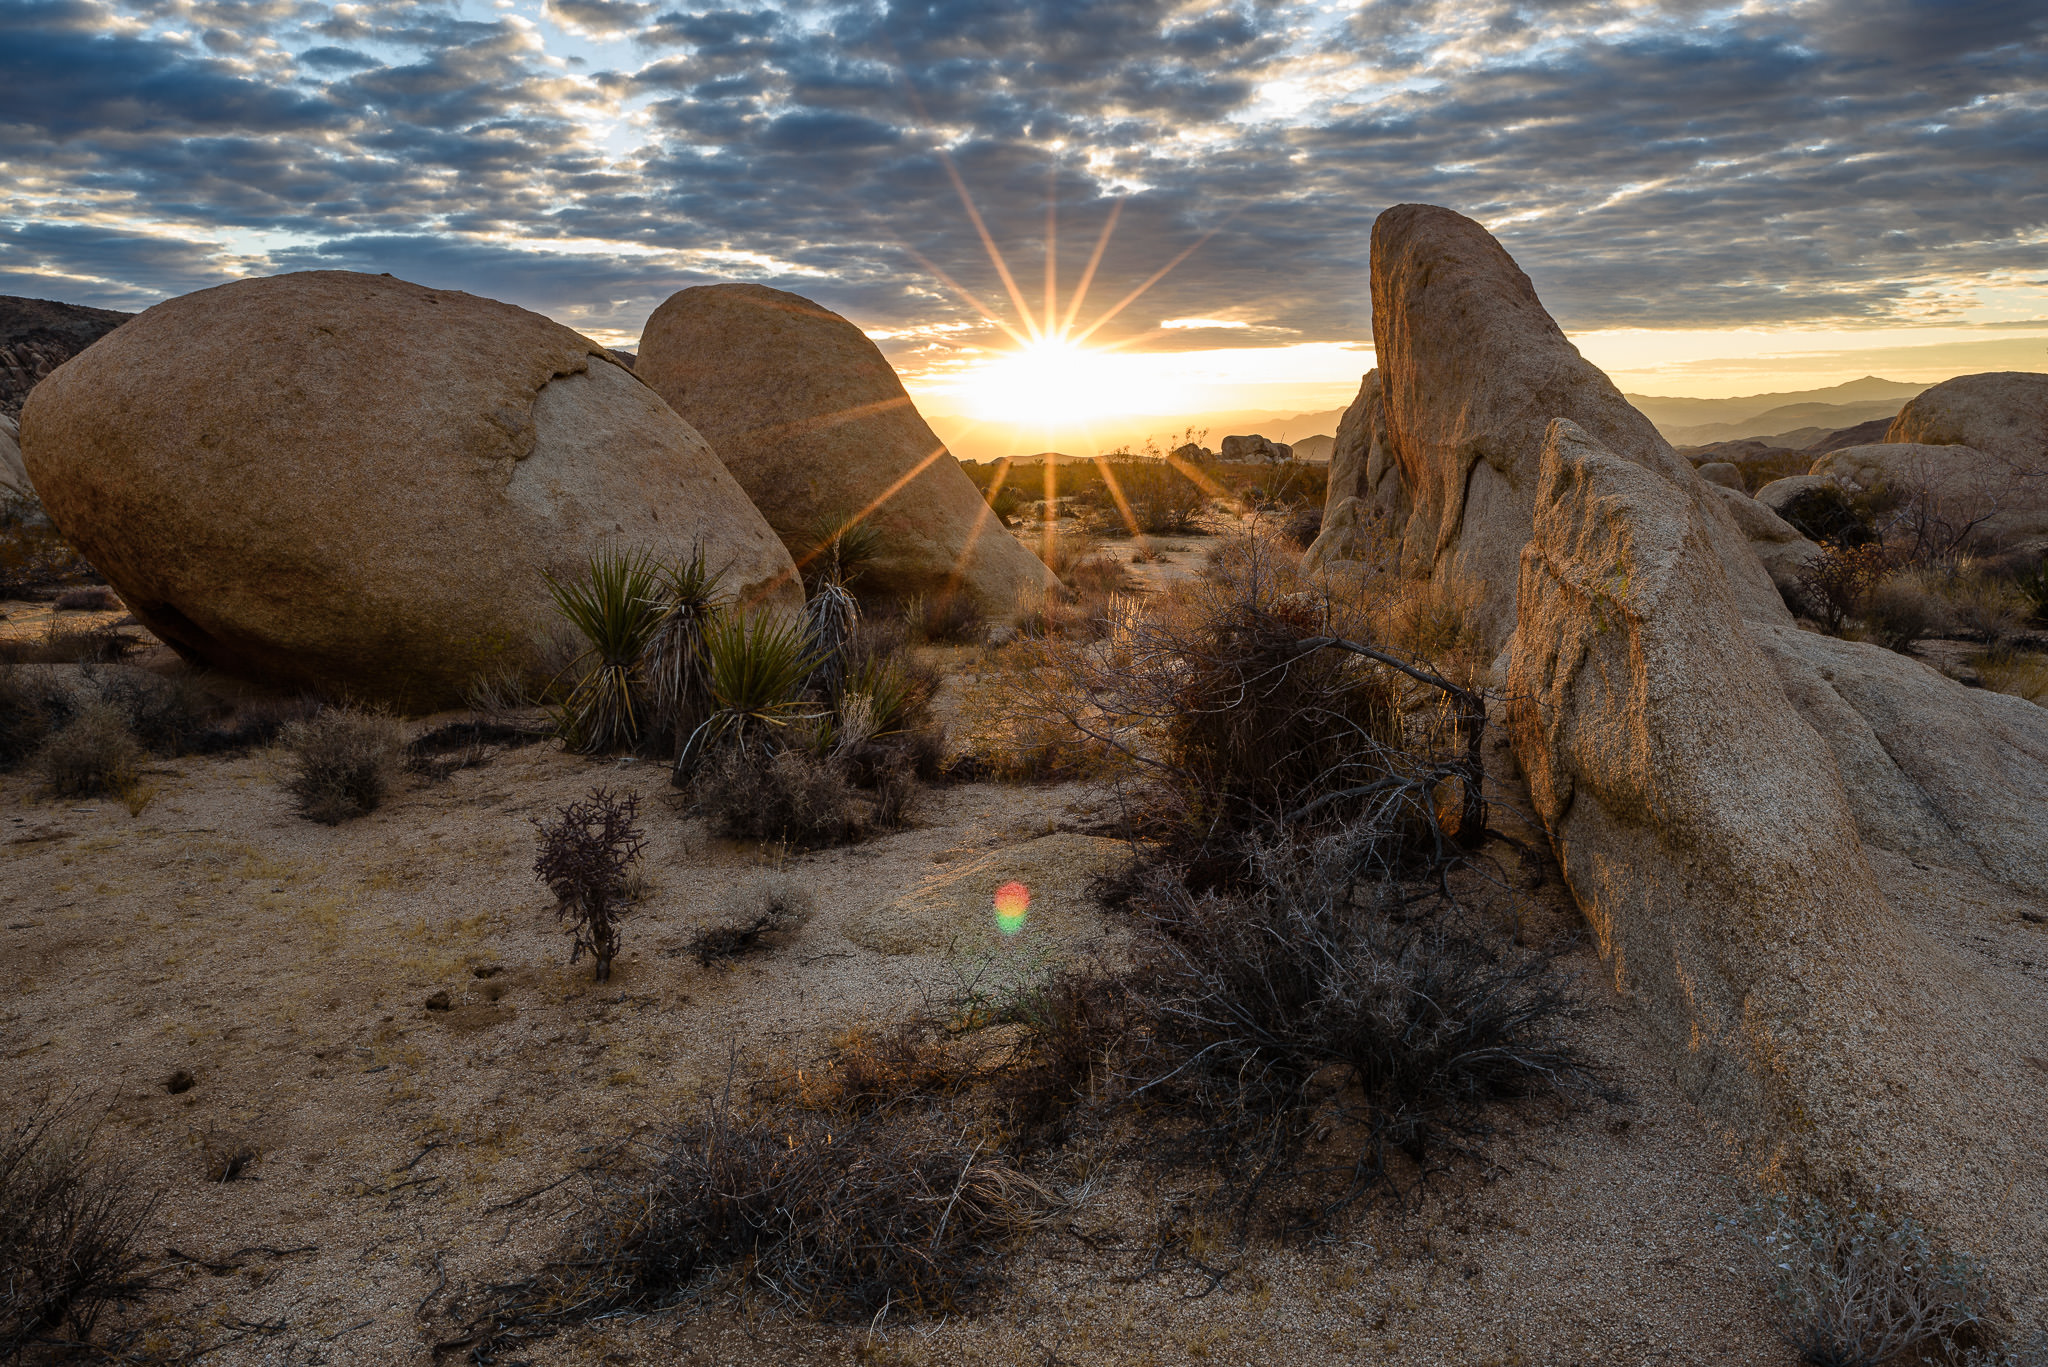
An image like this is the “best case scenario” when photographing the sun, because the resulting damage of ghosting and flare is very minimal – as you can see, there is only a single ghost present on the mid-lower portion of the frame, which can be easily fixed with a spot healing tool in Photoshop, Lightroom or any other software that has such capability. There are a few reasons why the sun did not do a lot of damage to the image here. First, it was shot at a reasonably short focal length of 24mm on a full-frame camera. The reason why focal length is an important factor, is because the effects of ghosting and flare worsen at longer focal lengths! When shooting with a wide angle lens, the bright source of light such as the sun occupies a tiny fraction of the frame, which minimizes the impact of light bouncing around between lens elements and also minimizes both veiling and ghosting flare. Shooting wider also reduces the impact of damage on the surrounding areas, allowing quite a bit of information to be restored, without losing too much highlight data. If you have ever shot with a fisheye lens and included the sun in the frame, you would have noticed that the sun would typically show sunbursts even at larger apertures and the area around the sun would practically lose no data! Take a look at the below image that was captured with a fisheye lens:

At 10.5mm on a cropped-sensor camera, the focal length makes the sun so small in the frame, that I was getting sunbursts even when shooting at f/5.6-f/8 apertures. For this particular image, I stopped the lens down to f/11 and as you can see, it created a pretty big burst on the upper left side of the frame. However, what’s impressive to see here is the effect of the sun on the sky – it practically had no impact! The areas of the sky immediately close to the sun appear to be blue, so I did not have to worry about recovering any details there or using a filter to reduce overexposure. In addition, there are no traces of ghosting and flare in the image. If I shot exactly the same scene with a longer focal length lens, I would have surely had more issues to deal with. So always keep in mind when including a bright source of light in your images – the longer the focal length, the more ghosting and flare damage you will see in the resulting images.
Second, the image was shot with a high-quality prime lens, specifically the Nikkor 24mm f/1.8G, which not only has an advanced optical formula, but also Nikon’s latest multi-coating technologies such as Nano Coating and Super Integrated Coating to reduce internal reflections. This is also one of the main reasons why the resulting damage from the sun was minimal.
Third, as I have pointed out above, the aperture was stopped down to f/16 to create the “sunburst” effect. In this particular case, the lens I used was a perfect candidate for such a beautiful burst – the 24mm f/1.8G has a 7 blade diaphragm, which is what Nikon usually uses on lower-end lenses. Typically, the more aperture blades, the smoother the bokeh highlights would be in images, particularly if the aperture blades are “rounded”, but higher number of aperture blades also has an adverse effect on being able to create beautiful sunbursts – as the number of blades increase, so do the number of bursts in the image. Nikon and Canon typically use either 7 or 9 blade diaphragms (odd number of blades result in doubling of sunburst rays), so a lens like the above would create a total of 14 rays, whereas a 9 blade diaphragm lens like the Nikkor 24-70mm f/2.8G would create sunbursts with 18 rays. The more the rays, the more messy it typically looks, which is why lenses with 7 diaphragm blades typically make better candidates for photographing landscapes with the sun included in the frame.
But what does stopping down do to images in terms of ghosting and flare? It depends by lens, its coatings and optical design, but usually, stopping down makes ghosting and flare appear more obvious by reducing the total area of the frame impacted by it. Certainly not a good thing! In many cases, you will see more defined shapes with more colors in them, making it quite difficult to deal with in post-processing, especially when there are lots of those to handle. If you see such damage in images, your best bet is to use the technique I describe in this article to reduce and potentially even eliminate those nasty ghosts.
Fourth, the sun was placed in the upper middle portion of the frame. Typically, if you move the sun to the edges of the frame, you will see ghosts on the opposite side of the frame. For example, placing the sun on the upper left side of the frame will mostly introduce ghosts on the lower right side of the frame. In this particular case, since the sun was placed practically in the center upper portion of the frame, the ghost we see is in the opposite side, towards the lower portion of the frame.
If I placed the sun on the upper left, the ghosts would have moved to the lower right, while placing the sun on the upper right would have moved the ghosts to the lower left side of the frame. Keep this in mind when photographing landscapes, as you might not pay much attention to the resulting images on the scene, only to be sorely disappointed when looking at those images on your computer. In some cases, veiling flare and ghosting at larger apertures can really harm your images, reducing contrast in select areas of the image – something that is close to impossible to fix in post-processing!
Let’s take a look at a different image, where ghosting and flare have a much more devastating effect:
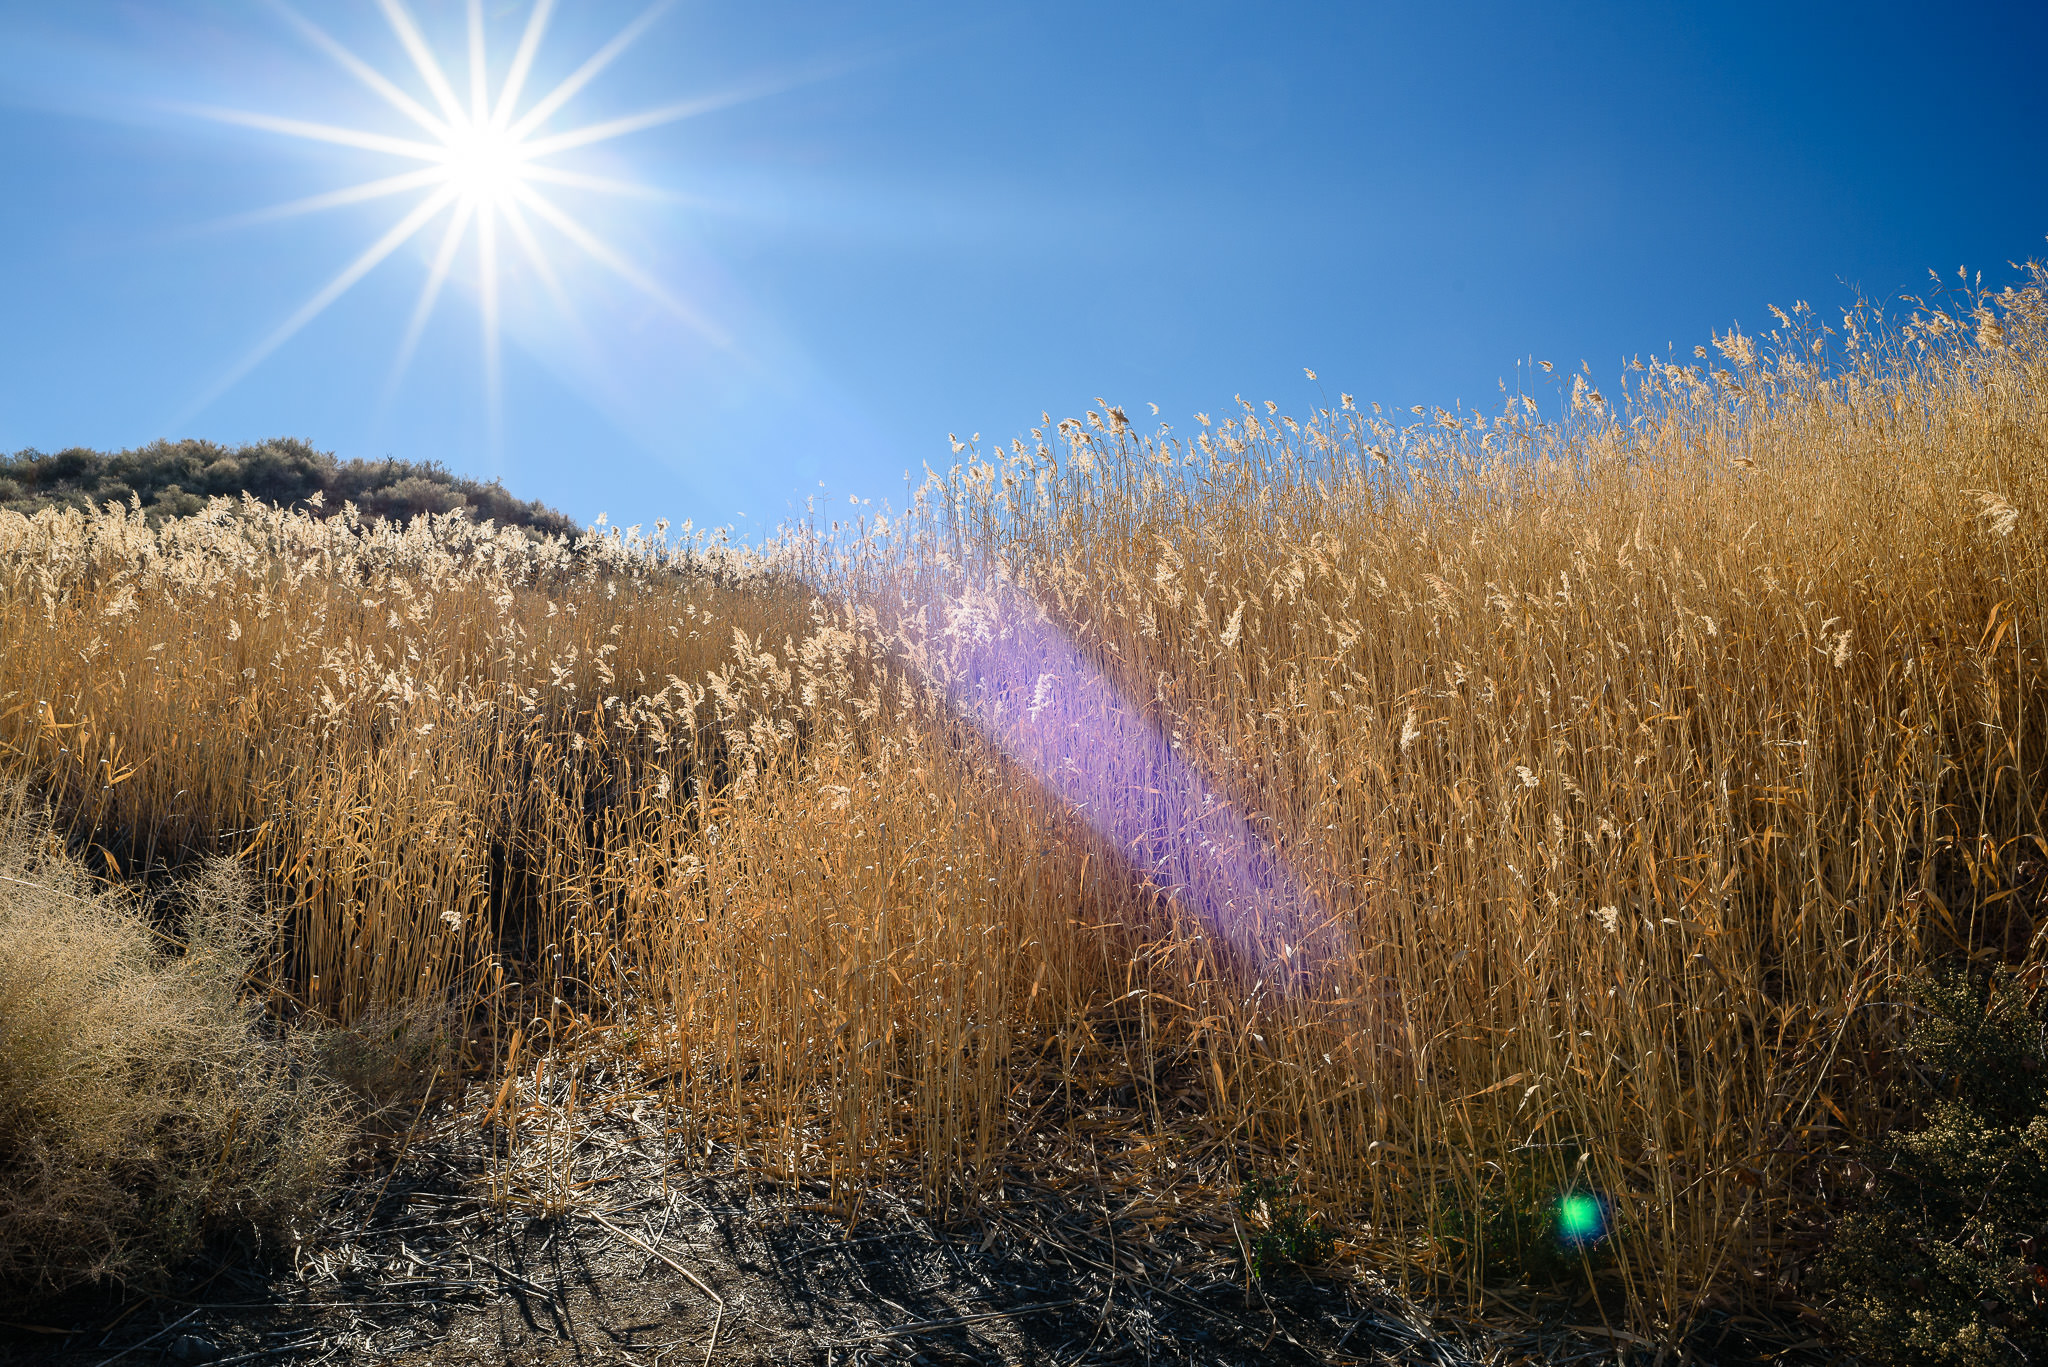
Ouch! What a heck is that? The same lens that I have just praised did this? Hard to believe, but it is true. In this particular case, the main reason for the weird purple line (which is impossible to fix in post) was the placement of the sun in the frame. That particular angle and placement really made those sun rays bounce inside the lens, creating this strange-looking flare and a ghost at the end of it.
And if I moved the sun a bit further to the left, the purple ray would practically disappear:
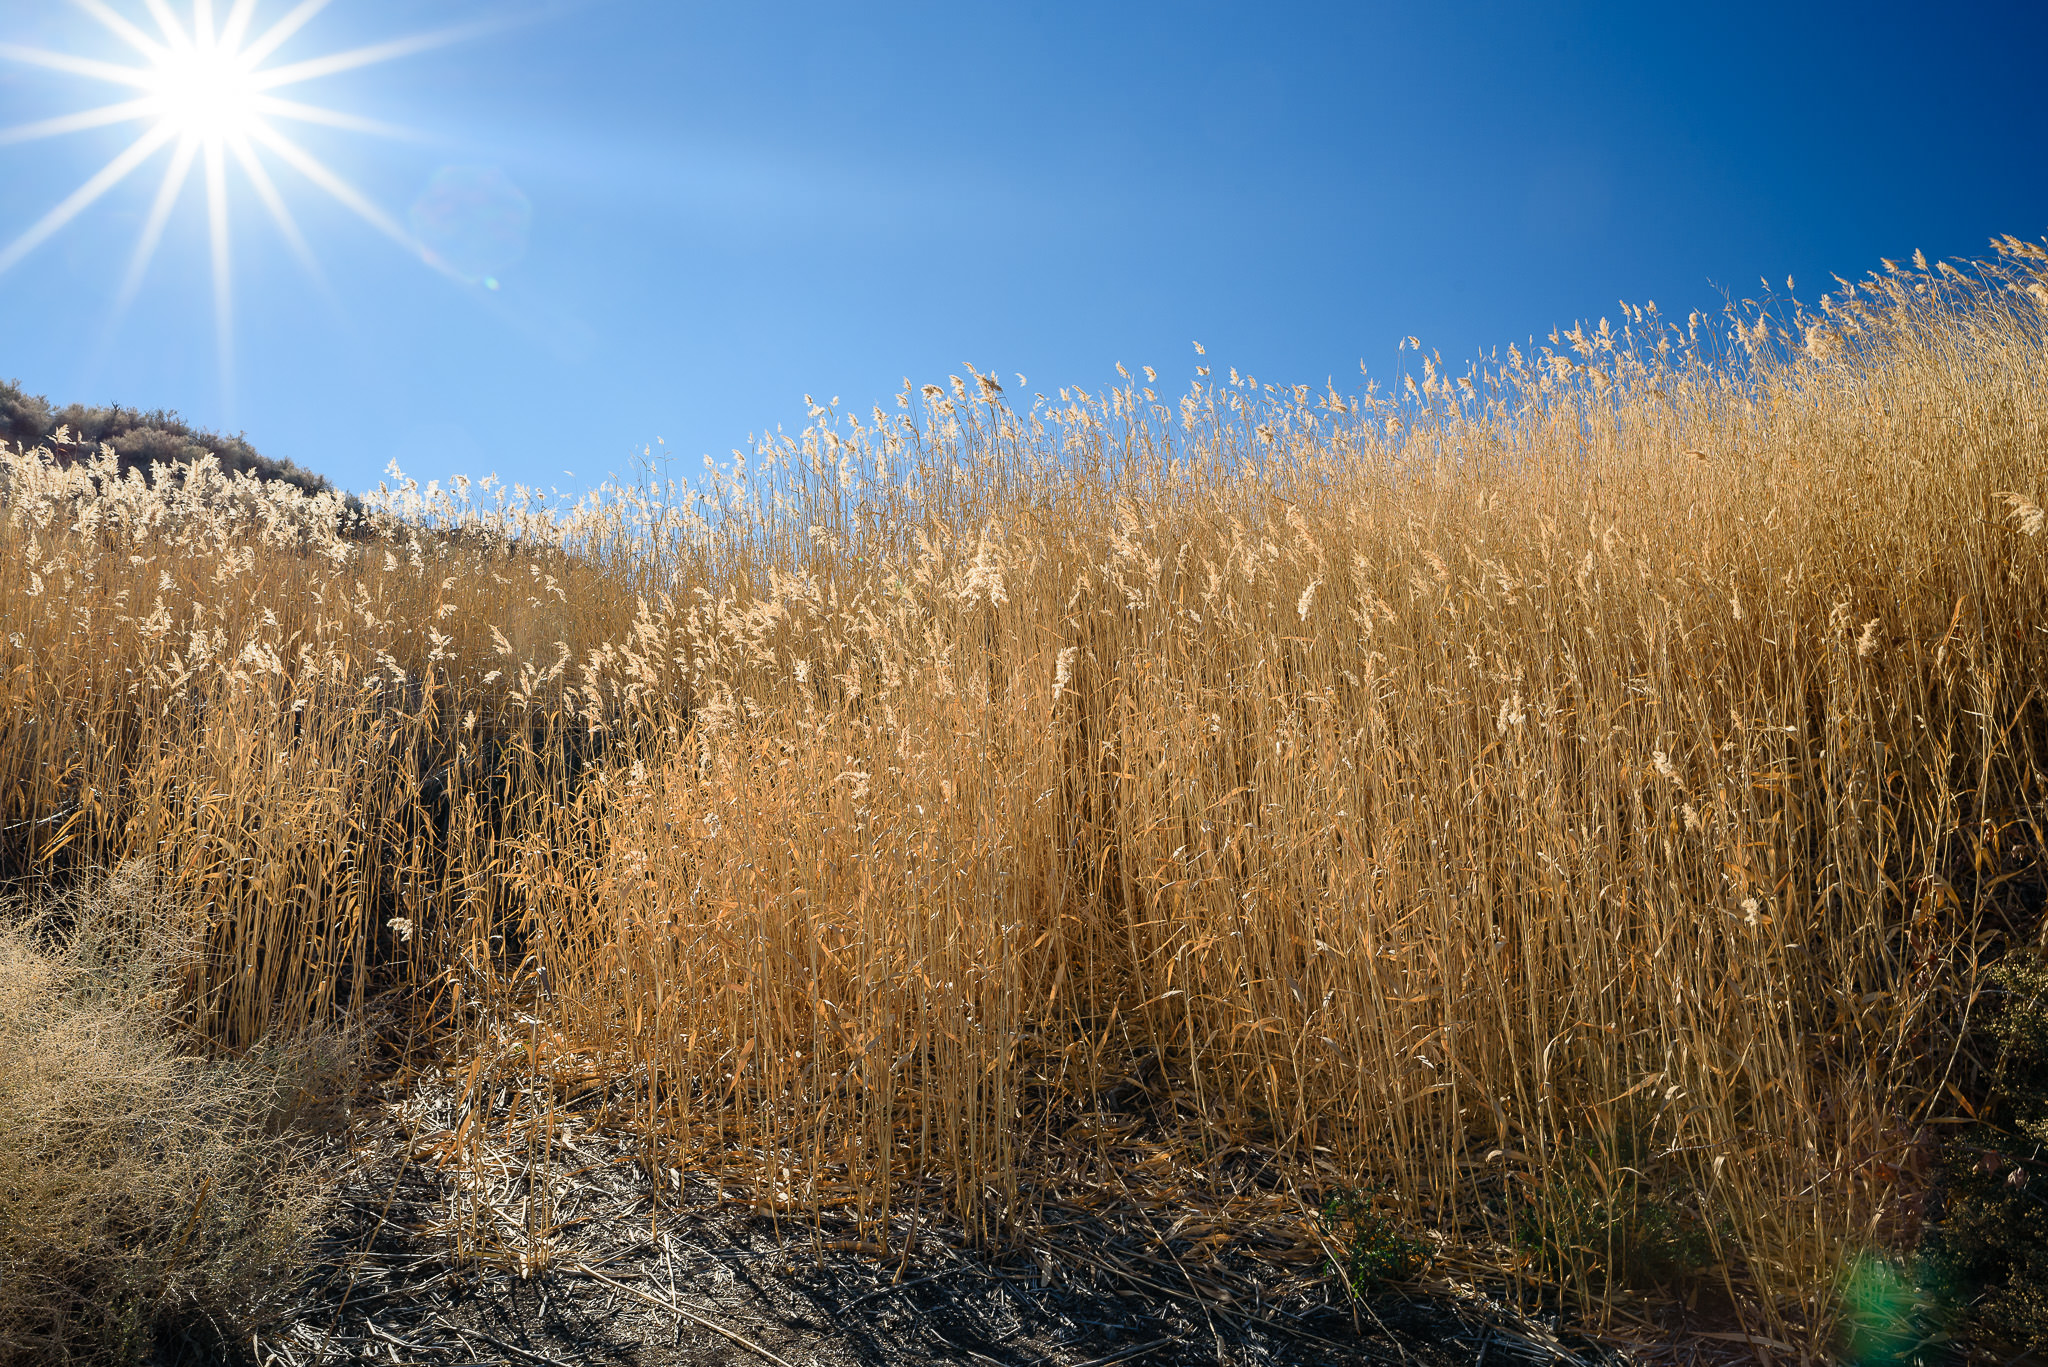
However, there is still some damage exhibited by ghosting and flare – we can see it on the lower right side of the frame, where contrast is impacted and there are traces of purple flare. The green ghost is now much bigger in size too, making it a pain in the rear to fix in post.
The Solution – “Finger the Sun” Technique
All right, I totally made this one up. “Fingering the sun” does not particularly sound appealing, but that’s what I usually end up doing in such situations, literally! LOL 🙂 Here is what this technique looks like:

Yup, that’s my thumb sticking out in the frame and blocking the sun. Yes, that’s not the image I would ever use and I will explain what I would do with such an image in a second, but take a look at the effect of blocking the sun like that – it completely eliminated ghosting and flare! The rest of the image looks really clean and perfectly usable. And as you will see below, just a simple trick in post-processing will allow us to make a single composite without any ghosting and flare damage in it.
Here is the step by step process to properly utilize the “Finger the Sun” technique:
- Work out your framing and composition, with the sun included in the frame.
- Ideally, you want to use a tripod for this technique, because you will be taking two shots. However, if a tripod is not available, you can also do this hand-held – just try to keep your hand as stable as possible, so that you are not drastically changing the framing. You can align images in post later on, but you will lose a bit of resolution due to cropping.
- Either shoot in manual mode, or lock your exposure before shooting. You want to make sure that your ISO, Shutter Speed and Aperture are all the same. If you have any exposure differences from shot to shot, it will be difficult to deal with in post-processing.
- Pre-focus on the subject you want to focus on and lock your focus. This is another critical step of the process.
- Block the sun with your finger and take the first shot.
- Immediately remove your finger from the frame and take another shot without changing the framing.
Once you are done, you should have to images with identical or nearly identical framing. Now it is time to take both of these into Photoshop. You can do this with a full-featured version of Photoshop, or Photoshop elements.
Post-Processing Using Photoshop
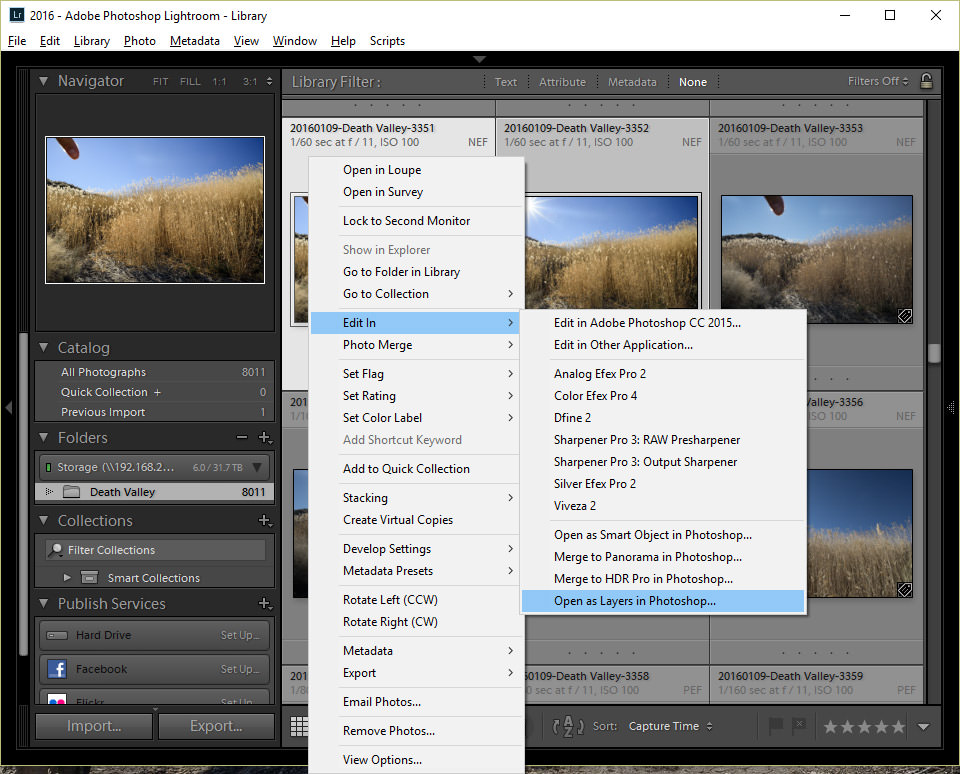
You can probably already tell what needs to be done in Photoshop. You will load both images into Photoshop as layers. If you use Lightroom, you can easily do this by selecting both images, then right clicking on one of the selected images, then going to “Edit In” -> “Open as Layers in Photoshop”:
If you don’t use Lightroom, you can open both images in Photoshop, then drag the first image into the second one to bring it up as another layer. Now we have two layers to work with:
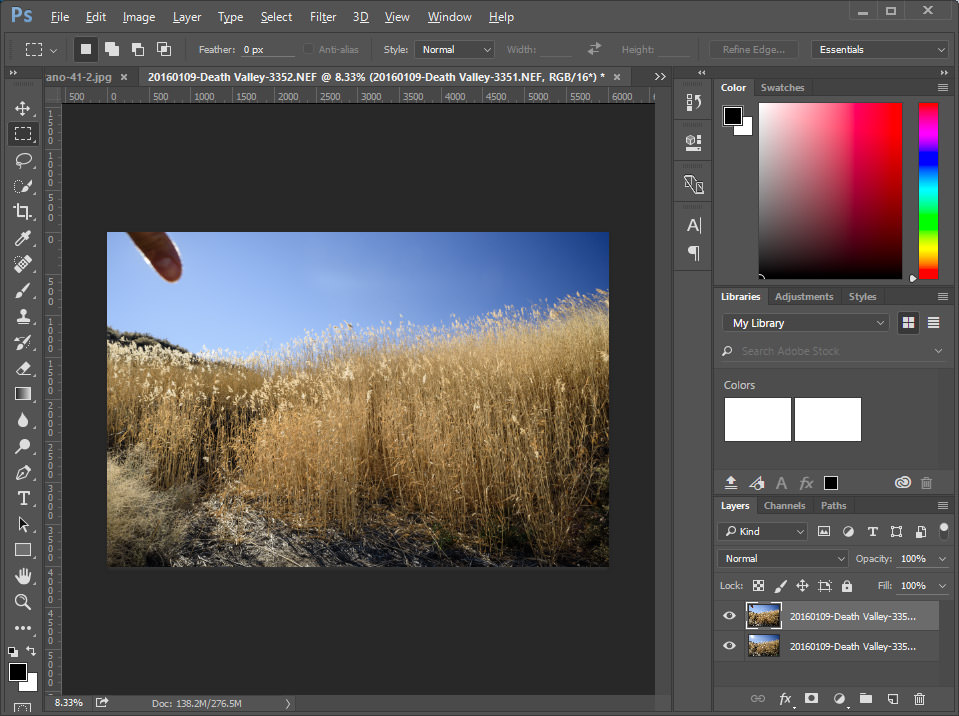
Make sure that the “Finger” layer is on top of the one with the sun. Next, all you need to do is erase the finger from the first layer. But before we do that, make sure that both layers are properly aligned. This is especially important if you did this shooting hand-held. Select both layers in Photoshop, then go to “Edit” -> “Auto-Align Layers”. Crop the empty space out after the alignment is complete.
Now it is time to erase the finger. Please note that even if you did this technique with exactly the same exposure on both images, the image with the sun in the frame might still look brighter. That’s perfectly normal, because light would still bounce inside the lens and affect the overall brightness. If you are pretty good with Photoshop, you can use masking and adjustment layers to do proper removal of finger from the first layer. But I won’t go there and show you the simplest and quickest way – using the Erase tool:
- Click on the Erase tool on the tool panel.
- Make sure to select “Brush” in the “Mode” drop-down on the top menu.
- Click the down arrow next to the size of the brush. Next, make sure to pick a fairly large size depending on the resolution of the image. In my case, I am using the full resolution and I picked a brush size of 900 pixels. Make sure to set “Hardness” to 0, as shown below:
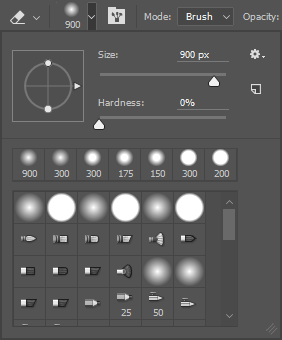
- Keep Opacity at 100% and Flow at something like 25%. The idea is to carefully erase the finger and replace it with the sun right behind it.
- Start brushing your finger out and revealing the sun behind. Continue erasing until the entire shape of the sun and its burst are revealed.
- You are done! Flatten the image and then save it.
Here is the final image:
Pretty awesome, isn’t it? Now I did a very quick job here and I did not include other parts of the burst that you see in the original image – I will leave that up to you to decide what to include and what not to include.
When the Technique Does Not Work
You will find that in some situations, the technique might not work as effectively as in the above case. Sometimes the size of the sun is much bigger when shooting at longer focal lengths, so the size of a single finger might not work. The solution? Use multiple fingers or even the whole hand. LOL, now it sounds even worse! 😀 If fingers / hand don’t work, use another object like your lens cap. Another case where the technique might not work well is if the sun rays still bounce around at odd angles when you move it in the frame – in those cases, you might be better off recomposing the shot and rethink about your framing. If you have one of those plastic hoods that has the tendency to reflect some of the light, you might also be better off removing it when using this technique.
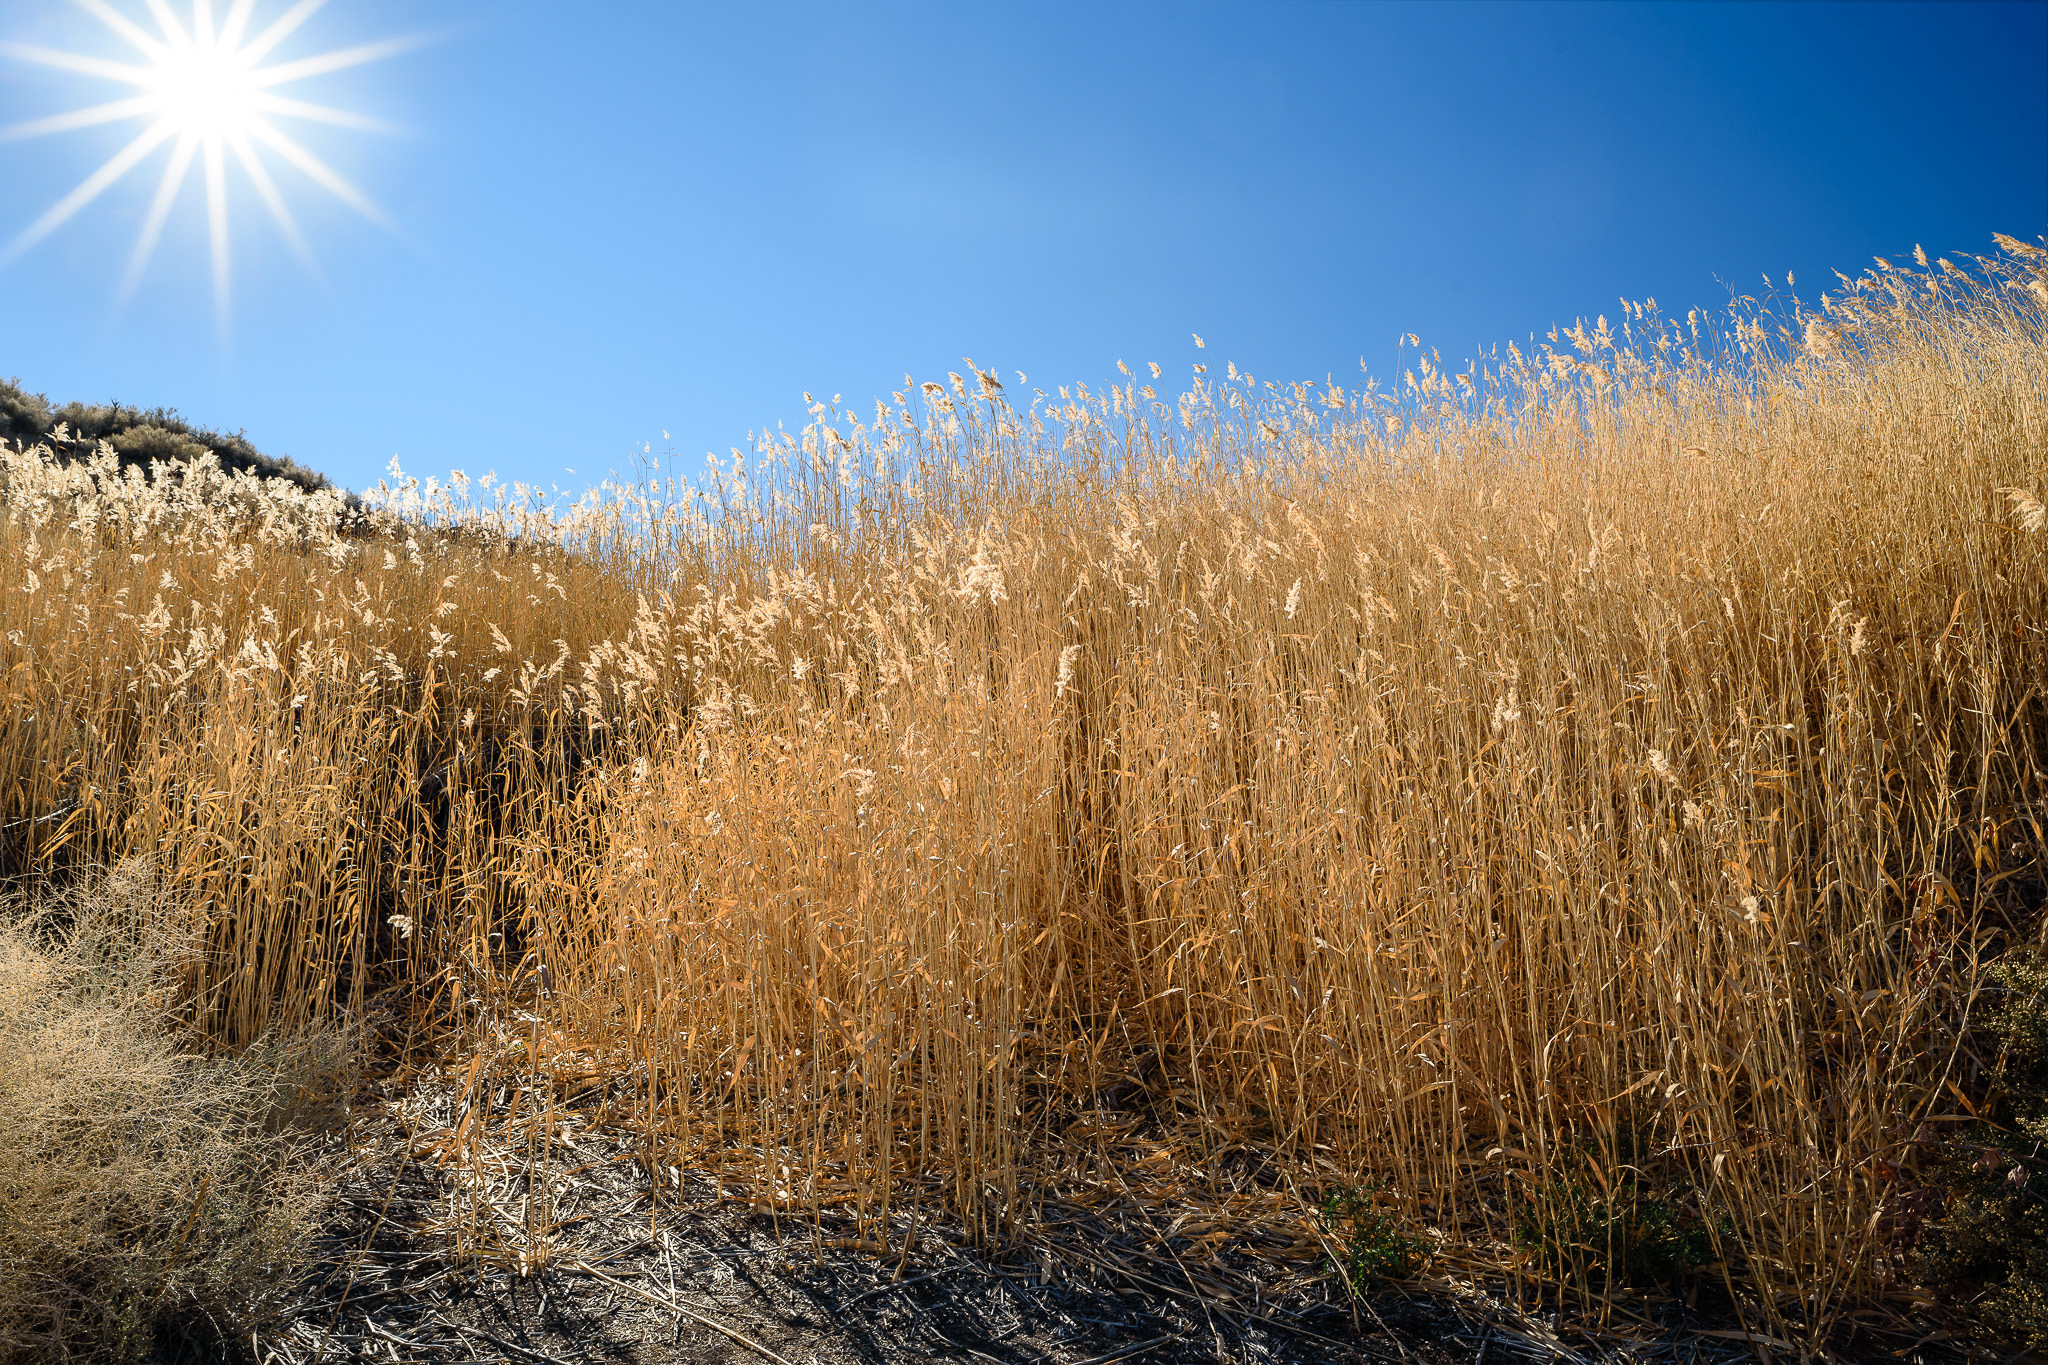
Here is the final version of the image that I started with:

To make this image, I recovered most of the image highlights in the background, added a bit more drama to the clouds, boosted some colors, used the dodge and burn tool to emphasize and de-emphasize the foreground elements and cloned out some of the distractions. Took me about 15-20 minutes to get it all done. Not the best job with cloning, but if I were to put this into print, I would certainly spend a little more time cleaning up some of the areas.
I hope you found this article helpful. It is a super simple technique and it really works, so give it a try next time you are out shooting!

