


Photography Terms – You may notice that the definitions below are more like “functional introductions” to each term rather than strict dictionary definitions. Personally, I consider that to be more useful. Sure, shutter speed is “the length of time which a camera’s shutter is open while taking a photograph” – but that doesn’t tell you much about why shutter speed matters and how to use it. Also note that there are a lot of topics here, and this is a long article – so if you want to jump to a specific term, I recommend using the list below:
Aperture
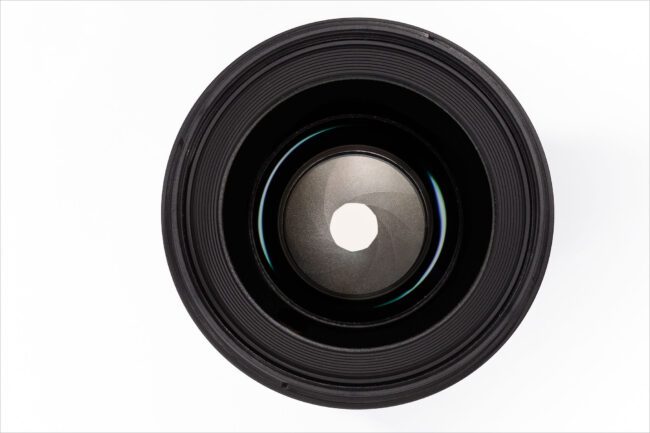
Aperture is perhaps the single most important setting in all of photography.
Similar to the pupil in your eye, aperture is an opening in the camera lens that (generally) can change size. A large aperture lets in more light, while a small aperture does not let in as much.
For this reason, photographers like using large apertures in low light conditions. The largest aperture a lens offers is called its “maximum aperture,” while its smallest aperture is called the “minimum aperture.”
At a given moment, the aperture you are using is designated by an “f-number” such as f/1.4, f/2, f/5.6, f/8, f/11, and so on.
One key – these numbers are fractions. So, an aperture of f/2 is larger than an aperture of f/8 (in the same way that 1/2 is larger than 1/8). This can be confusing at first and seem backwards, but it doesn’t take long to get the hang of it.
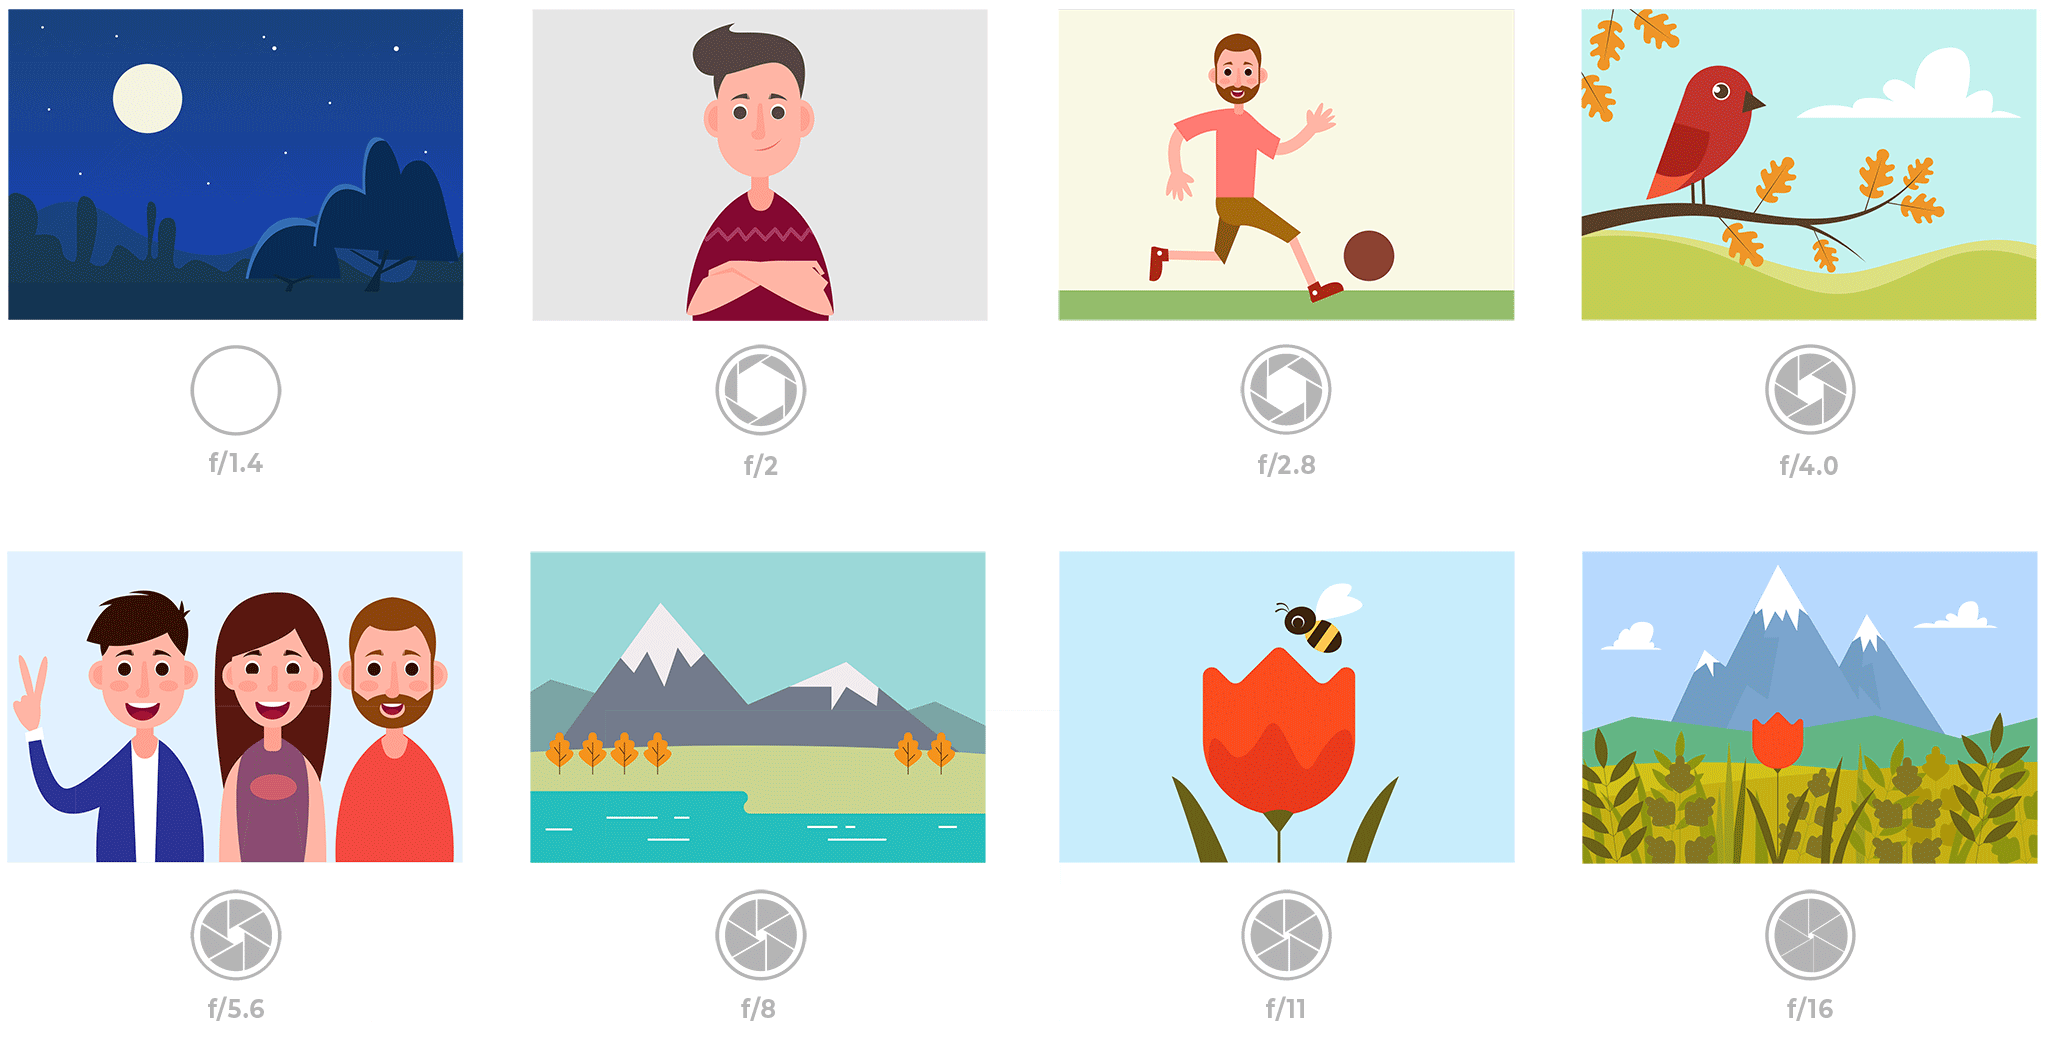
A typical lens will have a maximum aperture of around f/2.8, and a minimum aperture of around f/22. However, it varies from lens to lens. Some (generally more expensive lenses) have a maximum aperture of f/1.4, f/1.2, or even larger. These are great in low light conditions because – like a large pupil – they let in a ton of light.
Other than capturing more or less light, the biggest impact of aperture is on depth of field (see “depth of field” below). Small apertures like f/11 and f/16 have more depth of field than large apertures like f/1.4 or f/2.8. If you’re a portrait photographer looking for buttery smooth backgrounds, you’re probably a big fan of 50mm or 85mm f/1.4 lenses for this reason. (Landscape photographers, like me, rarely need 85mm f/1.4 lenses, which is a great tactic for saving money.)
Back-Button Focus
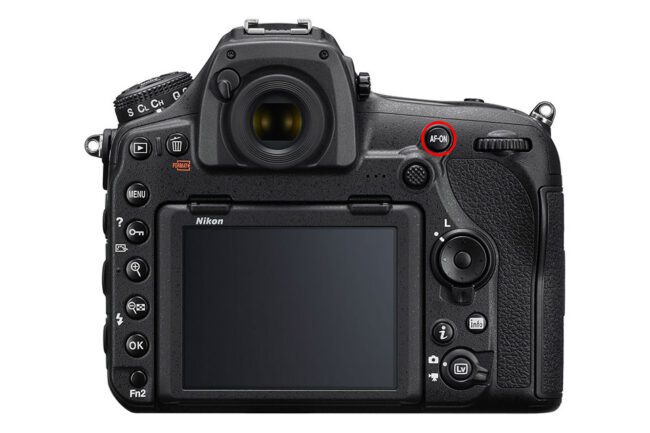
By default, almost every camera autofocuses when you half-press the shutter button. However, sometimes you will want to take a photo without focusing beforehand. That’s where back-button focus comes in.
Rather than half-pressing the shutter button, back-button focus focuses via a button on the back of your camera instead. Then (after disabling autofocus from the shutter button), you have more freedom to focus when you want.
Practically every camera on the market lets you reassign autofocus to a button on the back of your camera, or it has a button that already does this by default (the AF-On button). Likewise, every advanced photographer I know who has switched to back-button focus has never looked back.
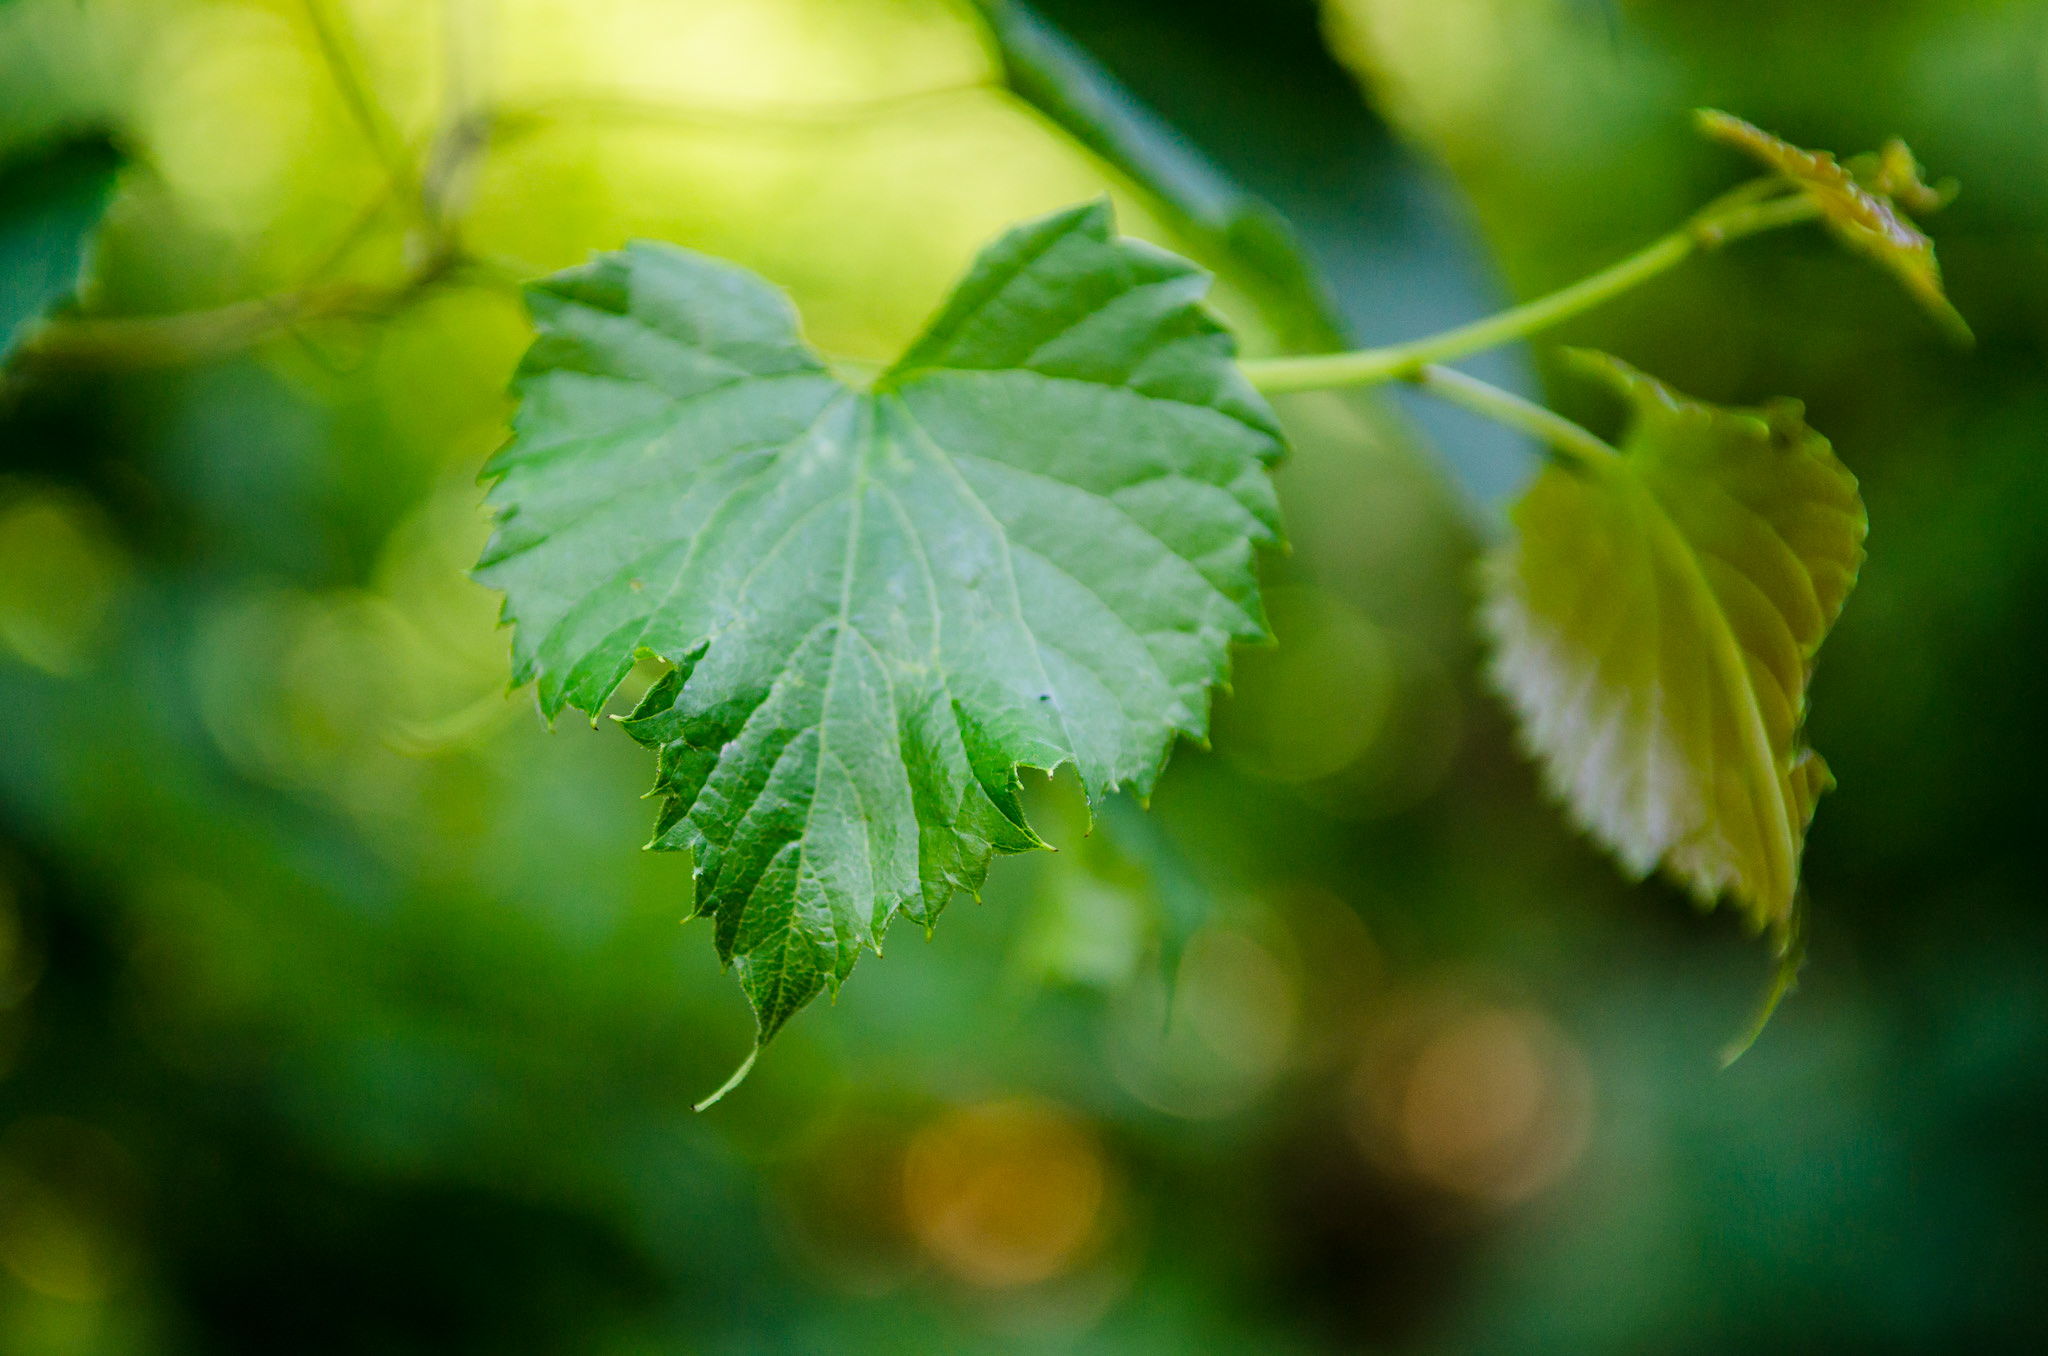
Bokeh
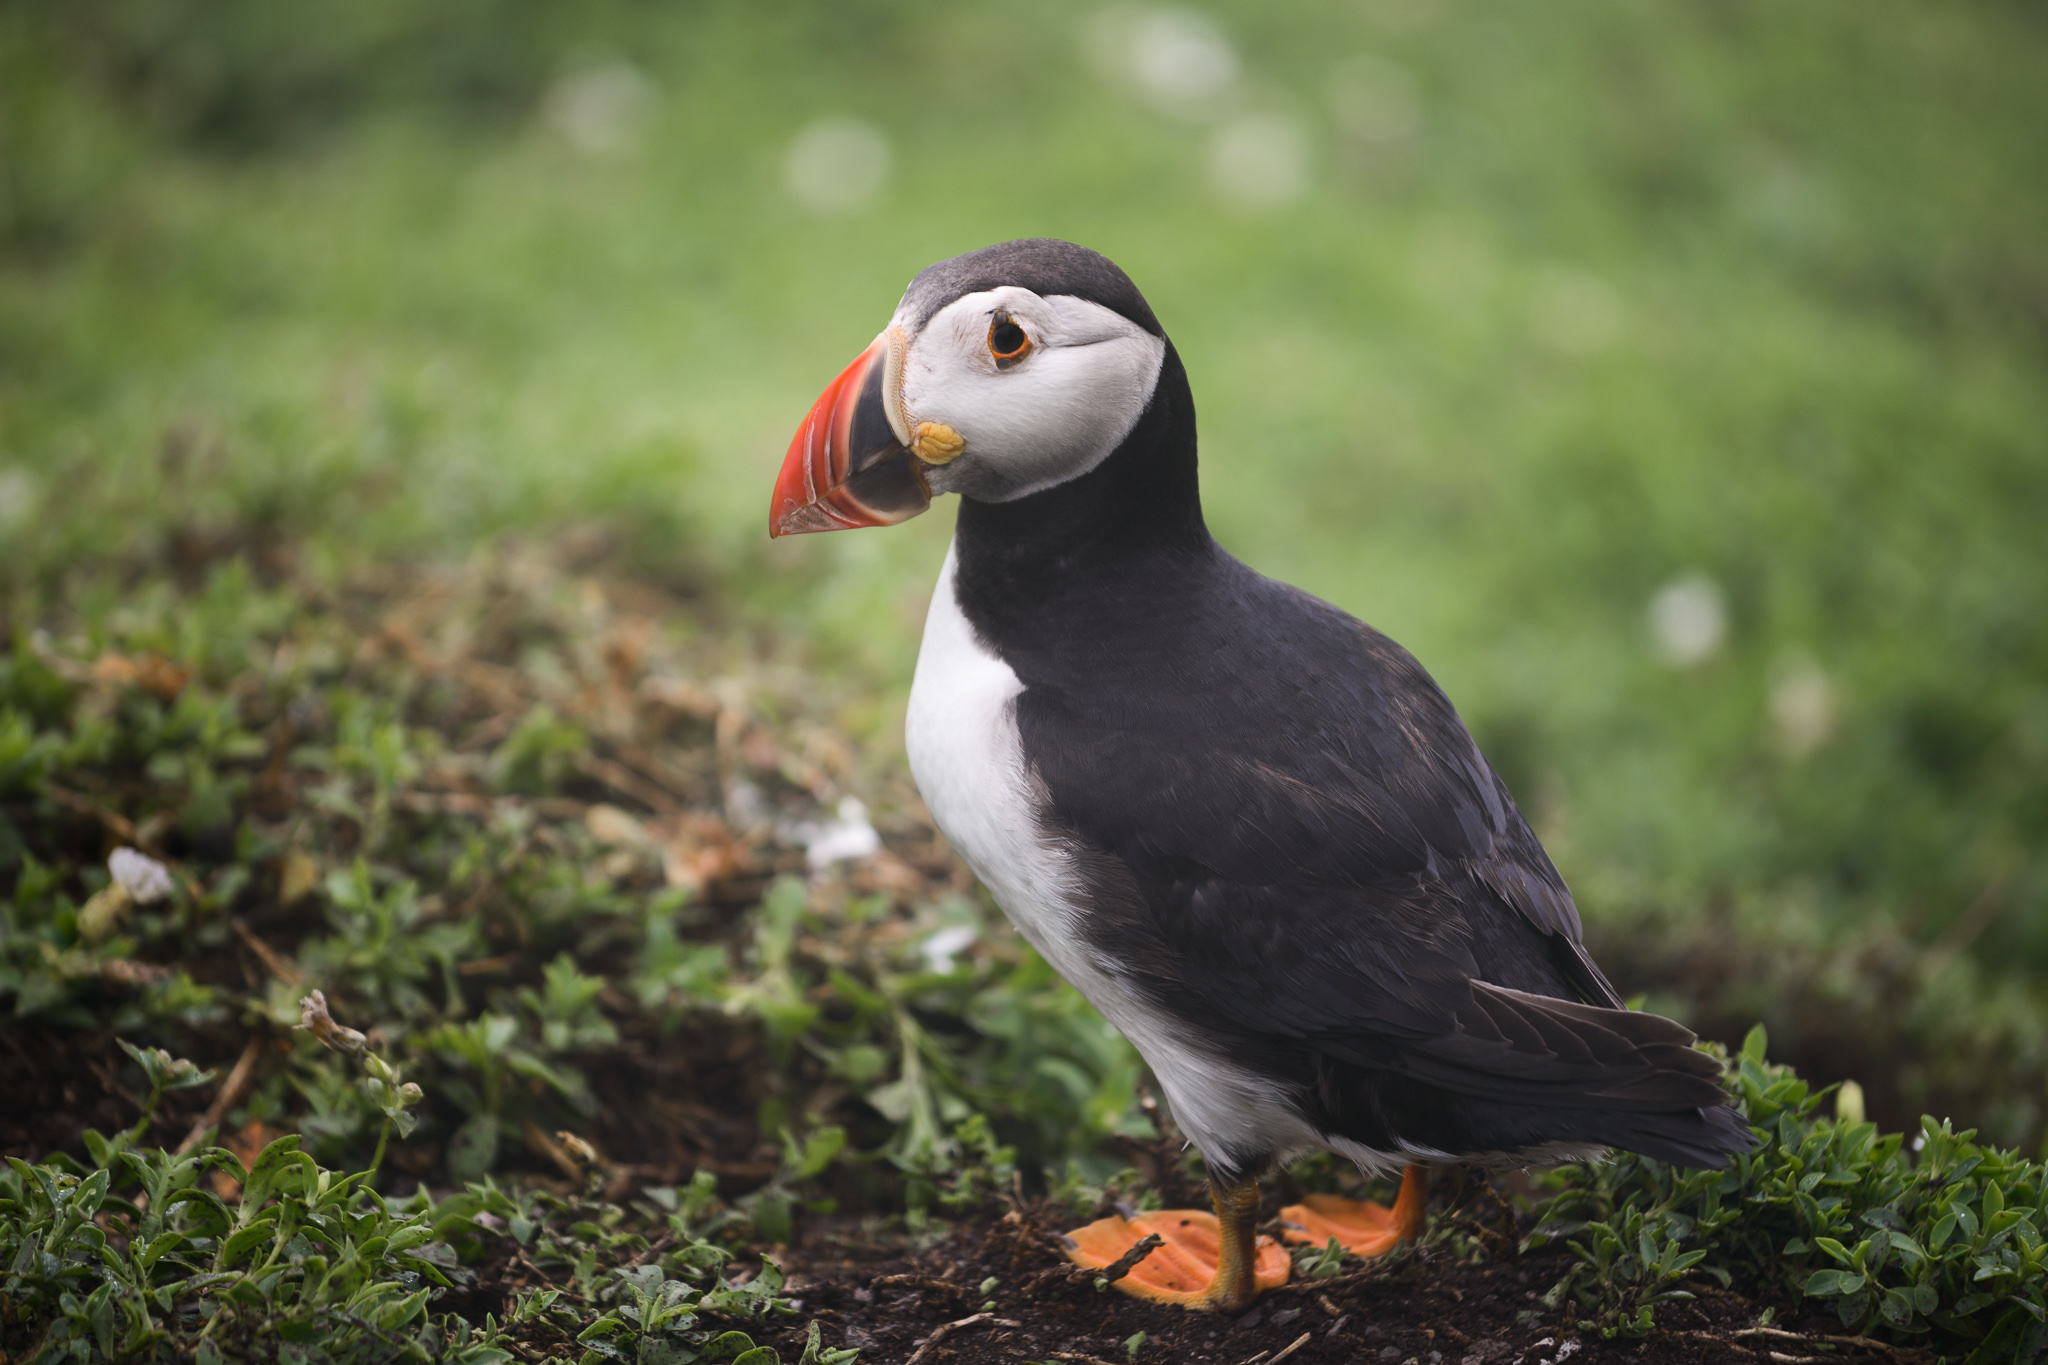
When you use large apertures, especially when you zoom in or get close to your subject, you’ll end up with a shallow focus effect. In other words, your subject will be sharp, while the background will be strongly out of focus.
The quality of this out-of-focus region – i.e., how it looks, how it’s rendered – is known as bokeh.
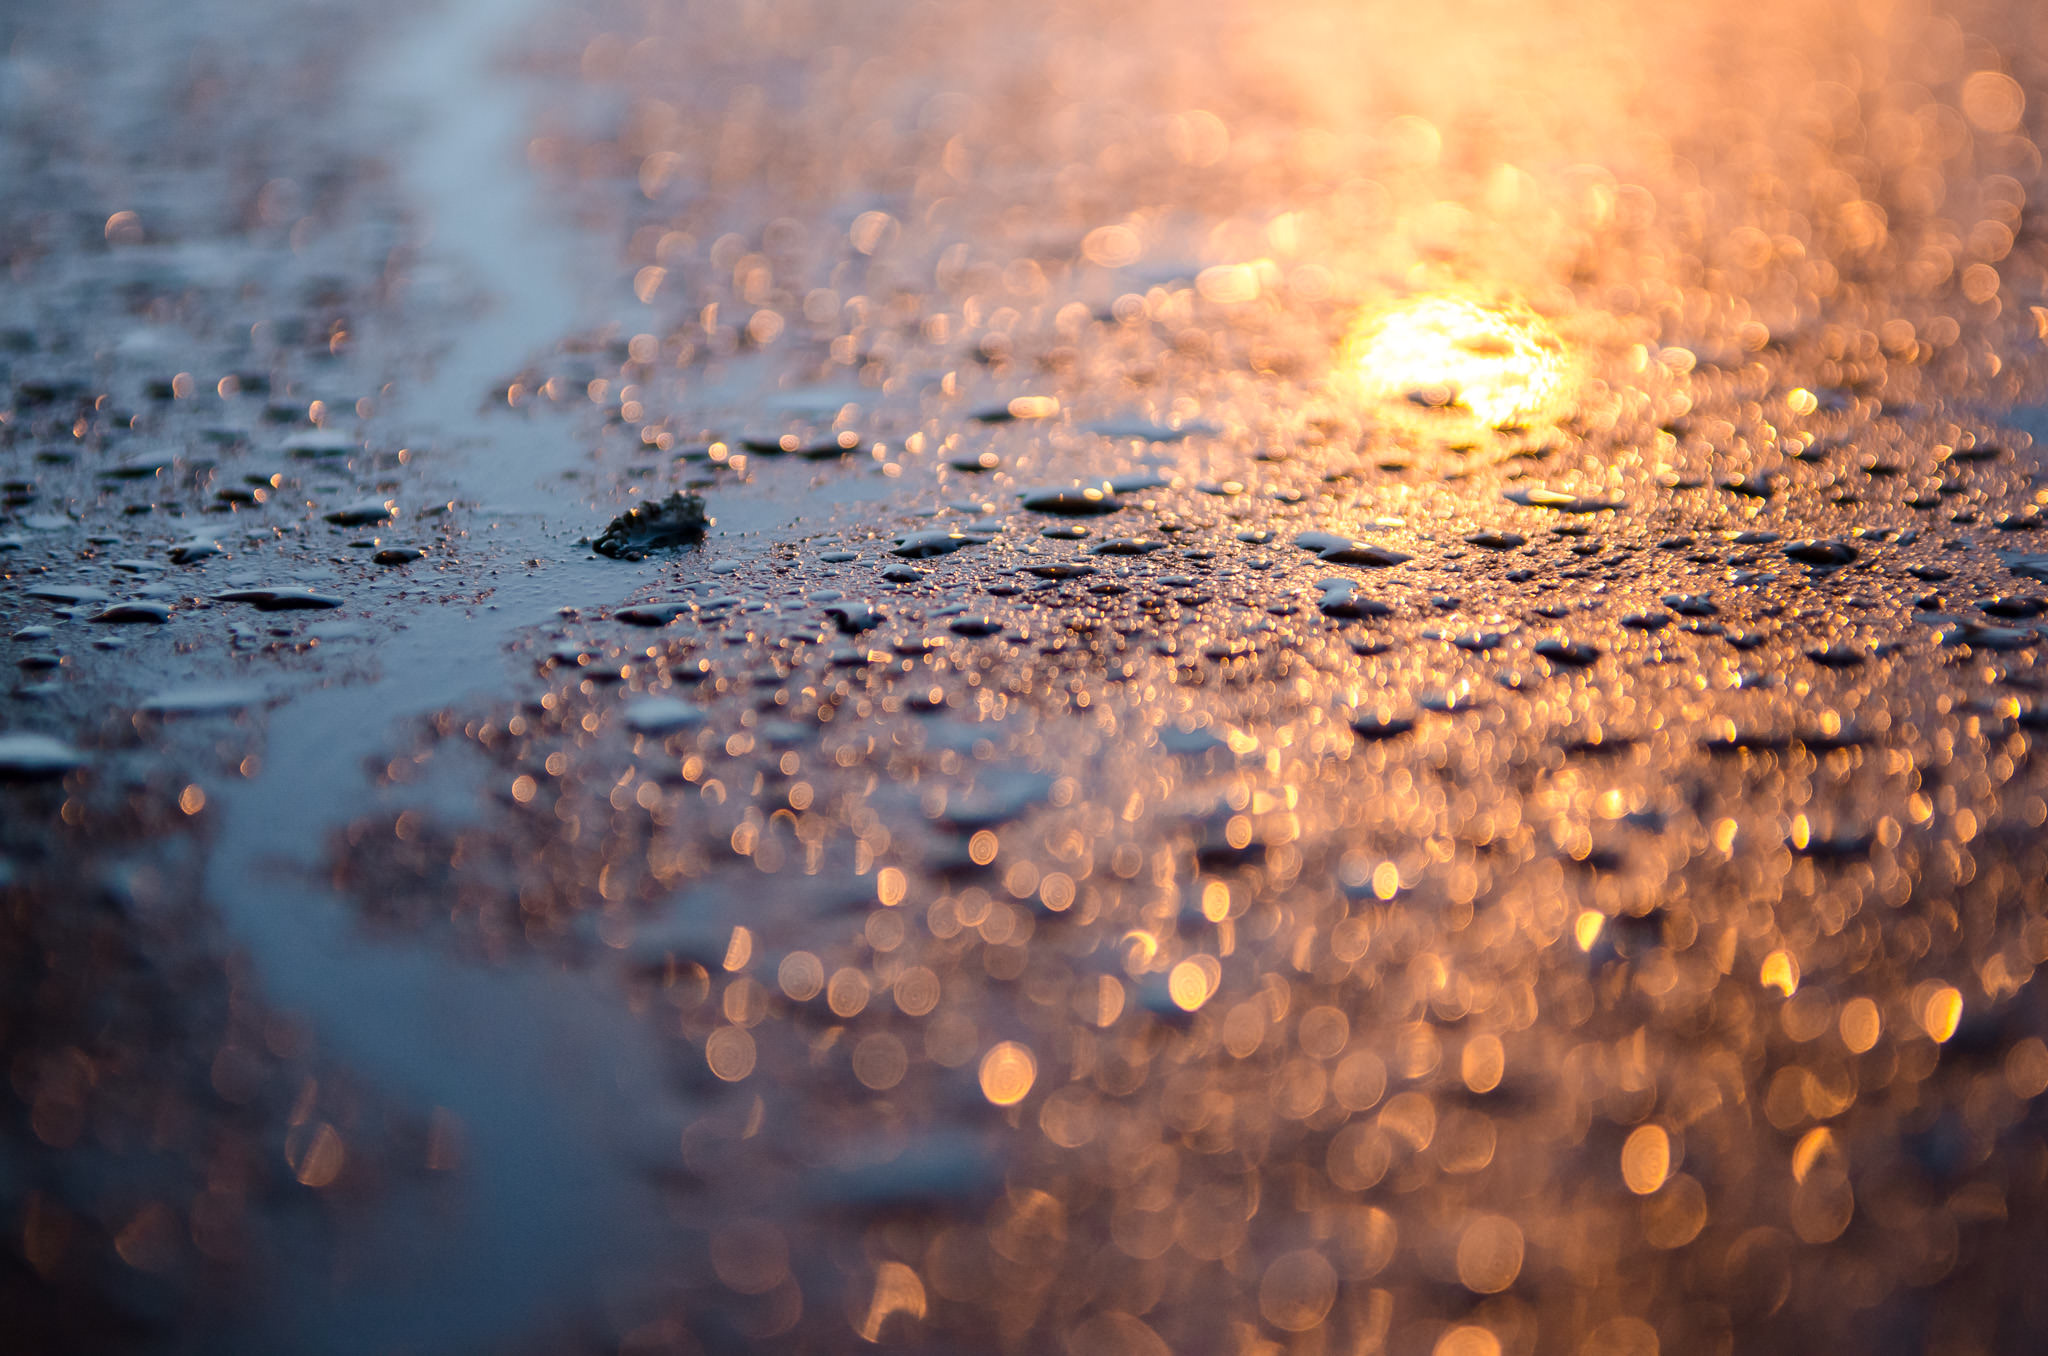
A lot of specialty portrait lenses (such as 85mm f/1.4 lenses and similar) are ranked more by their bokeh than their sharpness.
This term saw a surge in popularity recently when Apple released a commercial about bokeh. However, the quality of background blur is not very good on any phone’s “portrait mode” today, since it is all done with imprecise digital blurring effects.
You can read more about bokeh in our comprehensive article here.
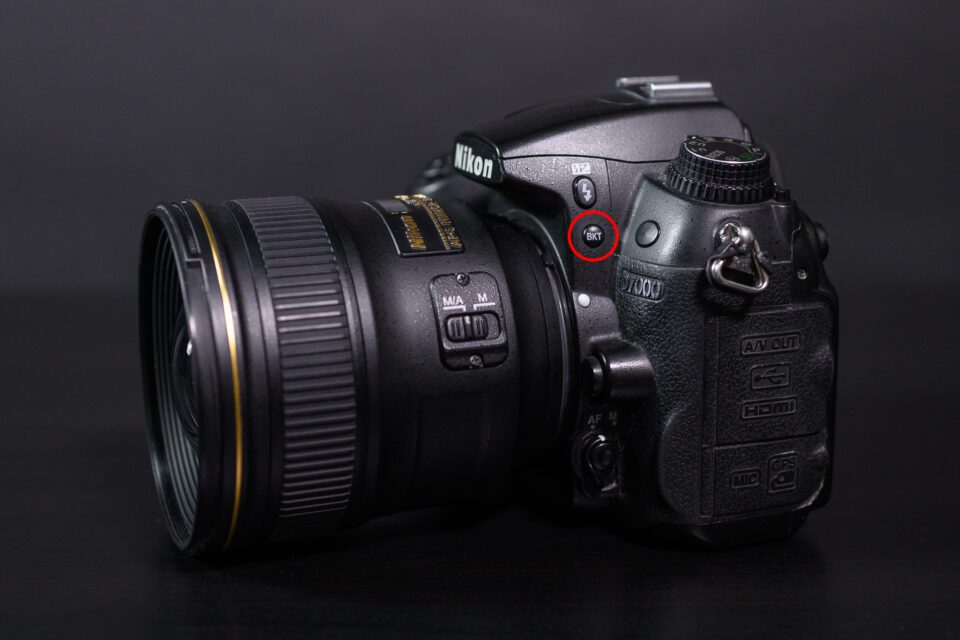
Bracketing
Bracketing simply means taking a series of photos in a row with slight variations.
The most common type of bracketing is exposure bracketing, where the photographer uses different shutter speeds (see “shutter speed” below) to take a sequence of photos with different brightness levels.
Most cameras have a bracketing button or menu setting that automatically captures a series of bracketed exposures in a row. This can be useful, although it’s easy to forget you turned it on and continue bracketing photos for a while by accident.
Bracketing can also refer to focus rather than exposure. In this case – “focus bracketing” – you’re shooting images in sequence that are focused at different distances.
In theory, bracketing can refer to almost any variable in photography – even something like composition – but exposure and focusing are the most common contexts.
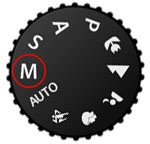
Camera Modes
Every advanced camera lets you select which settings (specifically exposure settings) you will change manually, and which the camera will change automatically. The setup you choose is known as your camera mode.
The five most popular camera modes are Automatic, Program, Shutter Priority, Aperture Priority, and Manual. You can switch from one to the other by using the “PASM” dial on most cameras.

Advanced photographers generally stick to aperture priority or manual mode, because those are the only two camera modes which give you full control over aperture – again, arguably the most important camera setting of all.
Chromatic Aberration
A common image quality issue you’ll see in photography is chromatic aberration. “Chromatic,” of course, refers to color.
The two types of chromatic aberration you may see in your photos are called lateral and longitudinal chromatic aberration.
The first – lateral – is more commonly talked about. It typically shows up as red/green, yellow/blue, or cyan/magenta outlines around high-contrast subjects in the corner of an image.
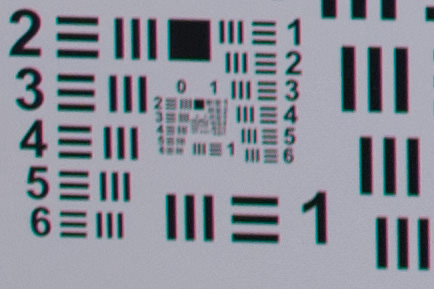
The second – longitudinal – occurs when there are color fringes in front or behind your photo’s focus point. This occurs as purple fringing in front of your focus point and green fringing behind.
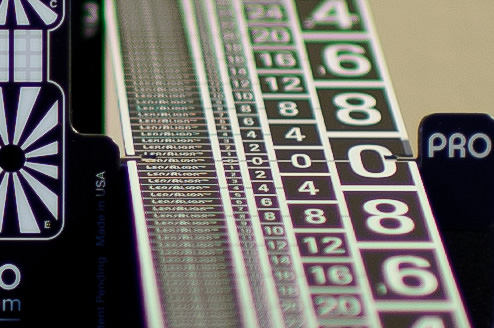
Both types can be corrected in post-processing software. However, lateral is easier to correct, with fewer residual effects in your photo.
Composition
Composition is the arrangement of elements in your photograph.
Some elements attract a lot of attention, especially those which are familiar (like people’s faces), bright, colorful, or high-contrast. The more attention an object attracts, the more “visual weight” it has.
So, composition is about arranging the visual weight in your photo – often to look pleasing, but not always. Composition should match your emotional goal for a photo.
In a given scene, different compositions will convey different emotions. That’s why it is so important to select yours with care.
NIKON D800E + 70-200mm f/4 @ 86mm, ISO 100, 1/10, f/16.0
Crop Factor
Based on the size of your camera sensor, you’re always shooting with a particular “crop factor” and you may not even know it.
Crop factor is calculated relative to the size of full-frame camera sensors. These sensors have a (no-difference) crop factor of 1×, because they’re the reference.
Smaller camera sensors literally act like “crops” of full-frame camera sensors. The specific amount of crop is the crop factor.
- APS-C sensor cameras (one of the most common sensor sizes) have a 1.5× crop factor.
- Micro Four Thirds cameras have a 2× crop factor.
- Phones and compact cameras have much smaller sensors, and therefore greater crop factors. The iPhone has a crop factor of about 7× because of its small sensor.
If you put the same lens on two cameras with different crop factors, you will appear farther “zoomed in” with the greater crop factor.
For example, if you use a 300mm lens on the Nikon D850 (a full-frame camera, 1× crop factor), you get the expected 300mm field of view. But if you put the same lens on the Nikon D500 (an APS-C camera, 1.5× crop factor), you will have a much tighter view – equivalent to 450mm reference.
Depth of Field
The portion of a photo that is (acceptably) in focus is known as your depth of field.
I like to think of depth of field as a window with thick glass that intersects the scene in front of you. Anything that touches the window is within your depth of field; anything farther away from the window is progressively farther and farther out of focus.
In a portrait photo, you may want to have a shallow depth of field, where only your subject’s face (or even just the eyes) will be in focus. In a landscape, you may prefer the opposite, where everything from the foreground to the horizon is within your depth of field.
The three ways to get a shallow depth of field are simple:
- Use a larger aperture, like f/1.4 or f/2.8
- Zoom in
- Get closer to your subject
To get a deeper depth of field, you simply do the opposite. Use a smaller aperture like f/11, zoom out, and move back from your nearest subject.
Diffraction
At smaller and smaller apertures (f/16, f/22, even f/32 and f/45), you will start to see your photos get blurrier and blurrier. This blur is known as diffraction.
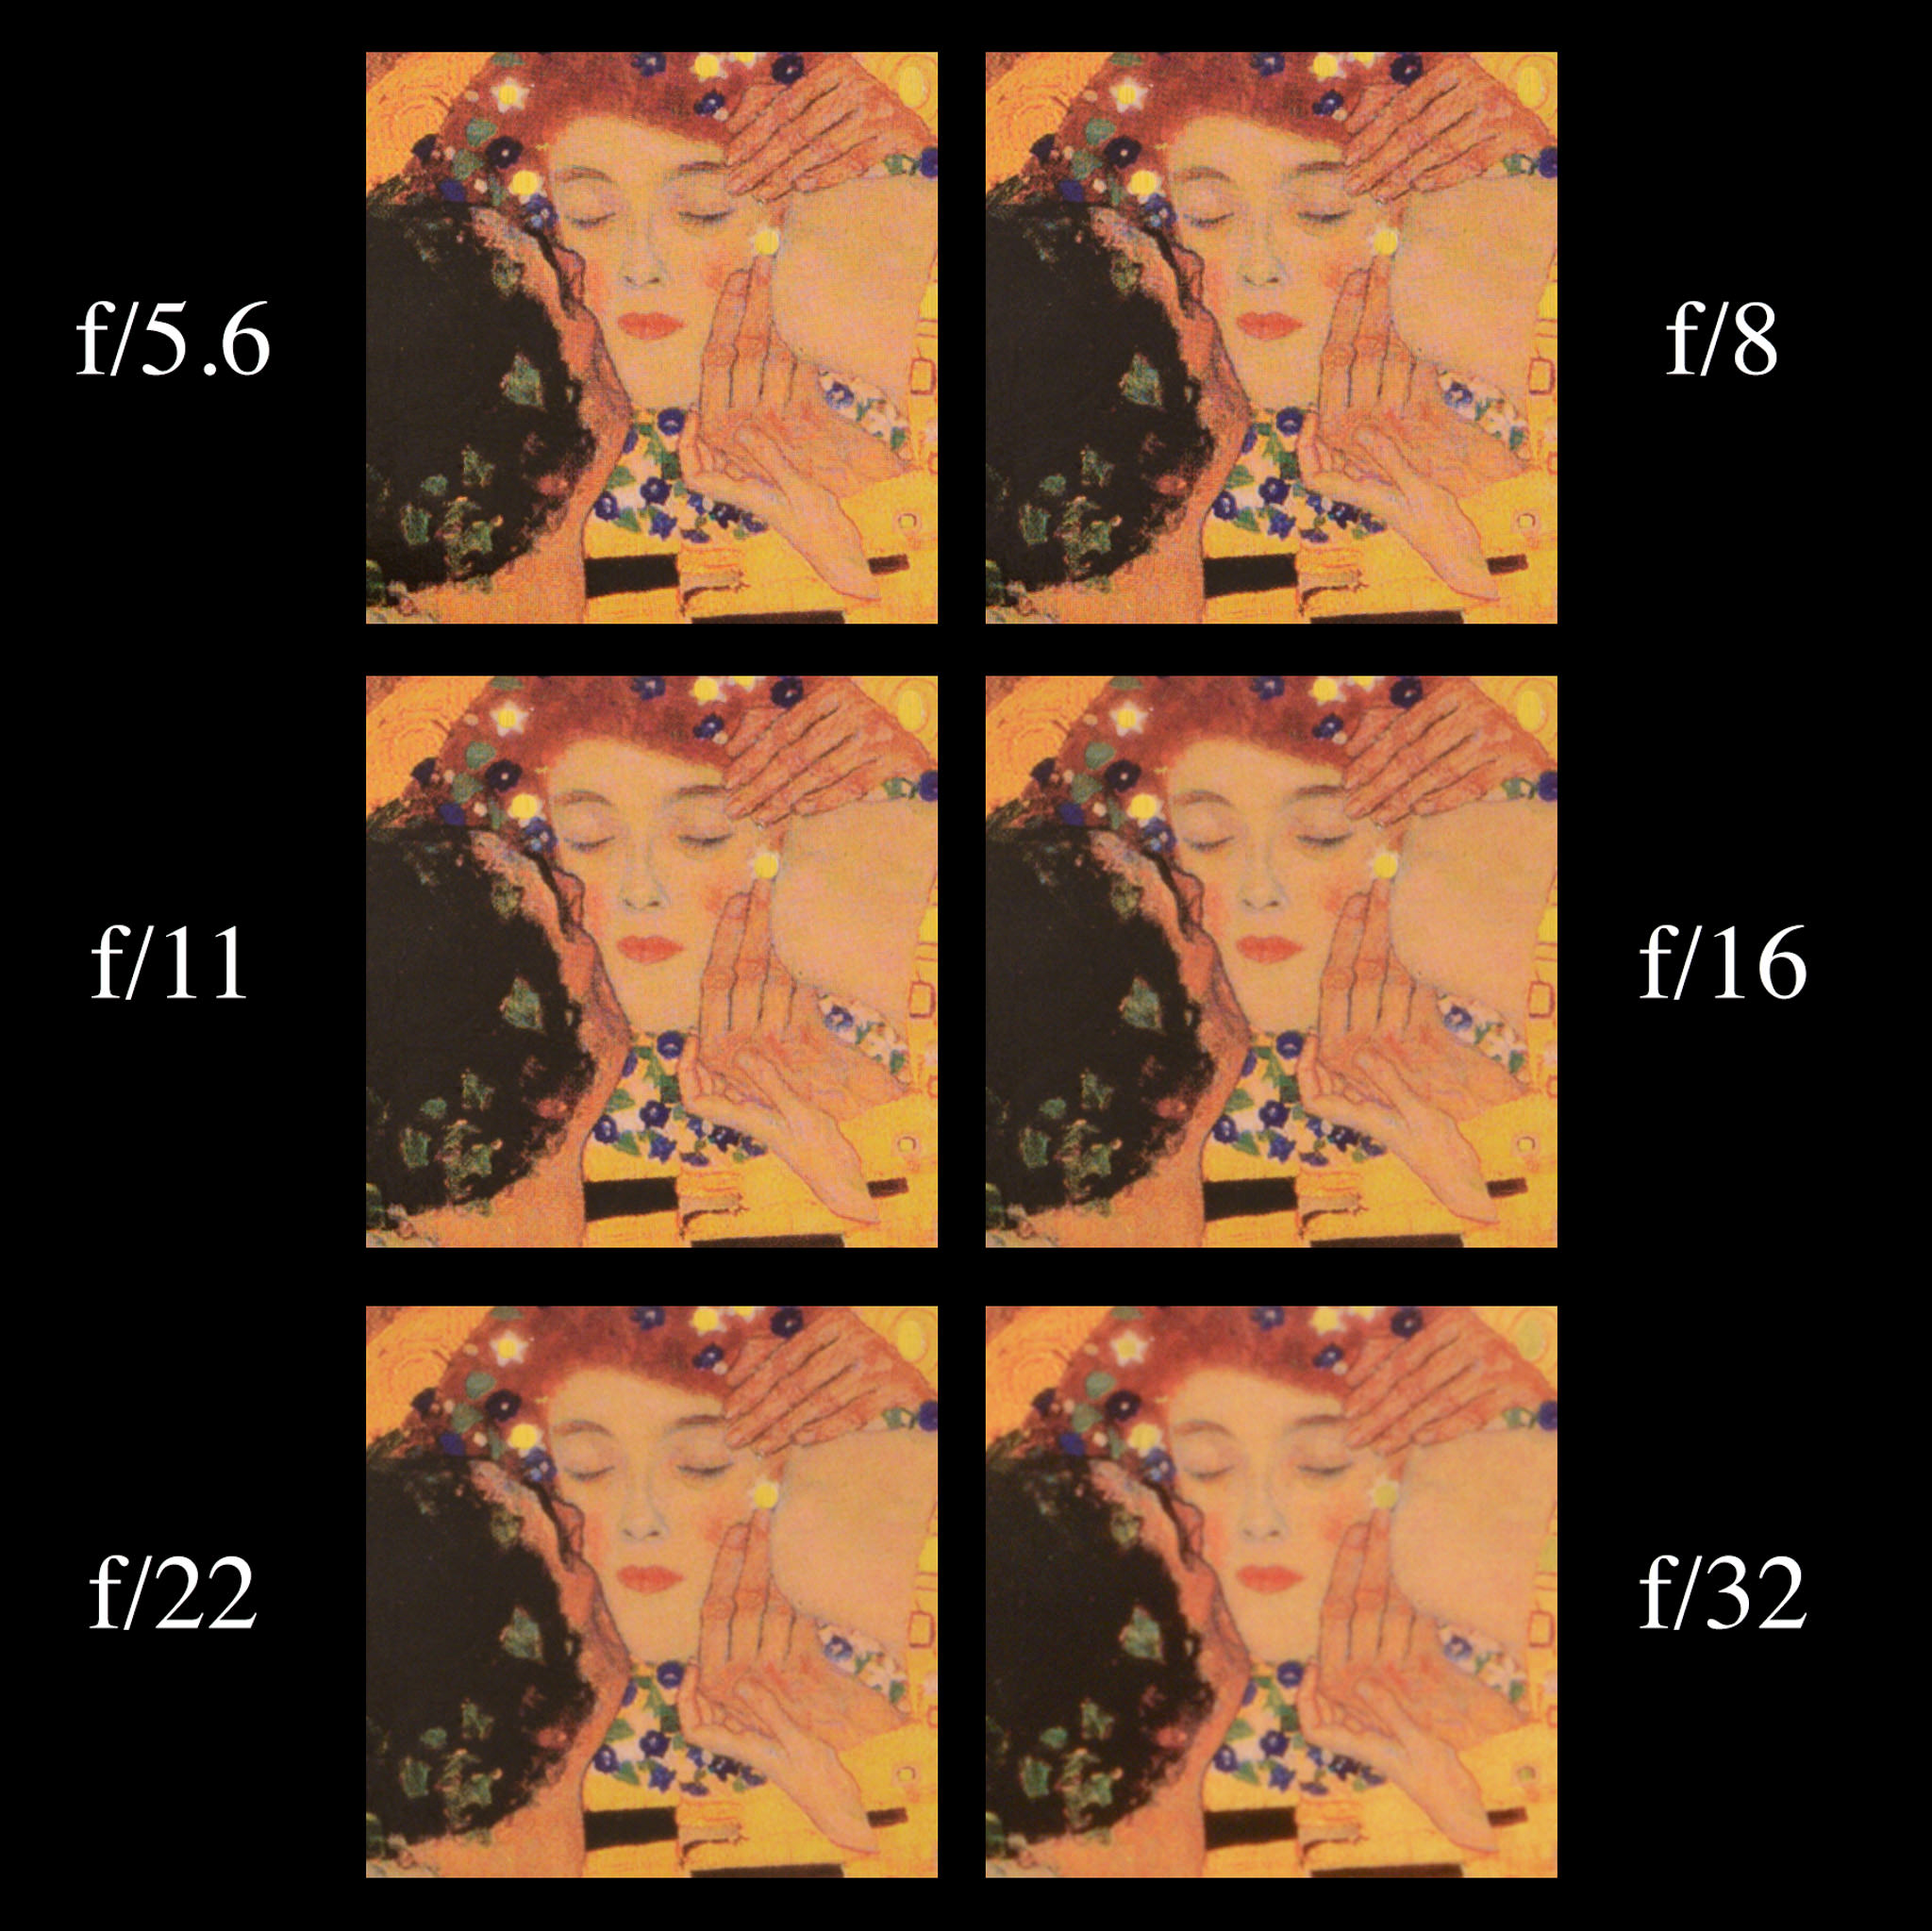
Diffraction exists no matter what lens you use; it’s just a property of physics. For this reason, I generally try not to use apertures of f/22 or smaller.
That said, it’s not the end of the world if you do. Personally, I like shooting macro photography (see “macro” below), where I’m focused very close and my depth of field is extremely shallow. In those cases, I very often use f/22 out of simple necessity.

Distortion
Distortion has a few meanings in photography, but the most common refers to an image quality issue (or occasionally feature) present to some degree in most lenses.
The three common types of lens distortion are barrel, pincushion, and wavy/mustache distortion. They look exactly like they sound:
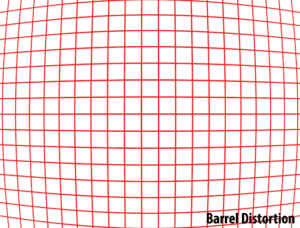
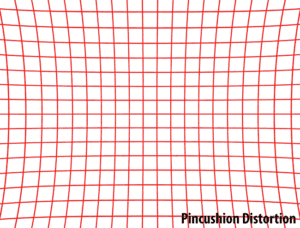
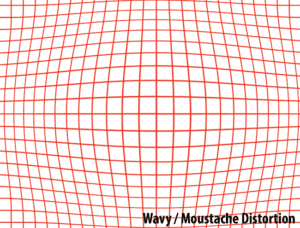
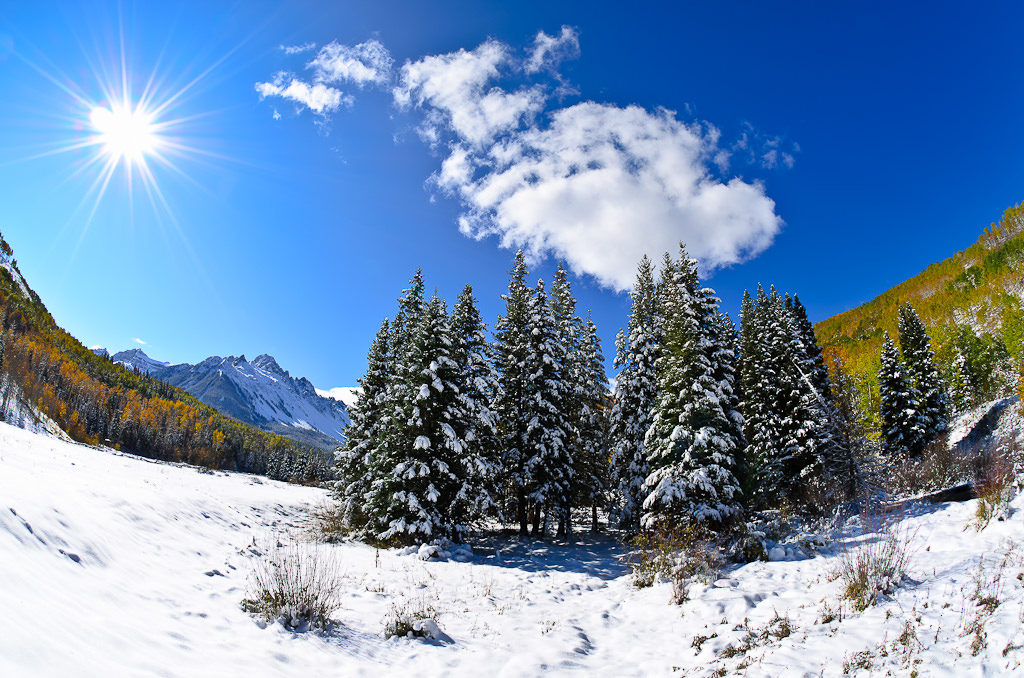
These types of lens distortion bend straight lines in your photo, which is especially obvious with architectural photography. However, a few specialty lenses – fisheyes – advertise their extreme distortion as a feature rather than a bug.
Copyright © Nasim Mansurov
Lens distortion is generally easy to fix in post-processing with minimal side effects.
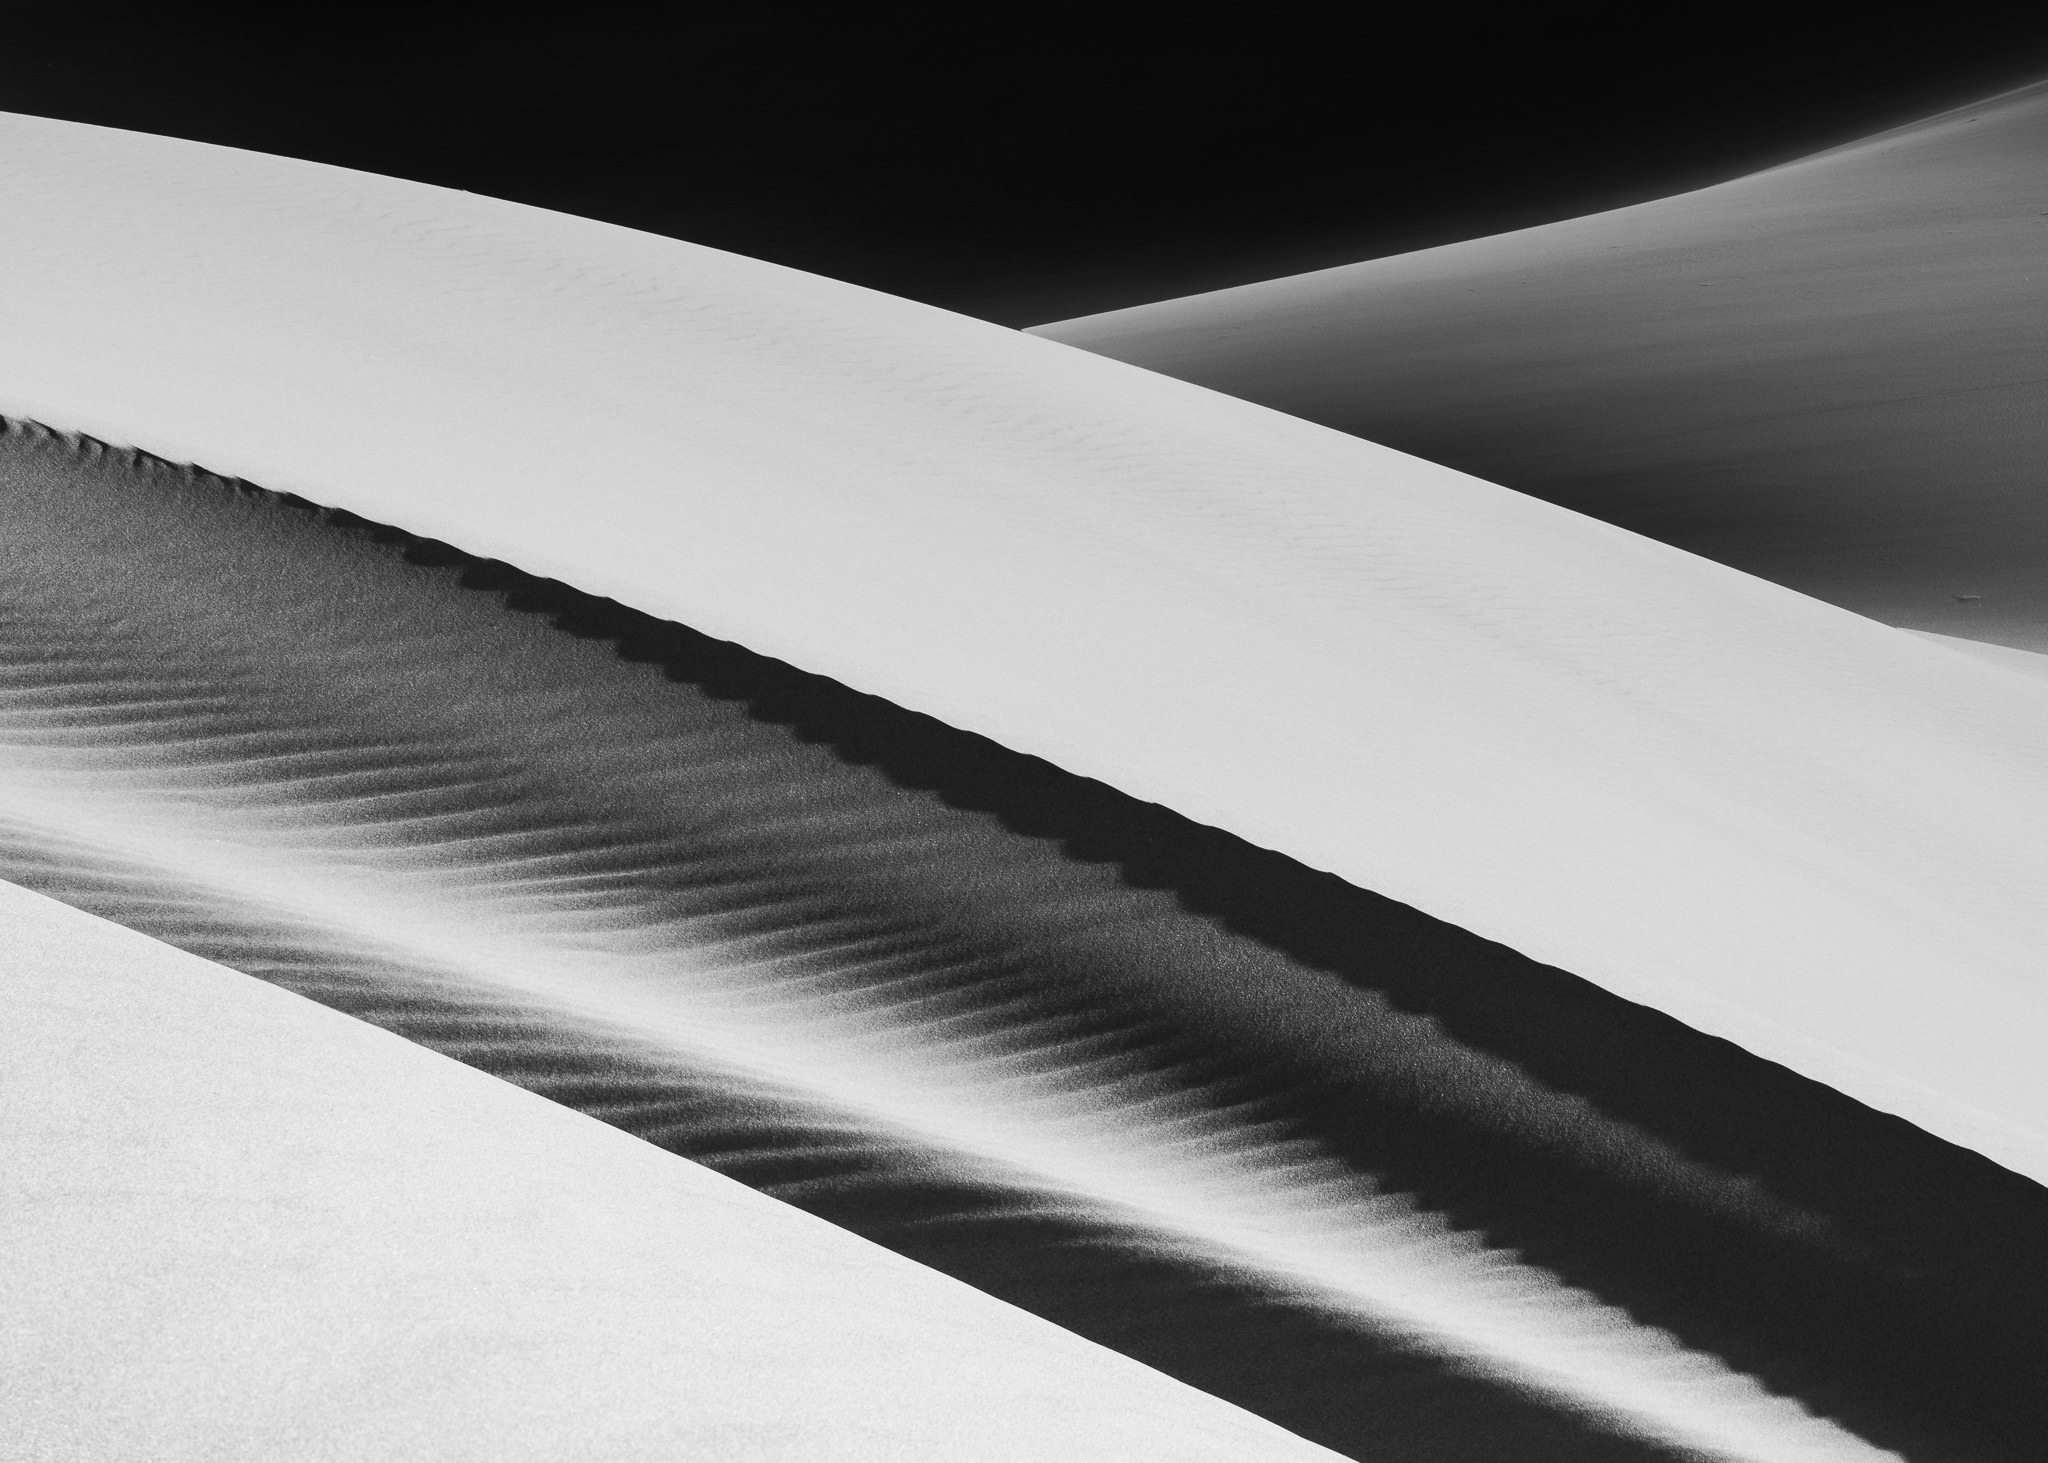
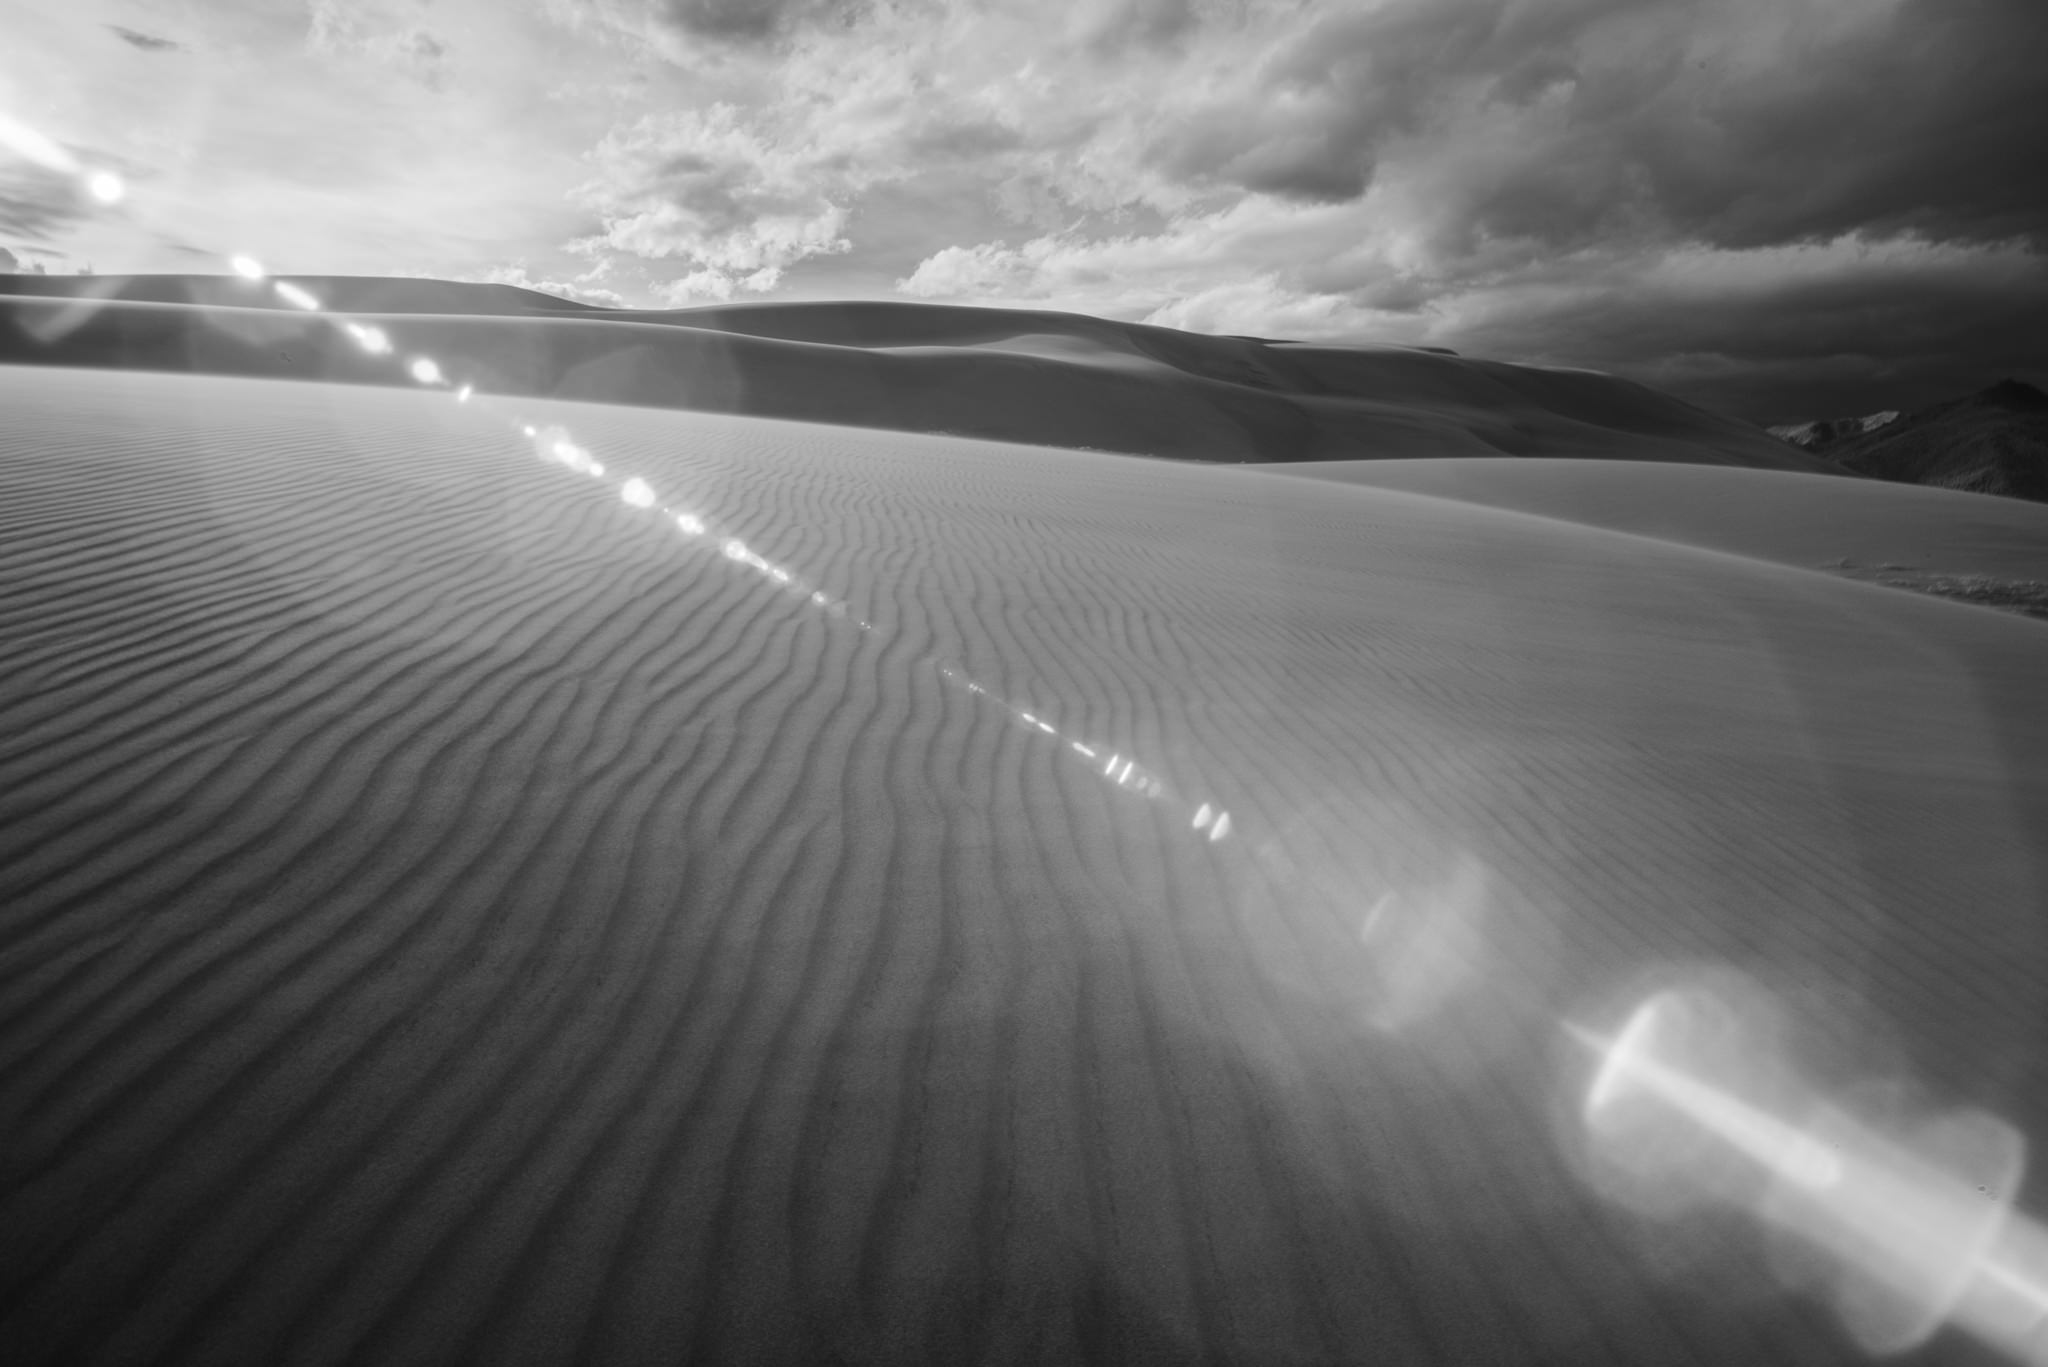
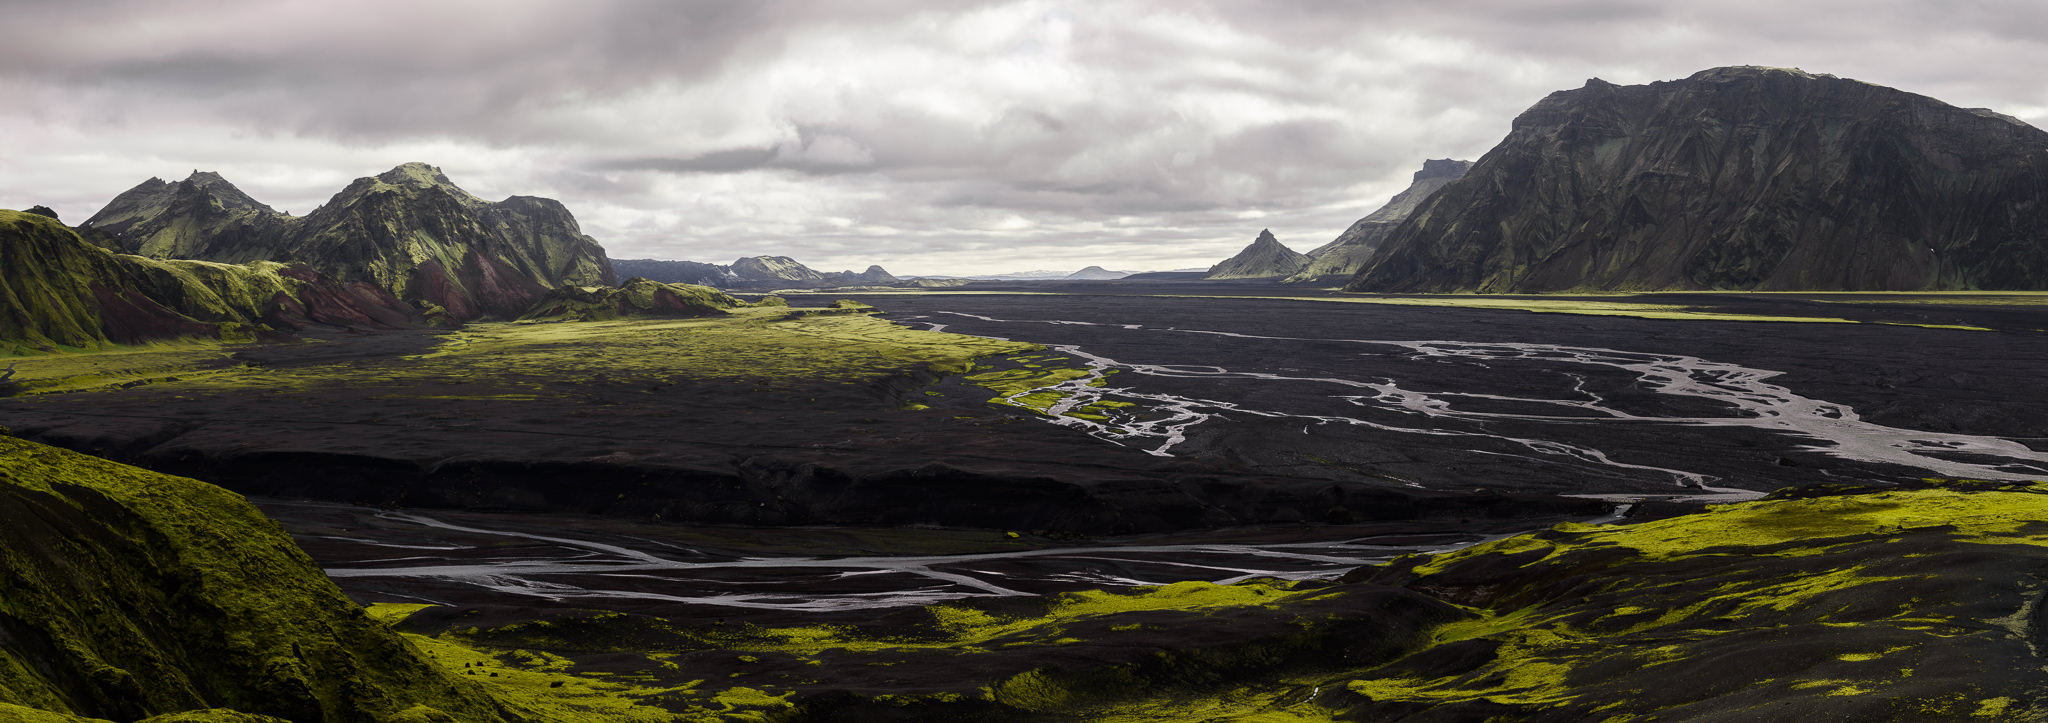
The other common type of distortion is perspective distortion. In this case, you’re getting very close to your subject (and generally zooming out a lot) to exaggerate its features.
Sometimes, extreme perspective distortion is nothing more than a gimmick. However, it can be quite helpful in emphasizing interesting foreground subjects, like lines on a sand dune.
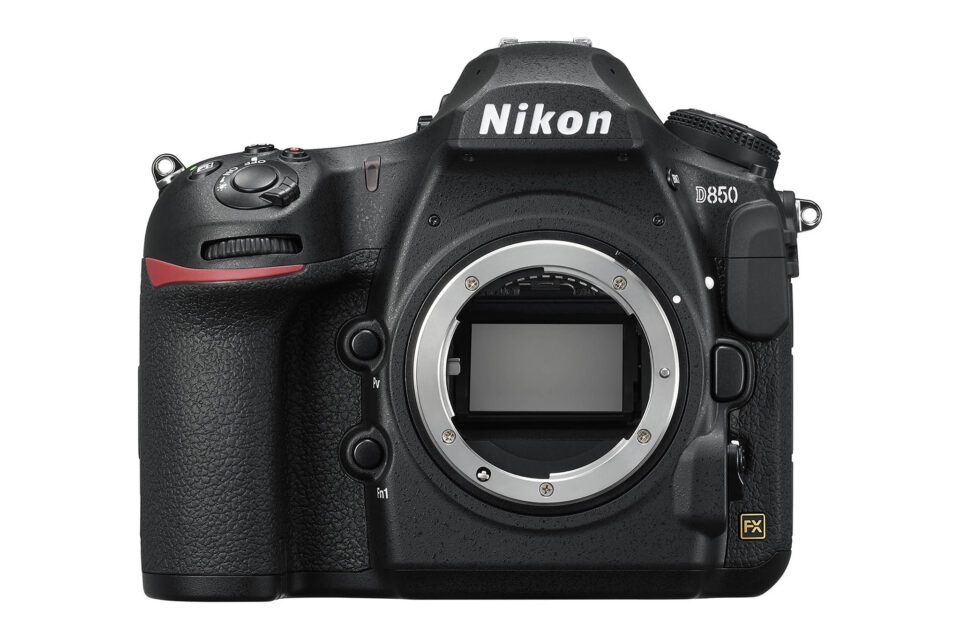
DSLR Camera
DSLR stands for “digital single lens reflex” camera. It is one of the most popular types of advanced cameras, along with mirrorless cameras (see “mirrorless” below).
The two defining aspects of a DSLR compared to other cameras are its digital sensor and its reflex mirror. The reason for a mirror inside the camera is to direct light from the lens to an optical viewfinder. When you take a photo, the mirror swings out of the way so as not to block your camera sensor.
Today, the two biggest DSLR companies are Canon and Nikon.
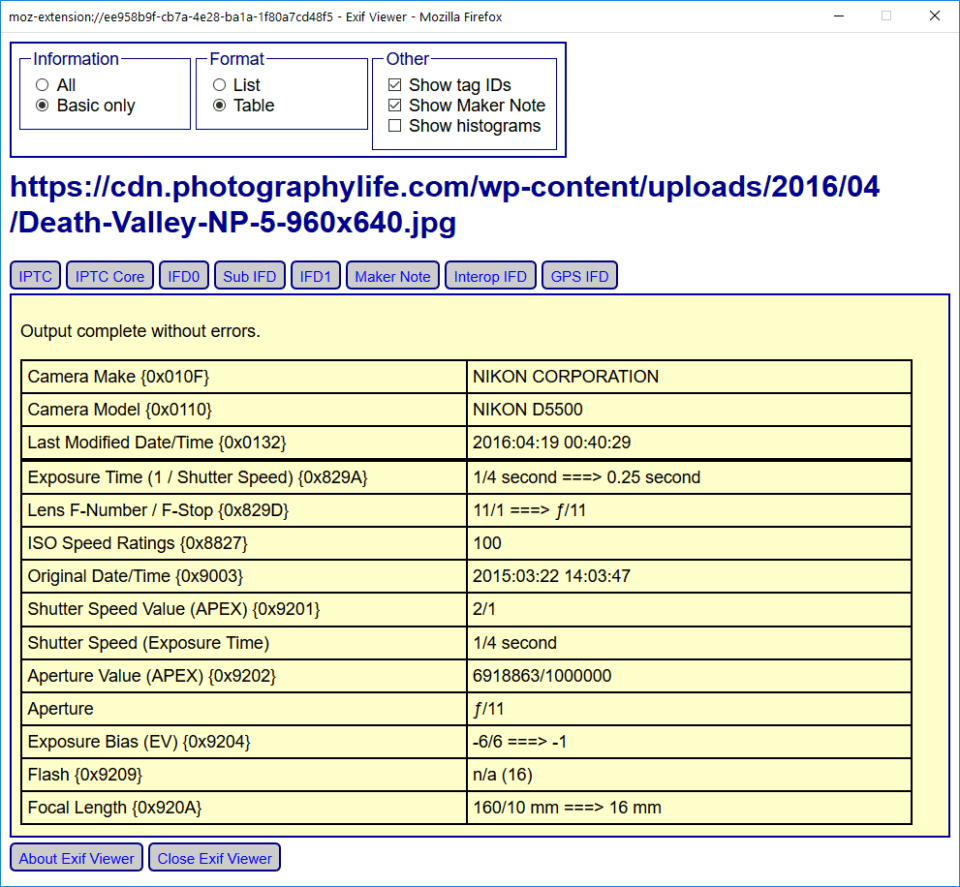
EXIF Data
A digital photo has more information embedded in its file than you may realize. Alongside the image data itself, most cameras also embed information like your camera settings, date/time of capture, and copyright information. This additional information is known as EXIF data.
EXIF stands for “Exchangeable Image Format.” It is very useful to look at your EXIF data when post-processing photos so you can get better at using your camera settings. (Before deleting a blurry photo, look at its EXIF data to see if you can spot a problem with the camera settings you used.)
I recommend eliminating EXIF data from certain photos you post online due to privacy concerns, especially if the photos are tagged with GPS coordinates. Almost all post-processing software lets you delete EXIF data upon export.
Exposure
There are several different meanings to the word “exposure” in photography. Most of them have to do with the brightness of your image, but not all. Here are the most common:
- A substitute for photo (“I took a few exposures of this scene.”)
- A substitute for shutter speed (“I’ll need a long exposure here.”)
- Your shutter speed and aperture values (“My exposure for this shot is 1/10 second at f/8.”)
- Your shutter speed, aperture, and ISO settings (“My exposure settings for this shot are 1/10 second, f/8, ISO 100.”)
- The brightness of your photo (“This photo is too dark; it’s underexposed.”)
Precisely what a photographer means when they say “exposure” depends on the context. However, it is irreplaceably tied to the brightness of your photo and the amount of light you capture.
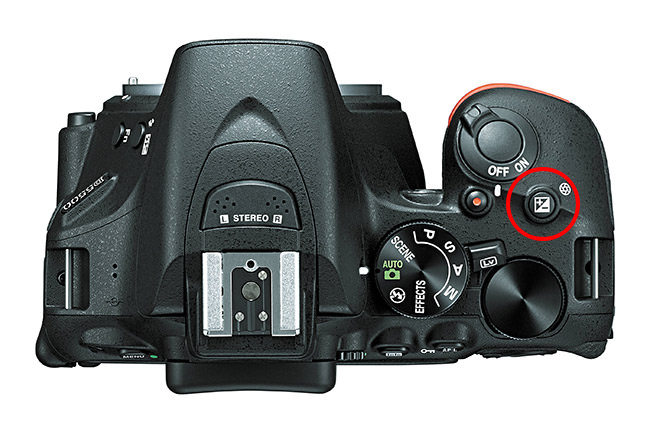
Exposure Compensation
This camera setting, exposure compensation, is a way to inform the camera to brighten or darken the photo compared to the camera settings you are currently using. (Specifically, compared to the metered exposure; see “metering” below.)
For example, perhaps you’re shooting a landscape, and part of your sky is “blown out” (too bright). To tell the camera to take a darker photo, you could input negative exposure compensation.
Note that exposure compensation does not darken the photo in all-manual mode, when you are in full control over aperture, shutter speed, and ISO (see “shutter speed” and “ISO” below). That’s because – aside from flash – those are the only three settings which can change the brightness of an image.
When you dial exposure compensation, the camera cannot magically take a darker photo without altering one of these variables. So if you are in aperture-priority mode (where the aperture is fixed), the camera will only ever adjust shutter speed or ISO when you use exposure compensation.
Personally, I use exposure compensation a lot, especially in combination with aperture priority mode. Specifically, when I take a landscape photo, I will select my aperture manually (because it’s so important to depth of field), then manually set my ISO to its lowest value. This leaves only one variable to adjust automatically – shutter speed. So, the camera adjusts shutter speed as the light changes, and I can nudge it either brighter or darker if the camera is consistently under/overexposing.
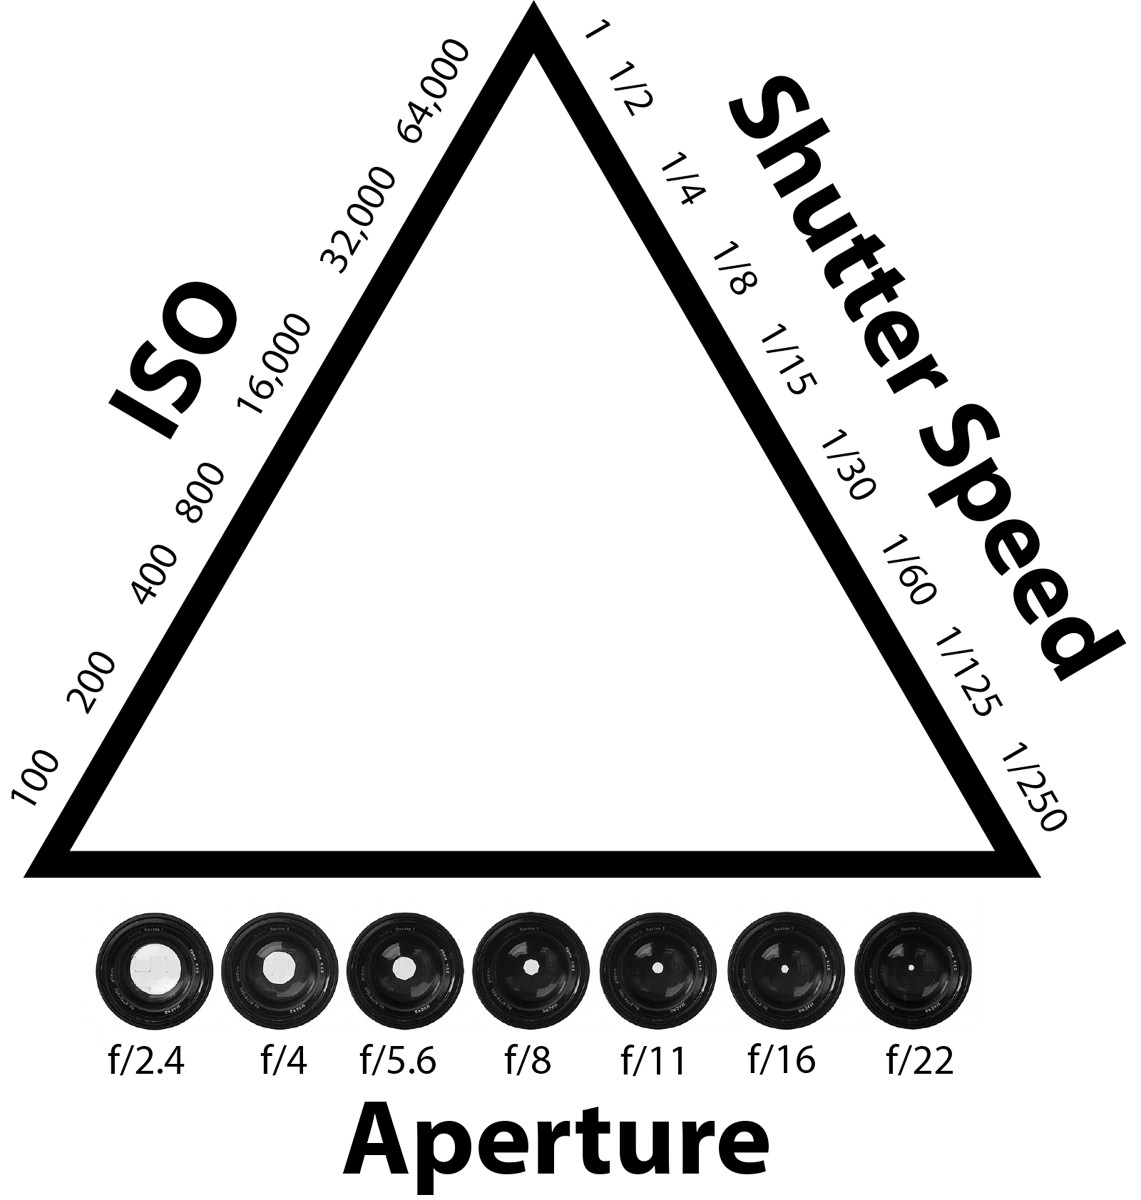
Exposure Triangle
The exposure triangle refers to the “big three” camera settings – aperture, shutter speed, and ISO (see “ISO” below). Aside from your flash, these are the only camera settings that alter the brightness of an image.
Note, however, that many photographers do not consider ISO to be part of exposure. While shutter speed and aperture physically change how much light you capture, ISO merely brightens the photo after the fact – not unlike raising brightness in post-processing. To keep the “triangle” name intact, a third variable – brightness of the scene – is sometimes used instead.
In reality, though, ISO still matters even though it doesn’t change how much light you physically capture. Indeed, I’d argue that the exposure triangle is actually a square. Shutter speed, aperture, ISO, and scene luminance all affect the brightness of your out-of-camera image.
But when you hear a photographer refer to the exposure triangle in context – unless they’re lamenting how inaccurate of a concept it is – they’re probably just talking about aperture, shutter speed, and ISO.
Filters
Filters are attachments to the front of your camera lens, or occasionally to the back. Filters are usually made of glass, resin, or plastic. They generally are meant to alter the quality of light that reaches your camera sensor. However, there are also “protective filters” to prevent scratches on the front of your lens.
Most lenses today have threads on the front to make it easy to attach filters. However, some specialty lenses – especially ultra-wides – may require separate filter holding systems in order to work.
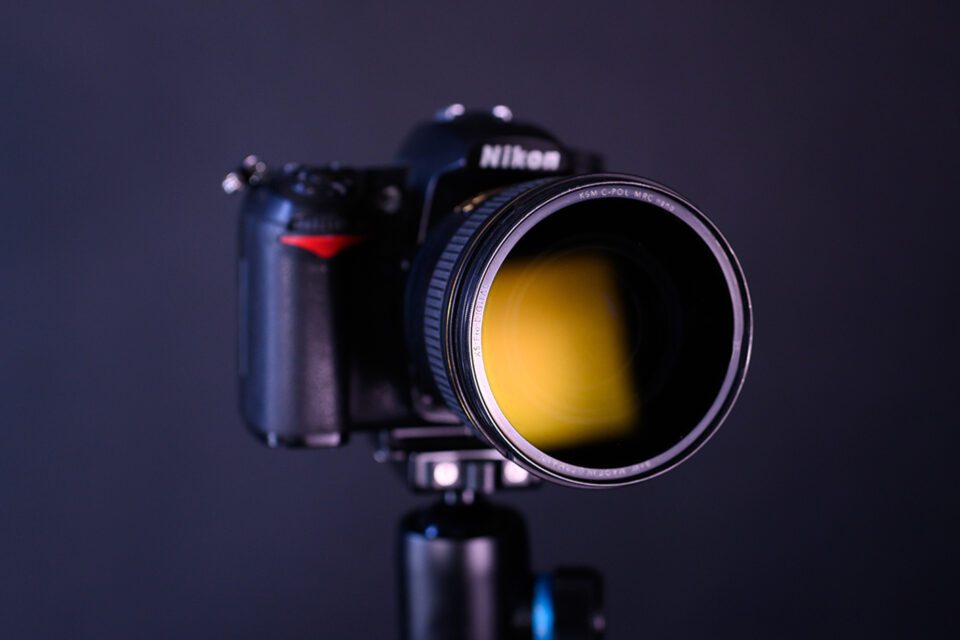
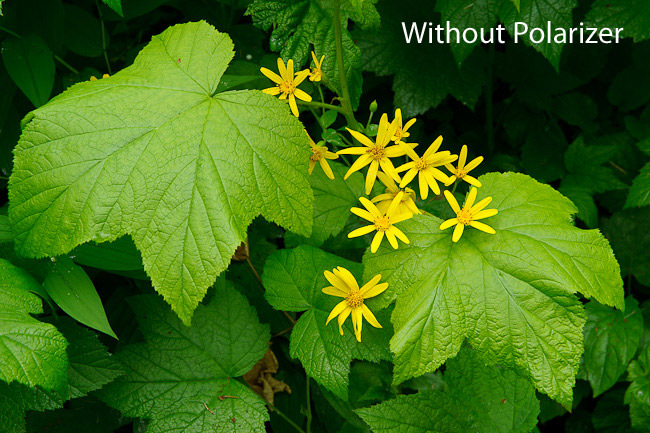
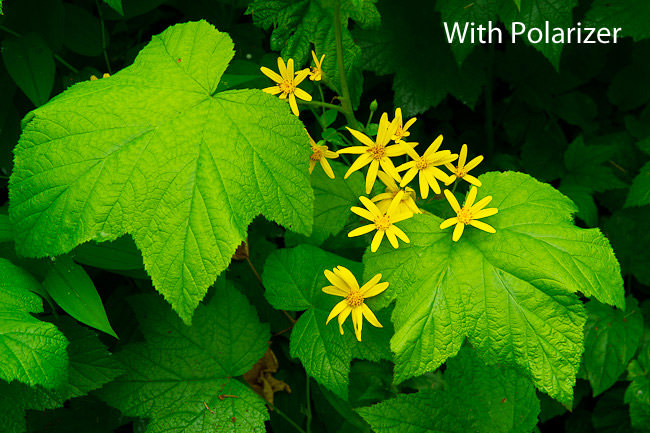
The most popular – and often the most useful – type of filter is a polarizer. These filters rotate to block or accentuate polarized light. This reduces reflections and distant haze in your photos, and cannot be replicated easily (or at all) in Photoshop.
Plenty of other filters exist, including dark filters (AKA “neutral density” filters), graduated filters (to adjust just part of the photo, like the sky), and color filters.
Also, some smartphone apps like Instagram call their editing presets “filters,” but we don’t talk about that here 🙂
Focal Length
Focal length is a property of camera lenses. It’s important because it tells you how far “zoomed-in” you are.
Focal length is written in millimeters, where a greater number represents a longer focal length (more zoomed-in).

Copyright © Elizabeth Gray
Earlier in this glossary, I defined crop factor and mentioned that small camera sensors act, essentially, as crops of larger sensors. In other words, the same focal length may appear to be farther zoomed in on certain cameras than others.
On higher-end cameras with large sensors, a long focal length (AKA a telephoto that is zoomed in a lot) is anything about 100mm and more. The giant telephoto lenses that sports photographers use at the Olympics tend to be at least 300mm, and often as much as 800mm.
Wide-angle lenses (good for landscapes) tend to be 35mm or less. A popular wide-angle lens offered by many manufacturers is a 16-35mm zoom lens.
When you are trying to figure out a lens’s focal length, just look in the lens name before the “mm” marking. Zoom lenses cover a range of focal lengths, while prime lenses cover just a single focal length. See “prime lens” and “zoom lens” below.
Focusing
Aside from the “big three” camera settings – aperture, shutter speed, and ISO – the most important setting to get right in photography is focusing.
With most lenses, you can only focus at one distance at a time. For example, you may choose to focus your lens 10 feet / 3 meters away. This means that any subject 10 feet away from the plane of your camera sensor will be maximally sharp, while other distances will be more and more out of focus.
How do you focus properly? Cameras typically offer a huge number of autofocus options. One of the most common is single-servo versus continuous-servo AF. This tells the camera whether to focus once when you press the focusing button, or continually focus as your subject moves. I leave it on single-servo (AF-S) for landscapes and continuous-servo (AF-C) for wildlife and portraiture.
Another common option is the function of your autofocus points (the dots/squares that have autofocus capabilities). You can choose just a single autofocus point, 3D-tracking autofocus across all points, automatic (camera-selected) autofocus points, and often many other options. I recommend reading your camera manual to see which options you have, and when to use each one.
Of course, if the camera’s autofocus system is not locking onto your subject properly, you can always choose to focus manually.
Also see our article on focusing in photography for more.
HDR
Camera sensors cannot see high-contrast details nearly as well as our eyes can. If there are deep shadows beneath a bright sky, you pretty much have to choose one or the other to capture properly; the other will be poorly exposed.
One common fix to this problem is to create an HDR, or “high dynamic range” image. This involves taking two (or often more) photos with different exposures. Then, blend together the best parts of each in post-processing software.
Dedicated HDR photographers often use their camera’s bracketing feature to speed up capture. Indeed, the faster you take a series of HDR photos, the better; if something like a cloud is moving in the image, a quick series of photos will be easier to blend.
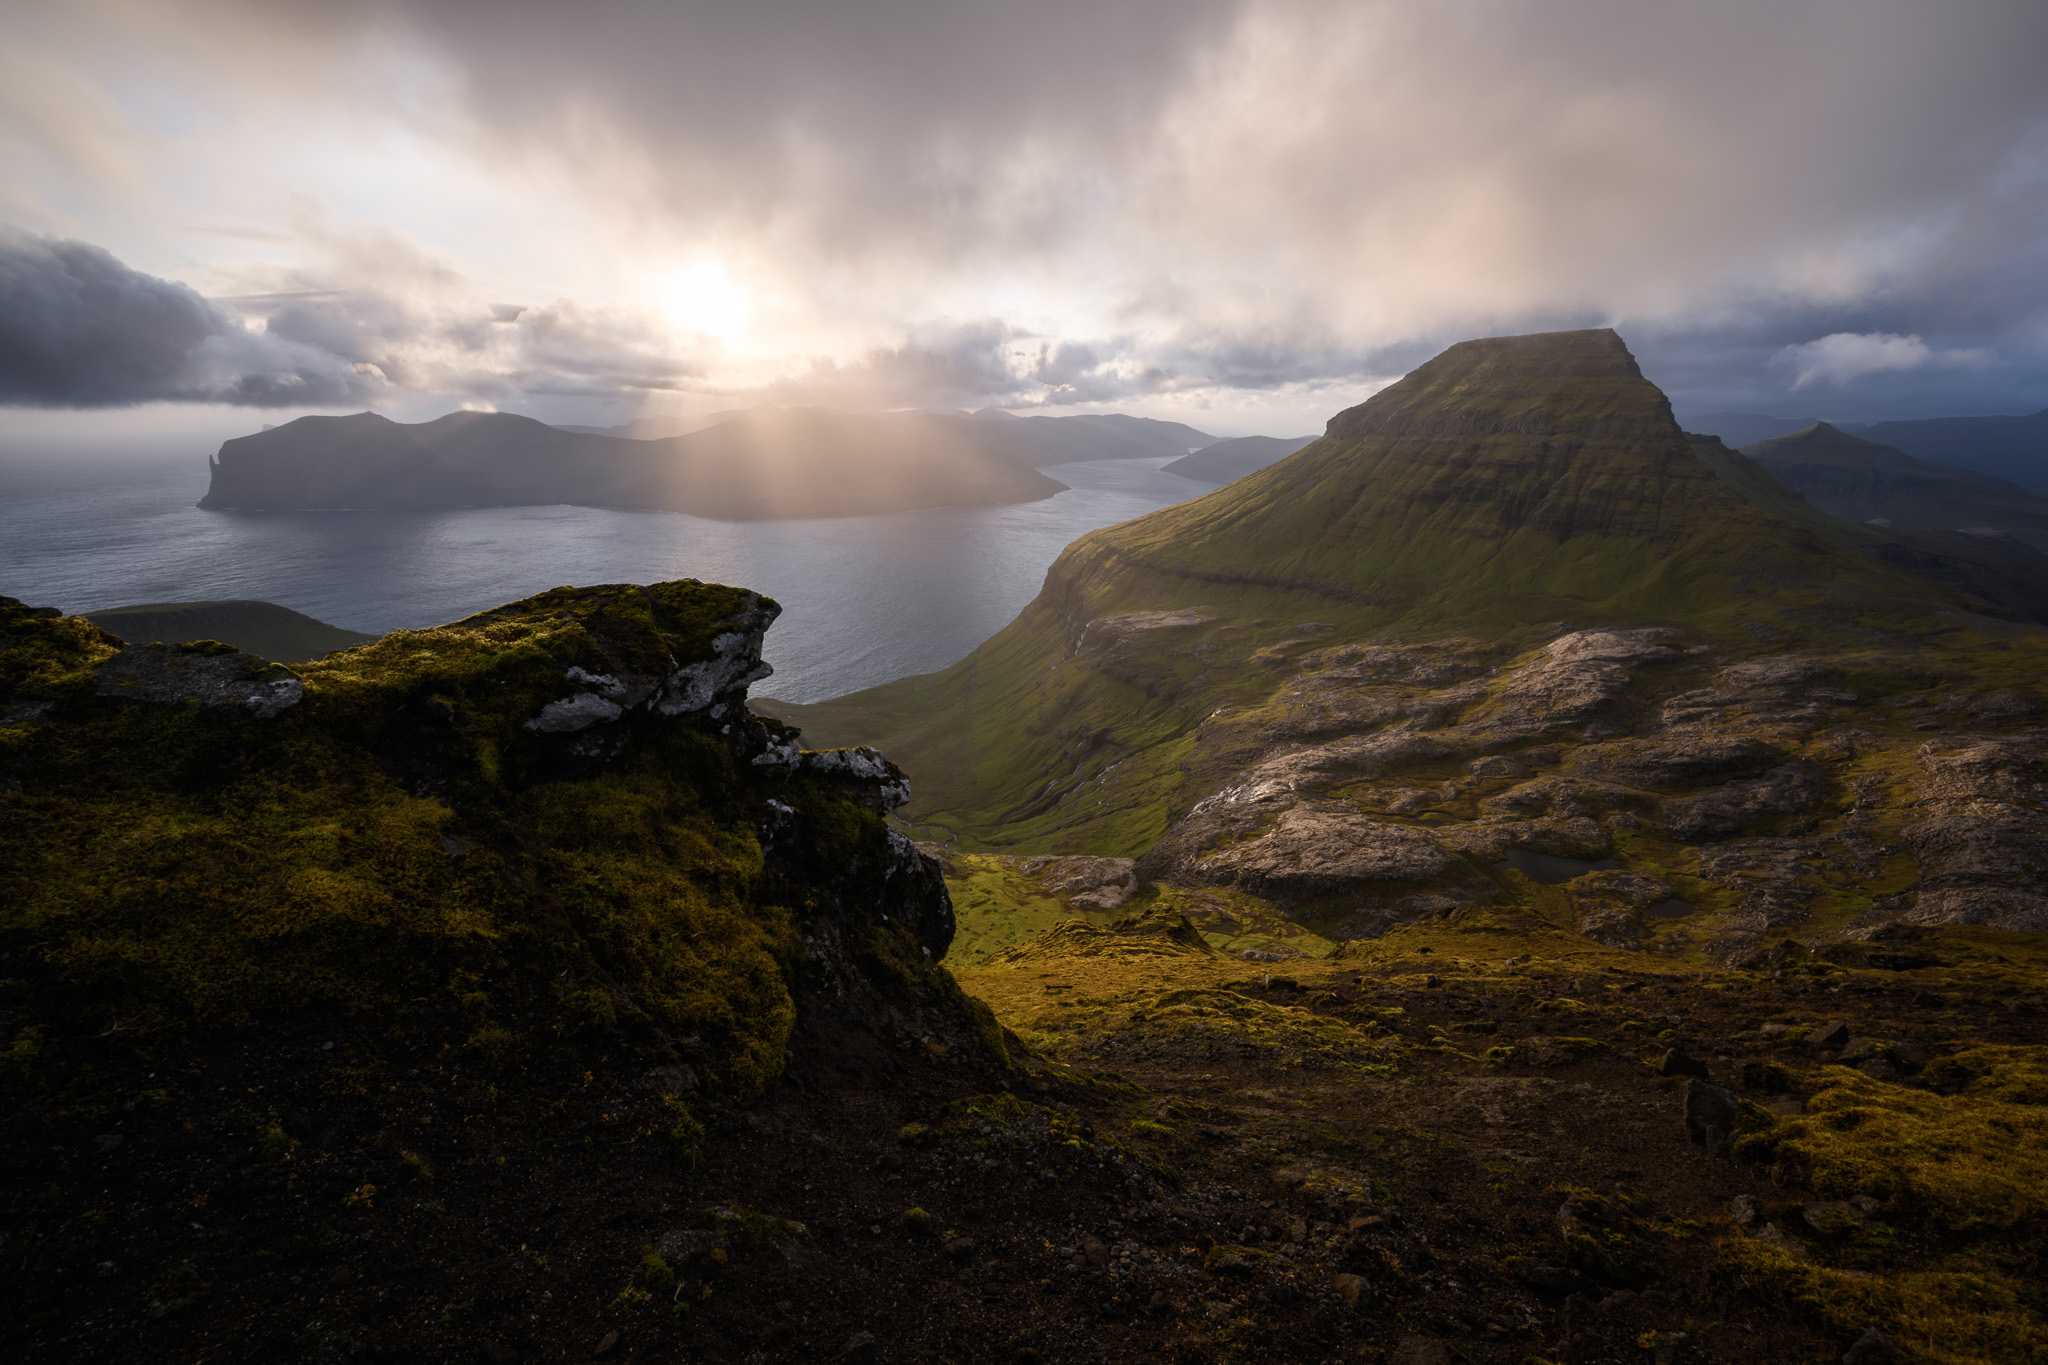
Image Blending
Photographers realized a while ago that it is possible to expand the capabilities of a camera by taking multiple images, and then blending the best parts of each together. HDR photography (the term directly above) is just one example.
Here are just a few more:
- Creating a panorama out of several single images
- Averaging a series of identical compositions together to reduce noise (see “noise” below)
- Focusing at different distances to make a “focus stack” with high depth of field
- More controversial blending, like sky replacement or “time” blending (merging two different photos of the same scene taken many minutes or hours apart from each other)
Image blending is frequently done in software like Photoshop (see “Photoshop” below). Certain types of image blending are more accepted than others among photographers. In fact, many publications and photo competitions do not allow image blending at all, or may only allow panoramas and HDR.
Image Stabilization
Image stabilization is a feature of many camera lenses – and now a number of camera sensors themselves – to counteract shake from handholding your camera.
Lens-based image stabilization works by moving lens elements along (generally) either three or five axes to compensate for any movement it detects. Camera-based stabilization (known as IBIS or in-body image stabilization) does the same sort of thing, but it moves your camera sensor directly.
Both types of image stabilization are very useful in photography, especially when handholding in low light conditions. Image stabilization lets you take pictures in environments that are several times darker than what you could otherwise capture.
Lenses and cameras typically advertise in the range of four to six “stops” of improvement. One stop is equal to a doubling of your shutter speed (see “shutter speed” below). So, if you normally could handhold an image sharply at 1/60 second, a four stop improvement would be 1/30 > 1/15 > 1/8 > 1/4 second. A six stop improvement would let you handhold at a whopping 1 second with high levels of sharpness.
However, almost all of these 4-6 stop improvement claims are exaggerated. I’m personally happy when I get 3 stops of improvement, and 4 is among the best on the market.
IPS Monitor
Photographers editing images should care a lot about color accuracy. After all, if you are editing photos on an inaccurate monitor, who knows what colors you are really editing?
The monitor of choice for most photographers is an IPS, or “in-plane switching” monitor. These are sold by many different companies, ranging from inexpensive to ultra-high-end.
IPS monitors have several benefits over traditional TN panels. The most obvious is that they have consistent color at different viewing angles, as shown in the comparison below:

Your monitor problems won’t be solved simply by getting an IPS monitor; some of them are not very good, either. But if you don’t have an IPS monitor already, you definitely should get one (along with proper color calibration equipment). This is one of the most overlooked, yet important pieces of equipment a photographer should have.
Read our larger guide to IPS monitors if you want more information on the benefits of this type of monitor.
ISO
One of the three most important settings in photography is ISO. Like shutter speed and aperture, changing ISO affects a photo’s brightness.
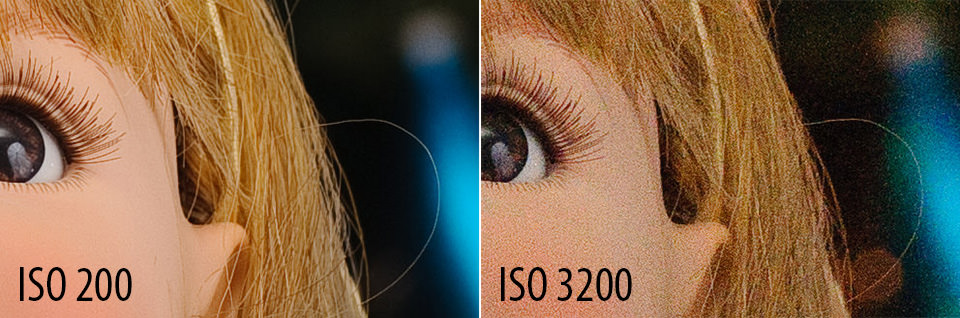
The lowest native ISO on a camera is called the base ISO. Base ISO – usually around ISO 100 – results in the darkest images. As you increase ISO, your photos will get brighter, which is useful in dark environments. Cameras often max out at ISO 6400, 12800, 25600, or even higher.
You’ll notice that higher ISO settings start to look very low-quality, with lots of graininess and discoloration. (The graininess is called noise – see “noise” below.) However, in dark environments, you may have no choice but to use a higher ISO; otherwise your photo will be far too dark.
To introduce the concept of ISO, some photography instructors will compare it to the ASA, or sensitivity, of a particular film. Others compare it to pushing a photograph brighter in post-production. Neither of these comparisons is perfectly accurate, but they each have elements of truth that may help you conceptualize ISO.
In either case, note that changing ISO does not alter the amount of light you physically capture in-camera (unlike shutter speed and aperture). The less light you capture, the lower your image quality will be – this is the real cause of noise/grain in dark environments! – and the higher your ISO needs to be in order to capture a bright image.
JPEG
The single most common file type for photographs is JPEG. Chances are you’ve heard of JPEGs before – but there are a few things about them that photographers need to know.
To start, although JPEG is essentially the “default” file format of photography, that doesn’t mean it is the best. In fact, JPEG images are often heavily compressed, and they are only capable of showing 8-bit color (256 shades each for red, green, and blue channels). By comparison, many cameras can shoot RAW files with 14-bit color, which stores a whopping 16,384 shades each for red, green, and blue channels. See our article on JPEG vs RAW, and also see the entry for “RAW” below.
JPEGs, however, have the advantage of being very small files and highly compatible with almost every application. Every photo you see in this article, I uploaded to Photography Life as a JPEG for precisely these reasons.
I recommend thinking of JPEG as the optimal output file type for many uses (especially online), but generally not the optimal starting file type.
Lens Flare
Glass is not fully transmissive; it also reflects some light back to you like a mirror. This should be immediately clear any time you look at a window at night, with sources of light bounding off it.
The glass in camera lens functions the same way, though manufacturers use plenty of expensive coatings these days to minimize reflections as much as possible. Why? Because lenses without anti-reflective coatings are often very prone to flare.
Flare occurs when bright sources of light in an image have misshapen “ghosts” that appear elsewhere in your photo. You’ve probably seen this sort of thing in countless movies:
NIKON D800E + 14mm f/2.4 @ 14mm, ISO 100, 1/30, f/13.0
Lens flare is sometimes an interesting effect, but it generally is something that photographers try to avoid. Personally, as a landscape photographer, I don’t want to have big, green blobs of light interfering with my subject all the time.
The most effective solution to lens flare is simply to use lenses with good coatings – and to avoid cheap lens filters, especially low-quality protective filters. If worse comes to worst, you can always use our image blending trick to get rid of pesky lens flares.
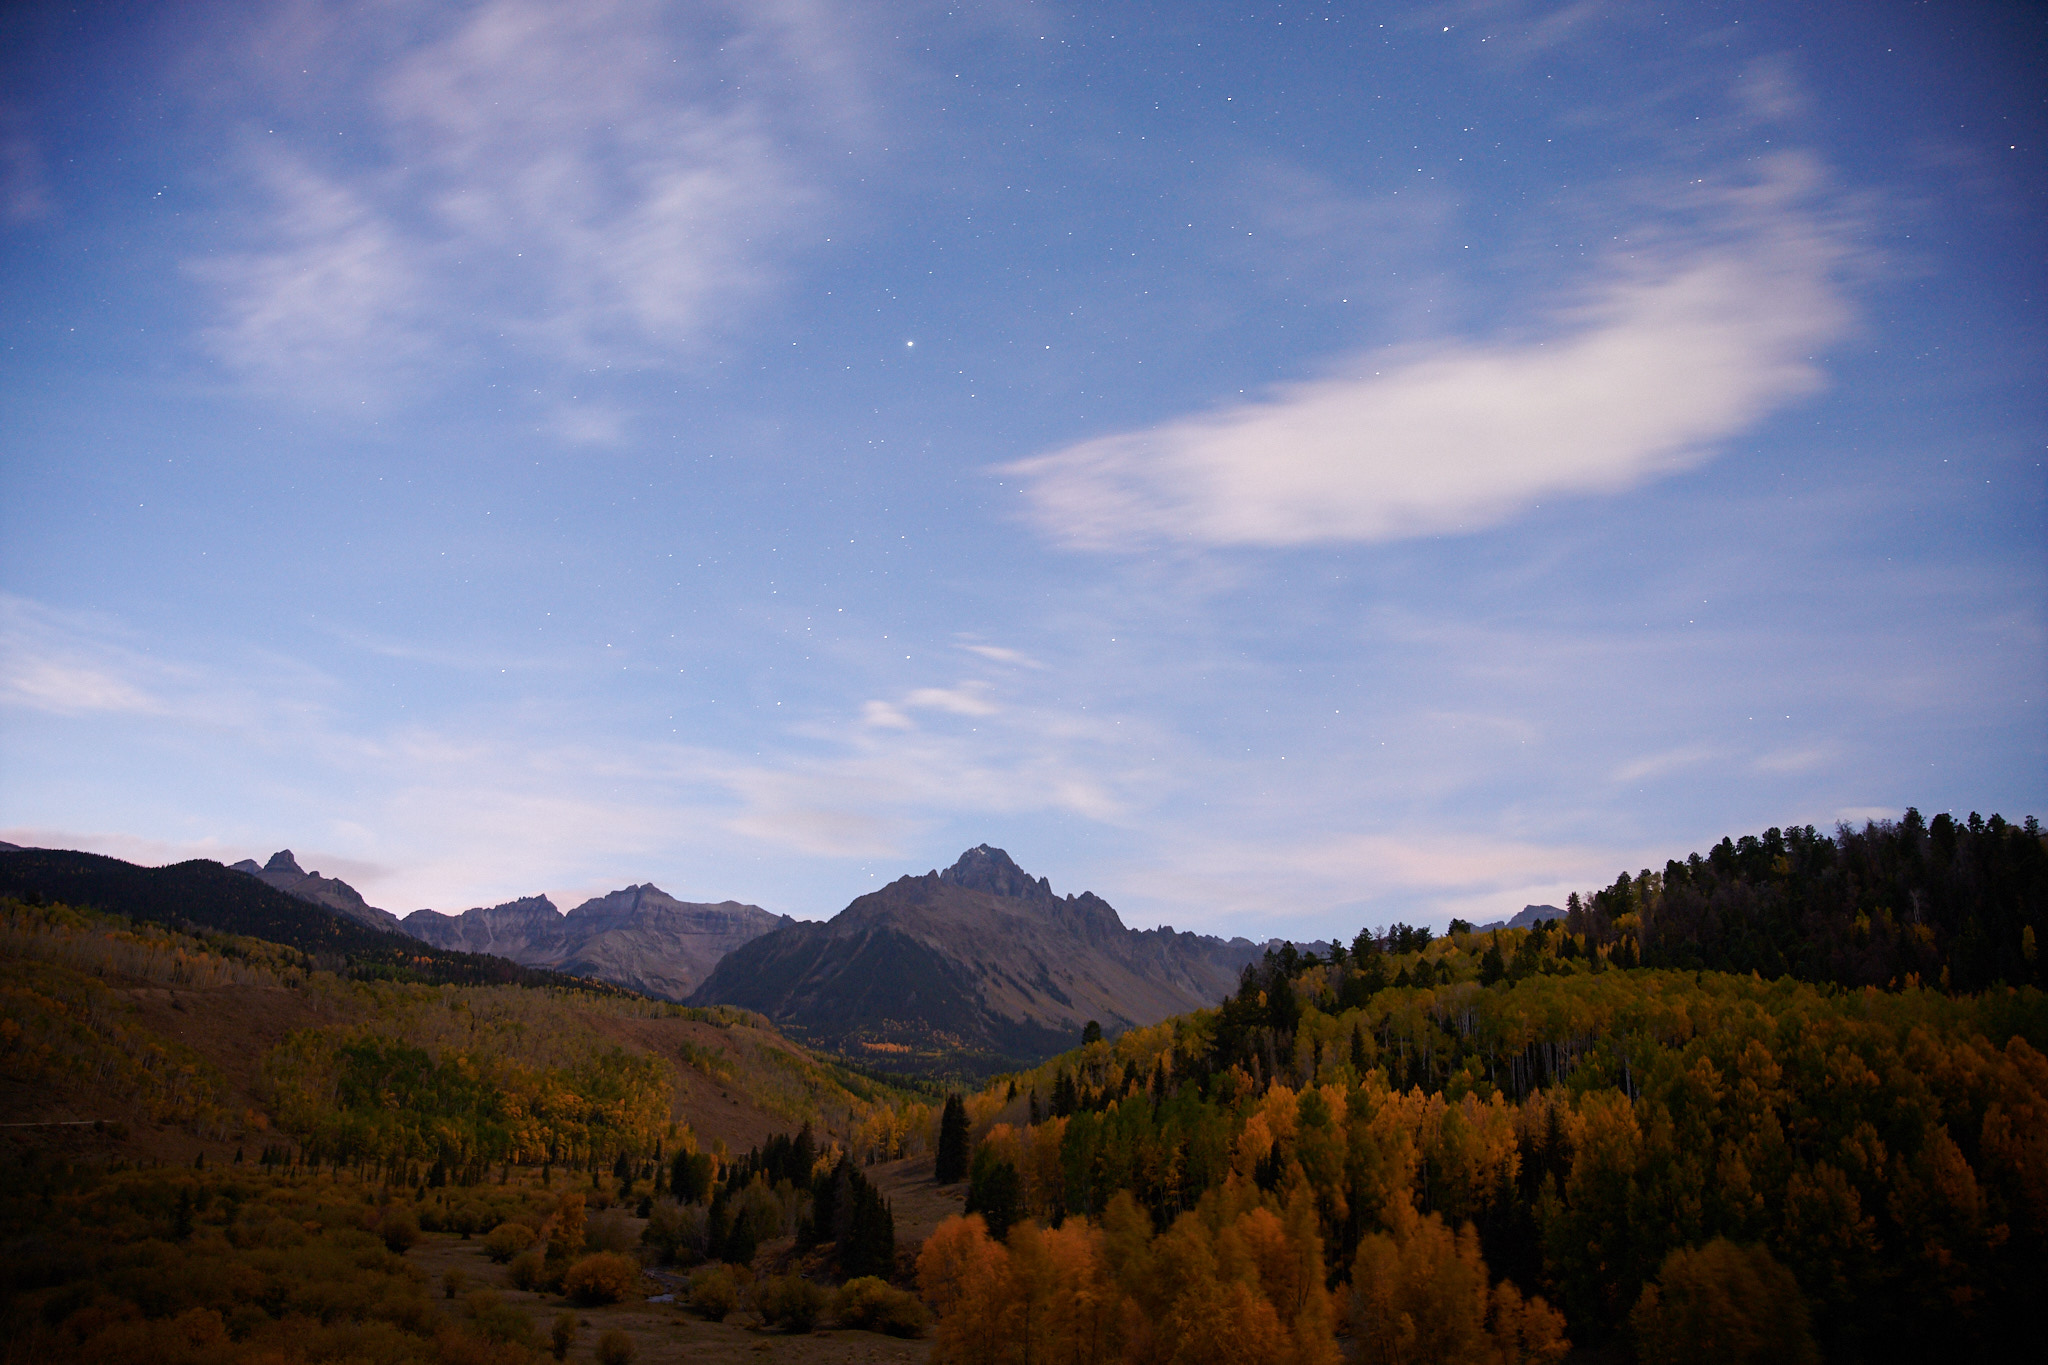
Light
Photography is the capture of light. It’s easy to forget that when you see an amazing landscape or interesting animal in front of your camera, but all you’re actually photographing is light.
One of the biggest things that separates a good photo from a bad one is the quality of its light. I’ve seen countless smartphone photos that decimate the average photo from a $3000 DSLR. Not because the phone is (even close to) the better camera, but because of the light.
Light carries emotion. “Good light” is light that harmonizes with the emotional message you’re trying to convey. Even the most beautiful sunset isn’t necessarily good light, and the dullest overcast sky isn’t necessarily bad light. Either could be a good or bad fit, depending on the look you want to capture.

NIKON D810 + 70-200mm f/2.8 @ 70mm, ISO 140, 1/500, f/9.0
Lightroom
Perhaps the single most popular post-processing software for dedicated photographers is Adobe Lightroom.
Photoshop (also an Adobe product) is better-known among non-photographers, but its complex set of tools is actually geared toward graphic design rather than photography in many cases. See “Photoshop” below.
Lightroom is strictly photography-oriented. It works by loading all of your images into a “Lightroom catalog,” from which you can organize and sort the photos as you like. You can also edit the images you’ve loaded into Lightroom.

A lot of photographers will be confused at first to see that Lightroom has no “save” button for editing images, and any edits you do will not appear in any software outside of Lightroom.
These are features, not bugs. Every one of your Lightroom edits is stored in the catalog file – not baked into the original image. Lightroom also saves your edits in real time. The only way to “lock in” an edit is to export the image from Lightroom. This is something you’ll do any time you want to put one of your images online, print it, or open it in other post-processing software.
As you may have gathered, even though Lightroom is simpler than Photoshop and geared strictly toward photographers, it’s still a complex piece of software. We wrote an article explaining Lightroom in-depth if you’re trying to wrap your head around it.
Long Exposure
When your shutter speed (see “shutter speed” below) is a few seconds or more, you are considered to be shooting with a long exposure.
The actual shutter speed cutoff for “long exposure” is flexible, and not particularly important. Some photographers may not consider the term to apply unless you’re using a multi-minute exposure, and that’s fine.
One of the main reasons to shoot long exposure photos is that it blurs any quick-moving objects in your frame (and plenty of slow-moving objects, too). That’s one reason why long exposure photography is often associated with photographing clouds or the ocean.

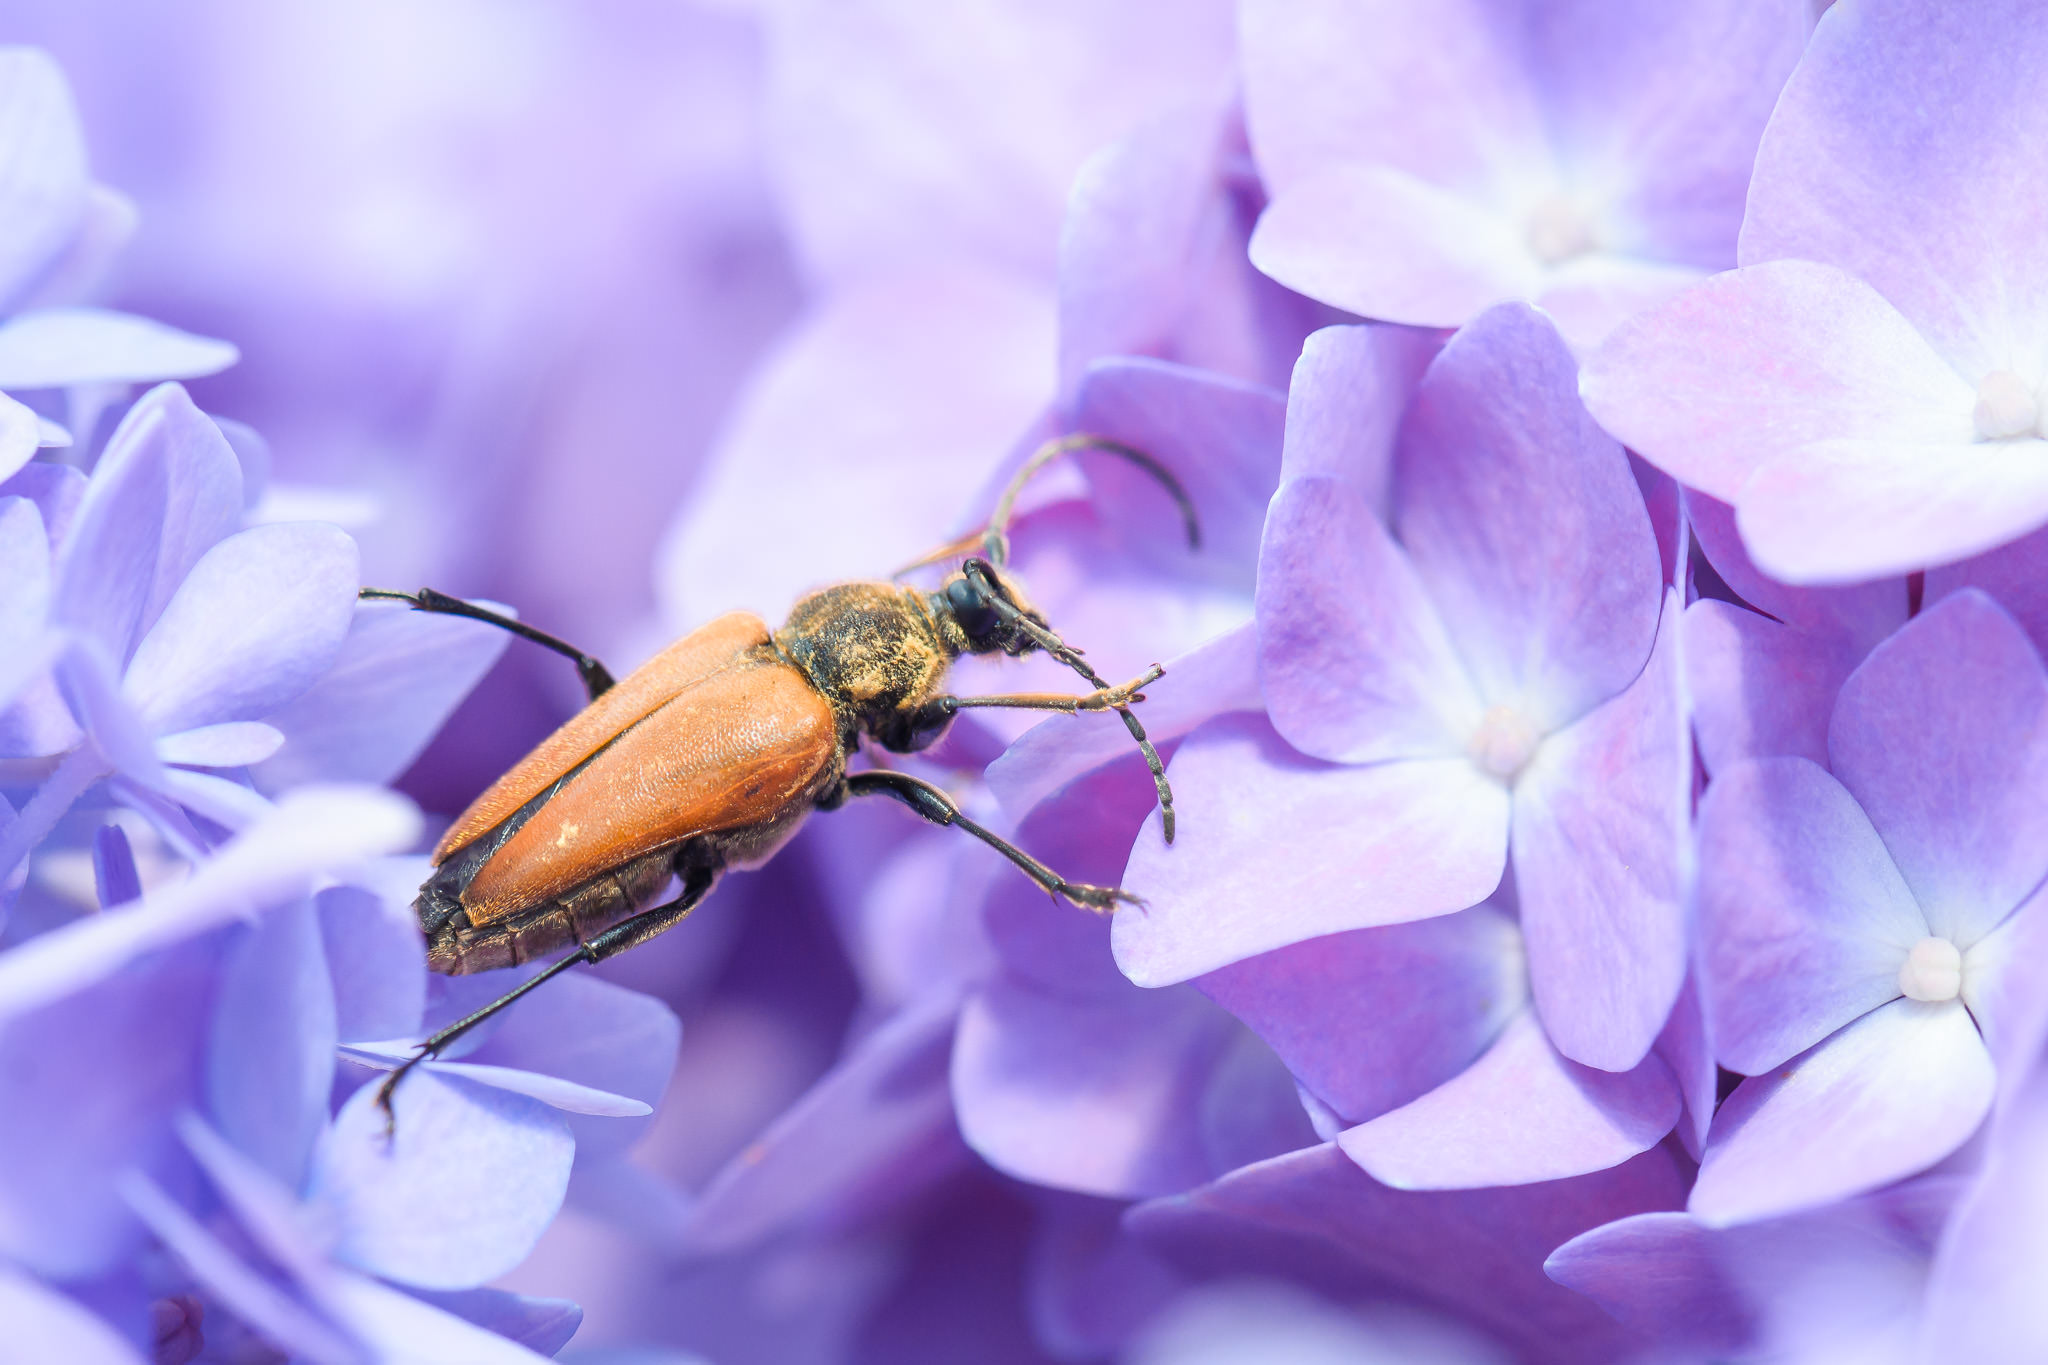
Macro
Close-up photography – photographing bugs, flowers, and other small things – is often known as macro photography.
The technical definition of macro photography is any photo taken at “1:1 magnification” or greater. 1:1 magnification means that the subject is the same size on your camera sensor as it is in the real world. (In other words, a one-inch ant filling a one-inch-wide camera sensor is exactly 1:1 magnification.)
However, even lens manufacturers don’t stick to this definition all the time. You’ll often see “macro” lenses that only get to half of 1:1 magnification, or even less.
Regardless, one of the amazing things about macro photography is that you can do it almost anywhere. It is one of the few genres of photography where you can take world-class photos literally in your backyard. And thanks to the availability of older, manual focus lenses, it doesn’t have to be all that expensive anyway. (Even with the best equipment, many macro photographers use manual focus for a large number of their photos.)
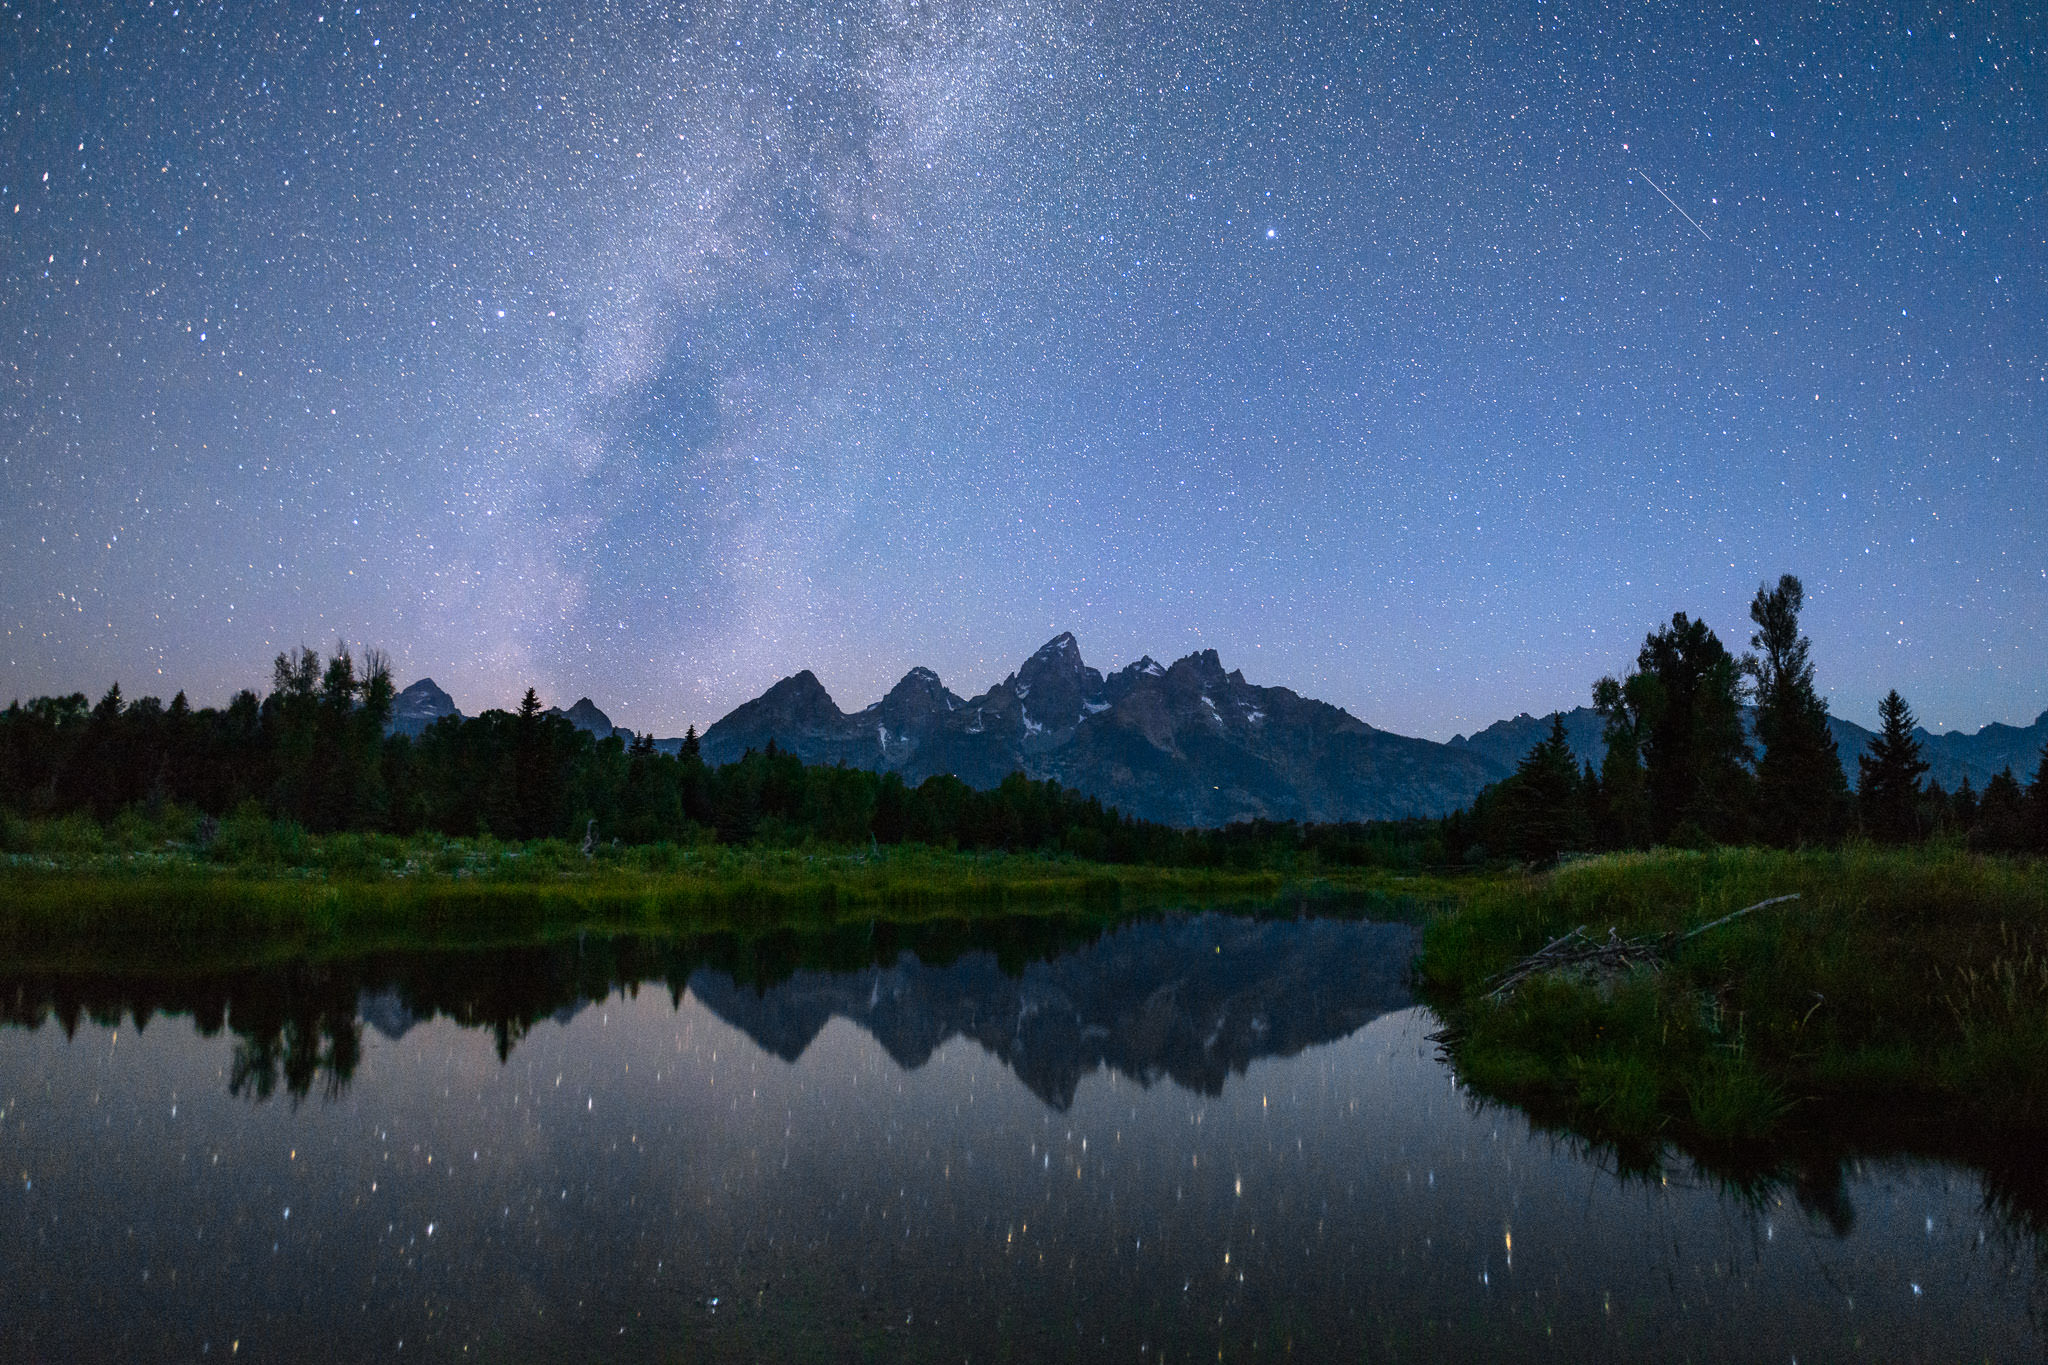
Manual Mode
The only camera mode which offers full control over both shutter speed and aperture is manual mode. You can also shoot ISO manually in manual mode, although most cameras allow you to set Auto ISO in manual mode if you so desire.
Personally, I primarily use manual mode when I need consistency from shot to shot, like making a panorama. However, I will also use it in cases when my camera’s metering system (see “metering” below) is not working properly, like Milky Way photography.
A lot of photographers see manual mode as the only “professional” camera mode, while the others are for beginners. However, don’t get hung up on this mentality.
The big downside of manual mode is that it doesn’t change exposure as the light changes. This is fine in many cases, but in fast-moving conditions, I personally default to aperture priority mode for my photography. So do many other photographers I know, including Nasim.
Metering
Metering is how your camera reads the light in a scene – brightness, darkness, contrast – and recommends an exposure (in this case, meaning a combination of shutter speed, aperture, and ISO that will result in a photo of the “proper” brightness).
The metering system is not always perfect. It can be fooled when there is a large amount of white or black in a scene, such as a snowy scene with few dark shadows. That’s because – to simplify things a bit – metering systems aim to expose the whole photo roughly to “middle gray,” meaning an exact midtone. White scenes become gray; black scenes become gray. Modern cameras are better at this than they used to be, but all can be fooled.
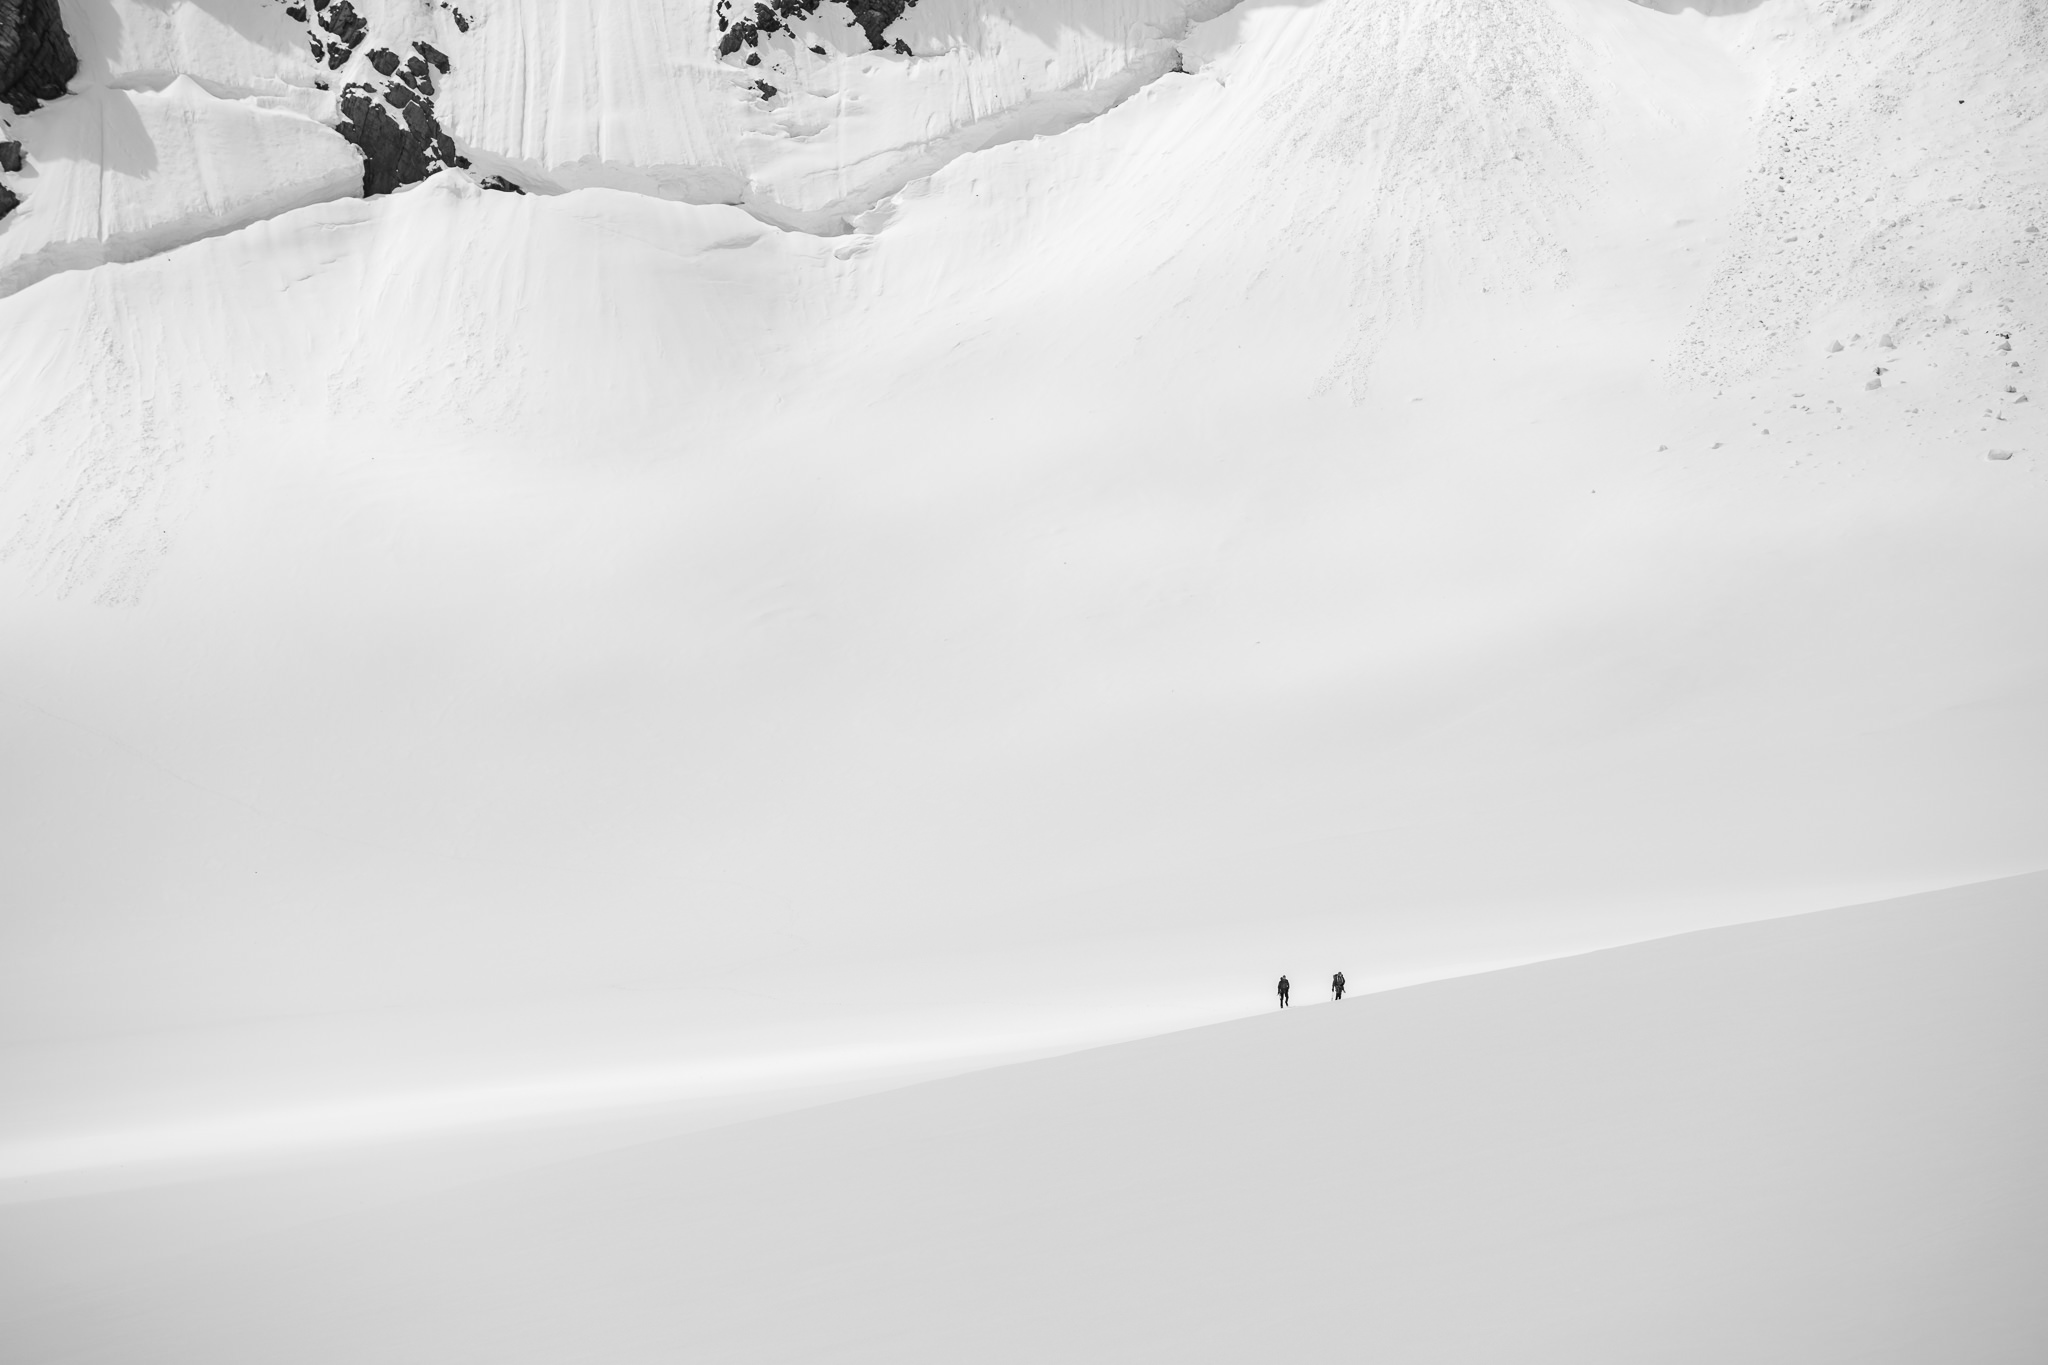
NIKON D800E + 70-200mm f/4 @ 200mm, ISO 140, 1/800, f/7.1
That’s why exposure compensation exists (or, in manual mode, watching your exposure carefully and manually making corrections one way or another).
Metering systems often allow you some choices in configuring them properly. One of the most common is to select among “Matrix,” “Center-Weighted,” and “Spot” (though the exact names vary from brand to brand).
- Matrix is the default, taking into account the entire image and representing the camera’s best guess at a good exposure
- Center-weighted prioritizes a central region of the image and tries to make it “middle gray”
- Spot metering only measures a very small portion of the scene – either your focus point (on some cameras) or the very center point of the image (on other cameras)
I leave mine set to Matrix by default, and only occasionally switch to Spot if Matrix is consistently exposing my subject wrong.
Megapixels
Megapixels is simply a term for the resolution of your camera sensor. For example, a lot of sensors today have a resolution of 6000 pixels across by 4000 pixels tall. If you multiply this out, you’ll end up with a total of 24 million pixels – i.e., 24 megapixels.
It’s very popular for camera companies today to advertise megapixel count above all other factors. However, this is far from the most important factor in image quality. There are plenty of high-megapixel cameras today that I wouldn’t touch with a ten foot pole.
See the 41-megapixel Nokia Lumia 1020 smartphone, for example. It has a lot of megapixels, but megapixels aren’t what make image quality. Far, far more important is the camera’s sensor size – and smartphones universally have tiny camera sensors.
That said, a higher megapixel count will give you some additional detail, all else equal. It can be useful for sports and wildlife photographers who do heavy cropping, for example. However, few photographers will need (or make the most of) anything more than 24 megapixels. Worry about other areas of image quality long before you worry about this one.
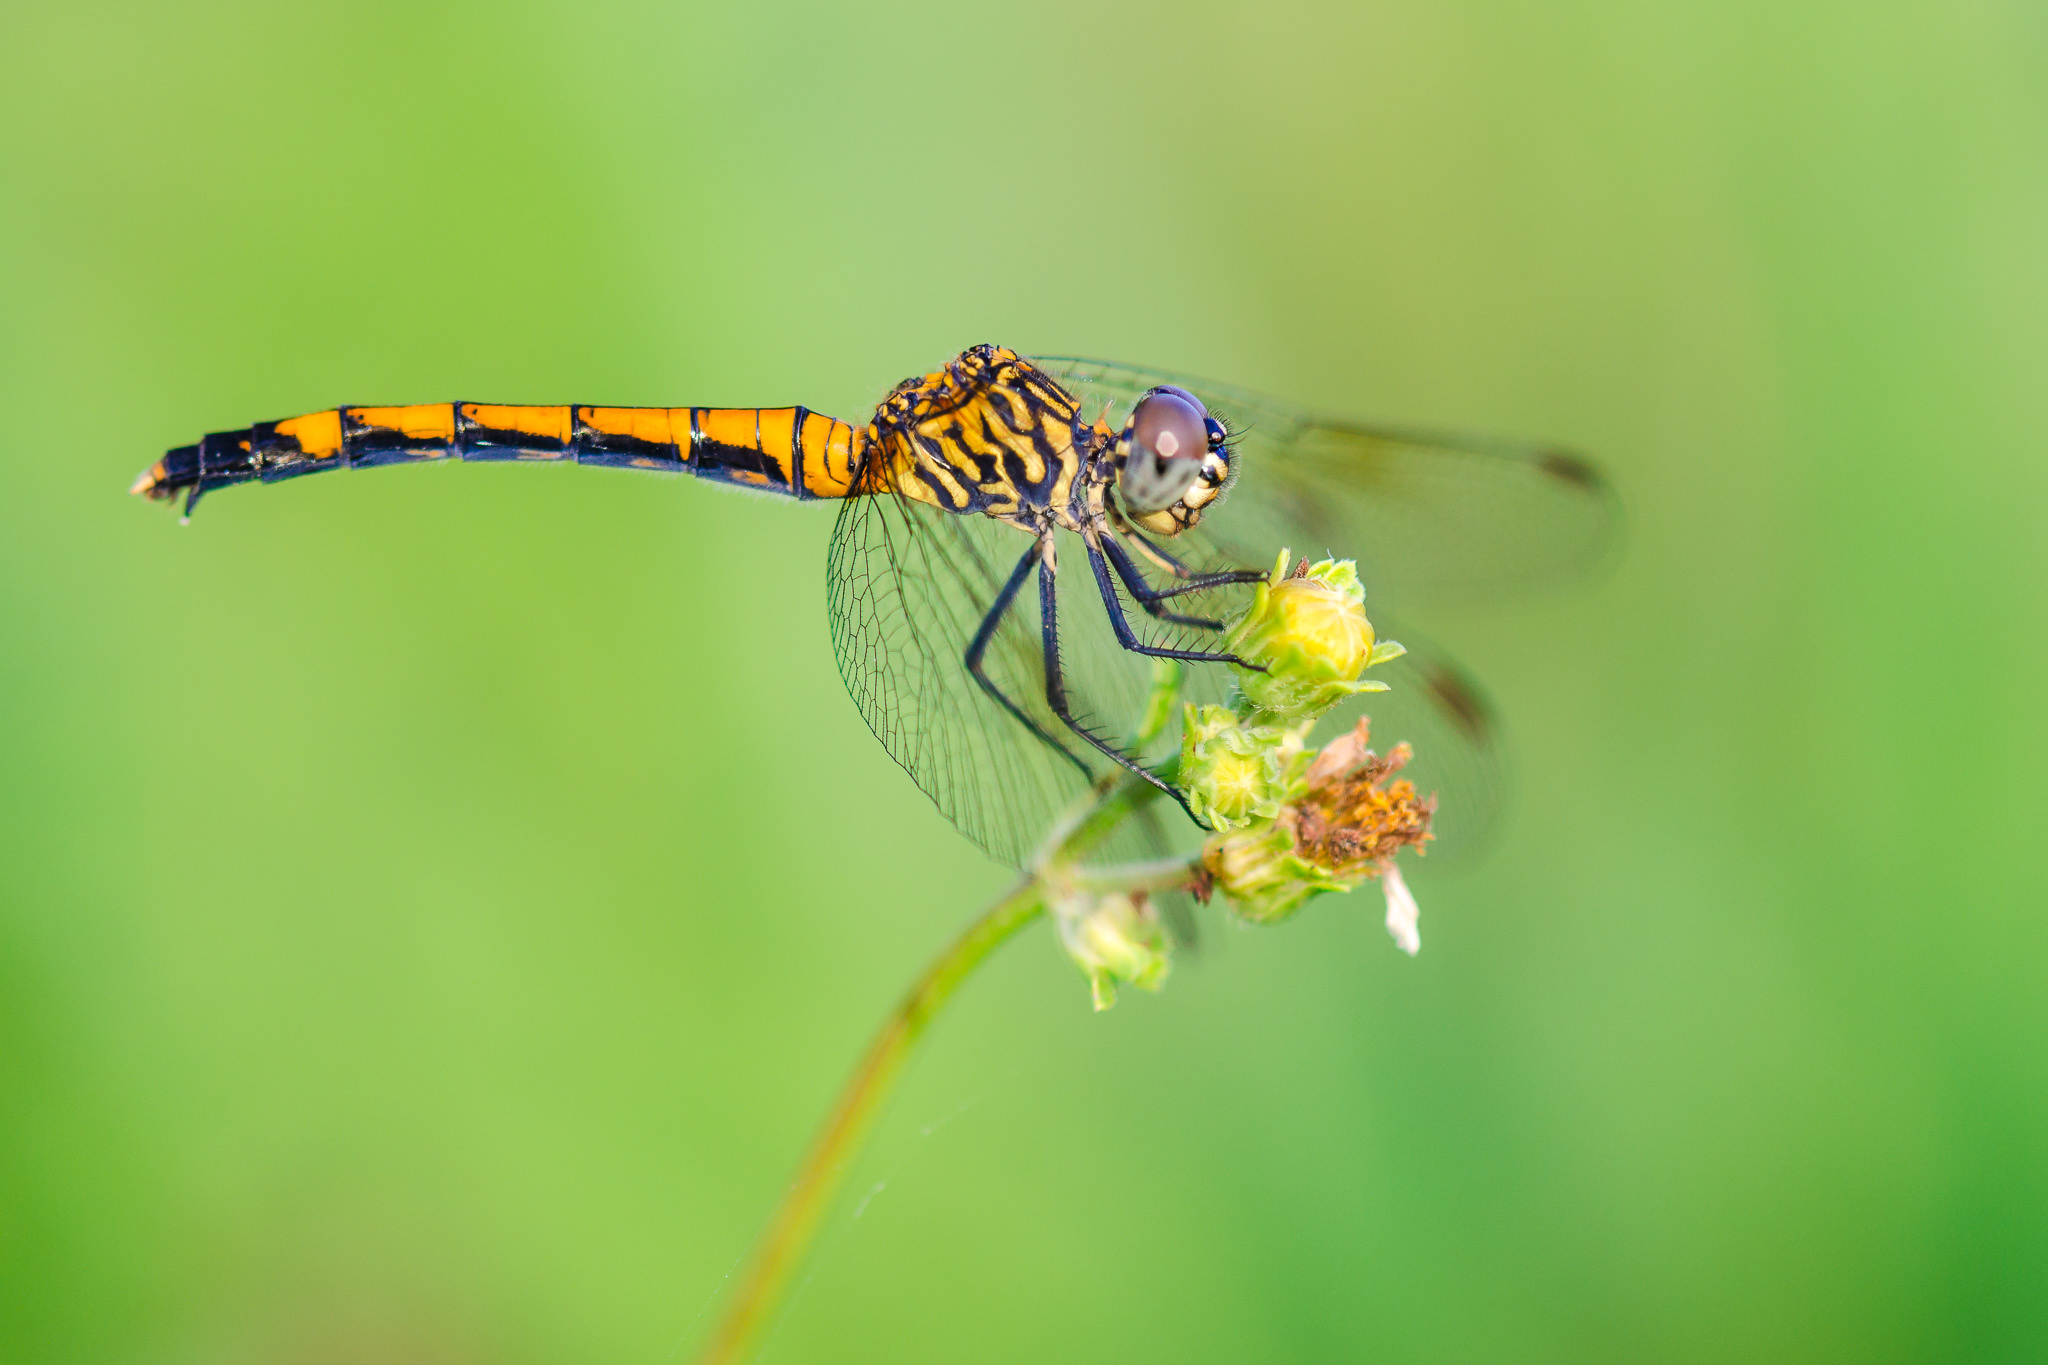
NIKON D800E + 105mm f/2.8 @ 105mm, ISO 100, 1/10, f/16.0
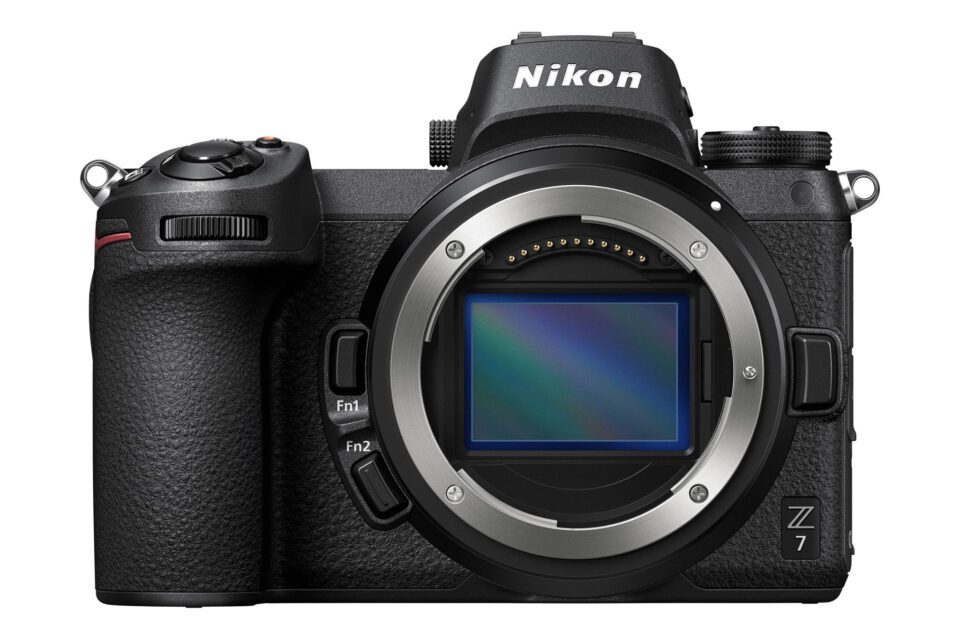
Mirrorless Camera
Technically, any camera without a mirror – including smartphones, point-and-shoots, and disposable film cameras – are mirrorless. But when photographers refer to mirrorless cameras, they are almost always talking about high-end cameras that allow you to change lenses. In other words, the DSLR’s biggest rival.
Mirrorless cameras are slowly becoming more and more popular among advanced photographers. The biggest reason is that they are almost always smaller and lighter than comparable DSLRs. However, mirrorless cameras also have other advantages, which vary from brand to brand. Some have better lenses, in-body image stabilization, or high-quality electronic viewfinders (compared to the optical viewfinders present in a DSLR, which also have plenty of fans).
That said, DSLRs have plenty of advantages of their own, including better battery life, generally faster autofocus tracking systems, and a longer legacy with more refined designs.
None of that really matters to photography. Fundamentally, a good camera is a good camera. Few people need the mirrorless advantages over a DSLR – and few people need the DSLR advantages over mirrorless. (You can read more at our article on DSLR vs mirrorless.)
Noise
Noise is essentially “visual randomness” – a grain of bright, dark, and discolored pixels that is especially prevalent in low light conditions.
The easiest way to see noise in your photos is to shoot with a high ISO like 6400 or higher. However, you will also see a lot of noise when you shoot an underexposed image at a low ISO (say, ISO 100) and then brighten the photo dramatically in post-processing.
Noise can be caused by many different sources. Some of them are related to the camera (i.e., you’ll see more noise when your camera sensor overheats), while some are due to the inherent randomness of light itself (called “photon noise”).
Bright/dark variations of noise are called luminance noise. Random colorations of pixels are called color noise.

It is fairly easy to reduce a photo’s noise in post-processing software. However, too much noise reduction can lead to dull colors and “plasticky” regions of a photo that look unnatural. This is true of both luminance and color noise reduction. Color noise reduction tends to work better, although a lot of photographers overdo it and end up with very flat colors. (For example, Lightroom’s default color noise reduction settings are way too high, for instance.)
The best solution is to minimize noise in-camera rather than in post-processing. However, in dark conditions – especially when shooting handheld, or photographing a moving subject – sometimes high noise is just a fact of life.
Overexposure
When your photo loses detail because it is too bright, it is said to be overexposed.
Overexposure doesn’t just mean your photo “looks too bright.” So long as you can darken the image in post-processing and maintain all your highlight details, the photo really isn’t overexposed. Instead, a photo is overexposed when it “blows out” highlight detail, like bright portions of a cloud. Overexposure = irrecoverable highlight loss.
Overexposure is a major problem; there is no way to get back highlight detail that has completely blown out to white. If you try, you’ll end up with discolored highlights, or – worst case – highlights that have no color at all, and are completely gray.

NIKON D800E + 20mm f/1.8 @ 20mm, ISO 100, 1/10, f/16.0
Because there is no post-processing fix for overexposure, your best bet is to expose the scene properly in-camera. One good tool for this is your camera’s “blinkies” option (generally found in your camera menu under the image review section).
When blinkies are turned on, you will want to review your photos and cycle through to the blinkies display. When you do, any overexposed areas in the image will blink between black and white to indicate blown highlights.
Photoshop
One of the most complex photo editing programs available – if not the single most complex – is Adobe Photoshop. With enough time and skill, you can do almost any photo edit you want in Photoshop – hence why “photoshopping” is a phrase so popular that non-photographers almost universally know of it already.

Indeed, Photoshop is arguably intended more for graphic design and digital art in general than photography specifically. And that works both ways. The huge number of editing options is great when you need to do some specialty edits, but a lot of photographers avoid Photoshop in favor of photo-specific software instead (including Adobe’s own Lightroom software).
Photoshop is largely based on the concept of layers, where you stack however many images you like on top of one another. You can then edit individual layers and change layers to be partly see-through as needed. This, for example, lets you place a photo of a person (top layer) in a landscape (bottom layer) almost seamlessly.
The details, of course, can get quite complicated. The good news is that there are almost endless Photoshop tutorials available today to help you learn anything new.
Prime Lens
Any lens that cannot zoom is called a prime lens. One example of a popular prime lens made by almost every lens manufacturer is a 50mm f/1.8.
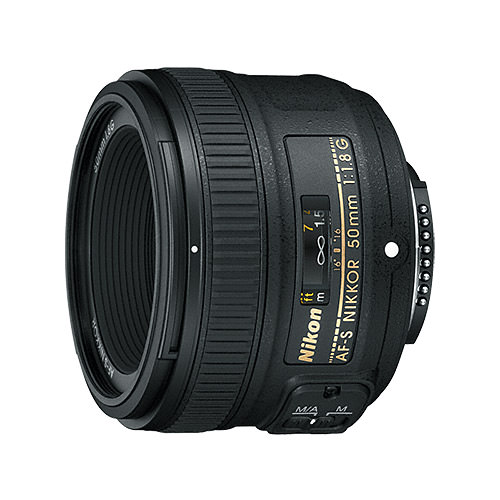
As useful as zoom can be, prime lenses have plenty of advantages of their own. The lack of zoom minimizes a lens’s complexity – which directly improves things like the lens’s size, weight, and often image quality.
Highly specialized lenses are often primes for this reason. For example, almost every macro lens today is a prime lens. The same is true of most supertelephotos (like the ones you’ll see press photographers use at major sporting events), and other exotic lenses like tilt-shift lenses and the like.
Prime lens shooters learn to use techniques like creating panoramas and cropping strategically – not to mention walking closer and farther back – to get the images they want. It can take a bit more time and effort, but I know a lot of photographers who prefer the prime route rather than zooms. Some even say it slows them down, helps them think more, and improves their work as a result.
RAW
Every advanced camera today lets you shoot RAW photos if you so choose. You should; the alternative is JPEG, and I’ve already explained in the “JPEG” entry above why that’s not a good idea.
RAW files are amazing because they contain all the imaging data from your camera sensor – meaning maximum image quality and post-processing flexibility. If you ever edit your photos, shoot RAW; even if you don’t edit your photos, at least shoot JPEG+RAW so that you have the higher quality version if you change your mind later. (For more, see our RAW vs JPEG article if you haven’t already.)

The two main downsides of RAW compared to JPEG are that RAW files take up more space, and they almost always require post-processing in order to look good. By default, RAW photos are very dull when you open them in most post-processing software (unless you’ve changed the software’s defaults extensively).
Technically, “RAW” itself is not a file type. There is no “.RAW” file from cameras today – only files like .CRW (Canon’s RAW), .NEF (Nikon’s RAW), and .DNG (Adobe’s open RAW format).
(As a side note, some photographers today push for the caps-lock “RAW” to be written lowercase as a result. Personally, I still write “RAW” rather than “raw” because it draws more attention, but you’re welcome to do as you like.)
The takeaway? Shoot in RAW. If you’re more comfortable with JPEGs right now, shoot RAW+JPEG and keep the RAWs somewhere safe for future use.
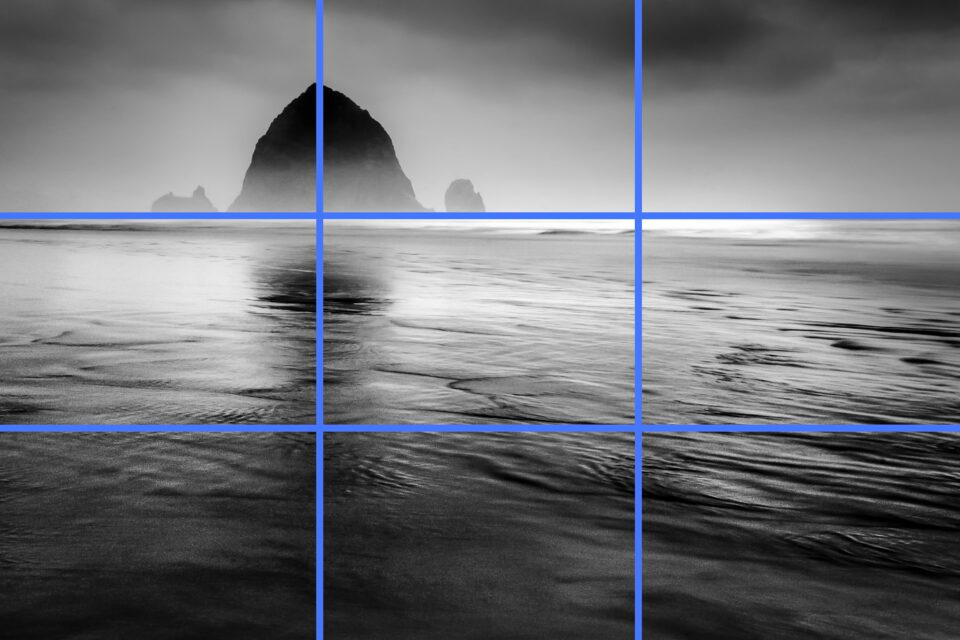
Rule of Thirds
The “rule of thirds” is a rule that says you should divide your photo into thirds (both horizontally and vertically) like a tic-tac-toe board. Then – according to this rule – place your main subject at one of the four intersection points, and place your horizon along the top or bottom third.

My personal thoughts on the rule of thirds are, to put it simply, not positive. I think that one of the most ridiculous things about photography is when people try to fence in a creative process like composition and simplify it into a cookie-cutter rule. Any value that the rule of thirds brings – say, teaching photographers about off-center composition – should, in my opinion, be taught some other way.
But that’s just how I see it, and certainly not everyone agrees. Clearly, as the most well-known composition rule out there, the rule of thirds is helpful to a lot of photographers. Some, I know, consider it to be a good default; others use it just as an occasional “guideline” to remind themselves of the value of off-center composition.
Wherever you fall, keep in mind that composition is one of the most personal, creative parts of photography. Don’t take any rule as gospel, or you could risk losing what makes your style unique.
Sensor Size
As the name implies, sensor size is simply the dimensions of your camera sensor. Some of the most common digital camera sensor sizes are below:
- Medium Format (Uncropped): 40.4 × 54 mm
- Medium Format (Cropped): 33 × 44 mm
- Full-Frame: 24 × 36 mm
- APS-C: 15.6 × 23.6 mm
- Micro Four Thirds: 13 × 17.3 mm
- One Inch: 8.8 × 13.2 mm
- 1/2.5”: 4.3 × 5.8 mm
More than perhaps any other factor of a camera, sensor size has a major effect on your image quality. It’s not enough that you should sacrifice on a good lens to get a larger sensor – but it’s an important factor nonetheless.
Sharpness
Photographers chase after sharpness unlike almost anything else in photography. In reality, sharpness does matter, but only to a point. If your photo is very blurry (and – goes without saying – that wasn’t your goal), you’ve clearly got a problem.
That’s how I recommend thinking about sharpness. Maximizing sharpness is great, no doubt, but the first step is clearing the “acceptable” sharpness bar every time. One of the most disappointing things you can do is capture an otherwise-incredible photo that isn’t sharp enough for anything but a tiny print.
To maximize sharpness, the best thing you can do is look for sources of blur and minimize them. The most common sources of blur are missed focus, lack of depth of field, and motion blur (either from handholding or from a fast-moving subject). We have a very detailed article on taking sharp photos, which is a good place to start.
One final thing to note about sharpness is that a lot of post-processing software has a “sharpening” slider that may catch your eye. To a degree, it does what it says – improving low-level contrast in an image and making it appear sharper. I almost always sharpen my images in post-processing. However, it is extremely easy to oversharpen using this setting and end up with weird, crunchy detail that just doesn’t look natural. Sharpen your photos, sure, but do so in moderation.
Shutter Speed
And now we come to shutter speed, arguably the second most important setting in photography (only behind aperture). I’ve mentioned it in numerous other terms throughout this article as a result.
Shutter speed is the amount of time your camera spends taking a picture. This is usually measured in fractions of a second, like 1/100 or 1/4000. However, you may sometimes shoot with longer shutter speeds that are several seconds – or even several minutes – long.
What effects does shutter speed have? The two important ones are exposure and motion blur.
Starting with exposure – the longer your camera spends taking a photo, naturally, the more light it captures. This leads to brighter and brighter images. When your shutter speed is several seconds long, you will capture a very bright – possibly overexposed – photo, unless the scene itself is quite dark. (For example, with Milky Way photography, my default shutter speed is about 20 seconds.)
The other major effect is motion blur. The faster your shutter speed, the more you freeze any movement in an image. If you are photographing sports, you’ll often want to be at 1/500, 1/1000, or even faster. Otherwise, your subject will be too blurry.
By the same token, it’s impossible to handhold sharp photos if your shutter speed is too long. Keep it to a maximum of 1/100 second if you’re handholding, unless you’ve tested with your particular lens and know you can go longer. (Wide-angle lenses and image stabilization allow you to shoot longer than that in many cases.)
Subject
It shouldn’t be a surprise that your subject in photography is simply the object that you are photographing. However, the importance of your subject cannot be overstated.
Personally, I always pay attention to the primary subject in an image. This is the part of the photo that my viewer will notice first. I always give the primary subject enough “breathing room” and avoid crossing it with less important objects whenever possible.

Your subject is important because of the emotions it conveys. Think, in the simplest example, of a person smiling versus frowning. That simple difference alone shapes the mood of the entire photo, and both situations are likely to demand very different decisions on your part – lighting, composition, post-processing, and more.
The subject is the core of your photo, and of your emotional message. Don’t just point your camera at something interesting. Ask yourself why it’s interesting, how to accentuate the most interesting points, and how to direct your viewer’s eye to it with your composition.
Time Lapse
A popular technique today that combines photo and video techniques is time lapse photography. Specifically, a time lapse is a series of photos taken immediately after one another, generally without changing any camera settings or moving the camera drastically. The goal is to capture the movement of a scene as time passes.
Time lapses are especially popular for landscape videographers. However, they are also useful as a still photography technique. Sometimes, I will put my backup camera on a tripod and shoot a time lapse while I’m busy taking regular photos with my main camera. Nasim especially loves this technique and uses it a lot in the field for landscape photography.
However, as useful as this method is for stills, videographers are the real time lapse shooters. Rather than picking a single “best light” frame from the series, they’ll just merge the whole thing into a 5 or 10 second video that drastically speeds up any movement in the scene. That’s why it’s called time lapse; you show how a landscape or other subject looks as time elapses.
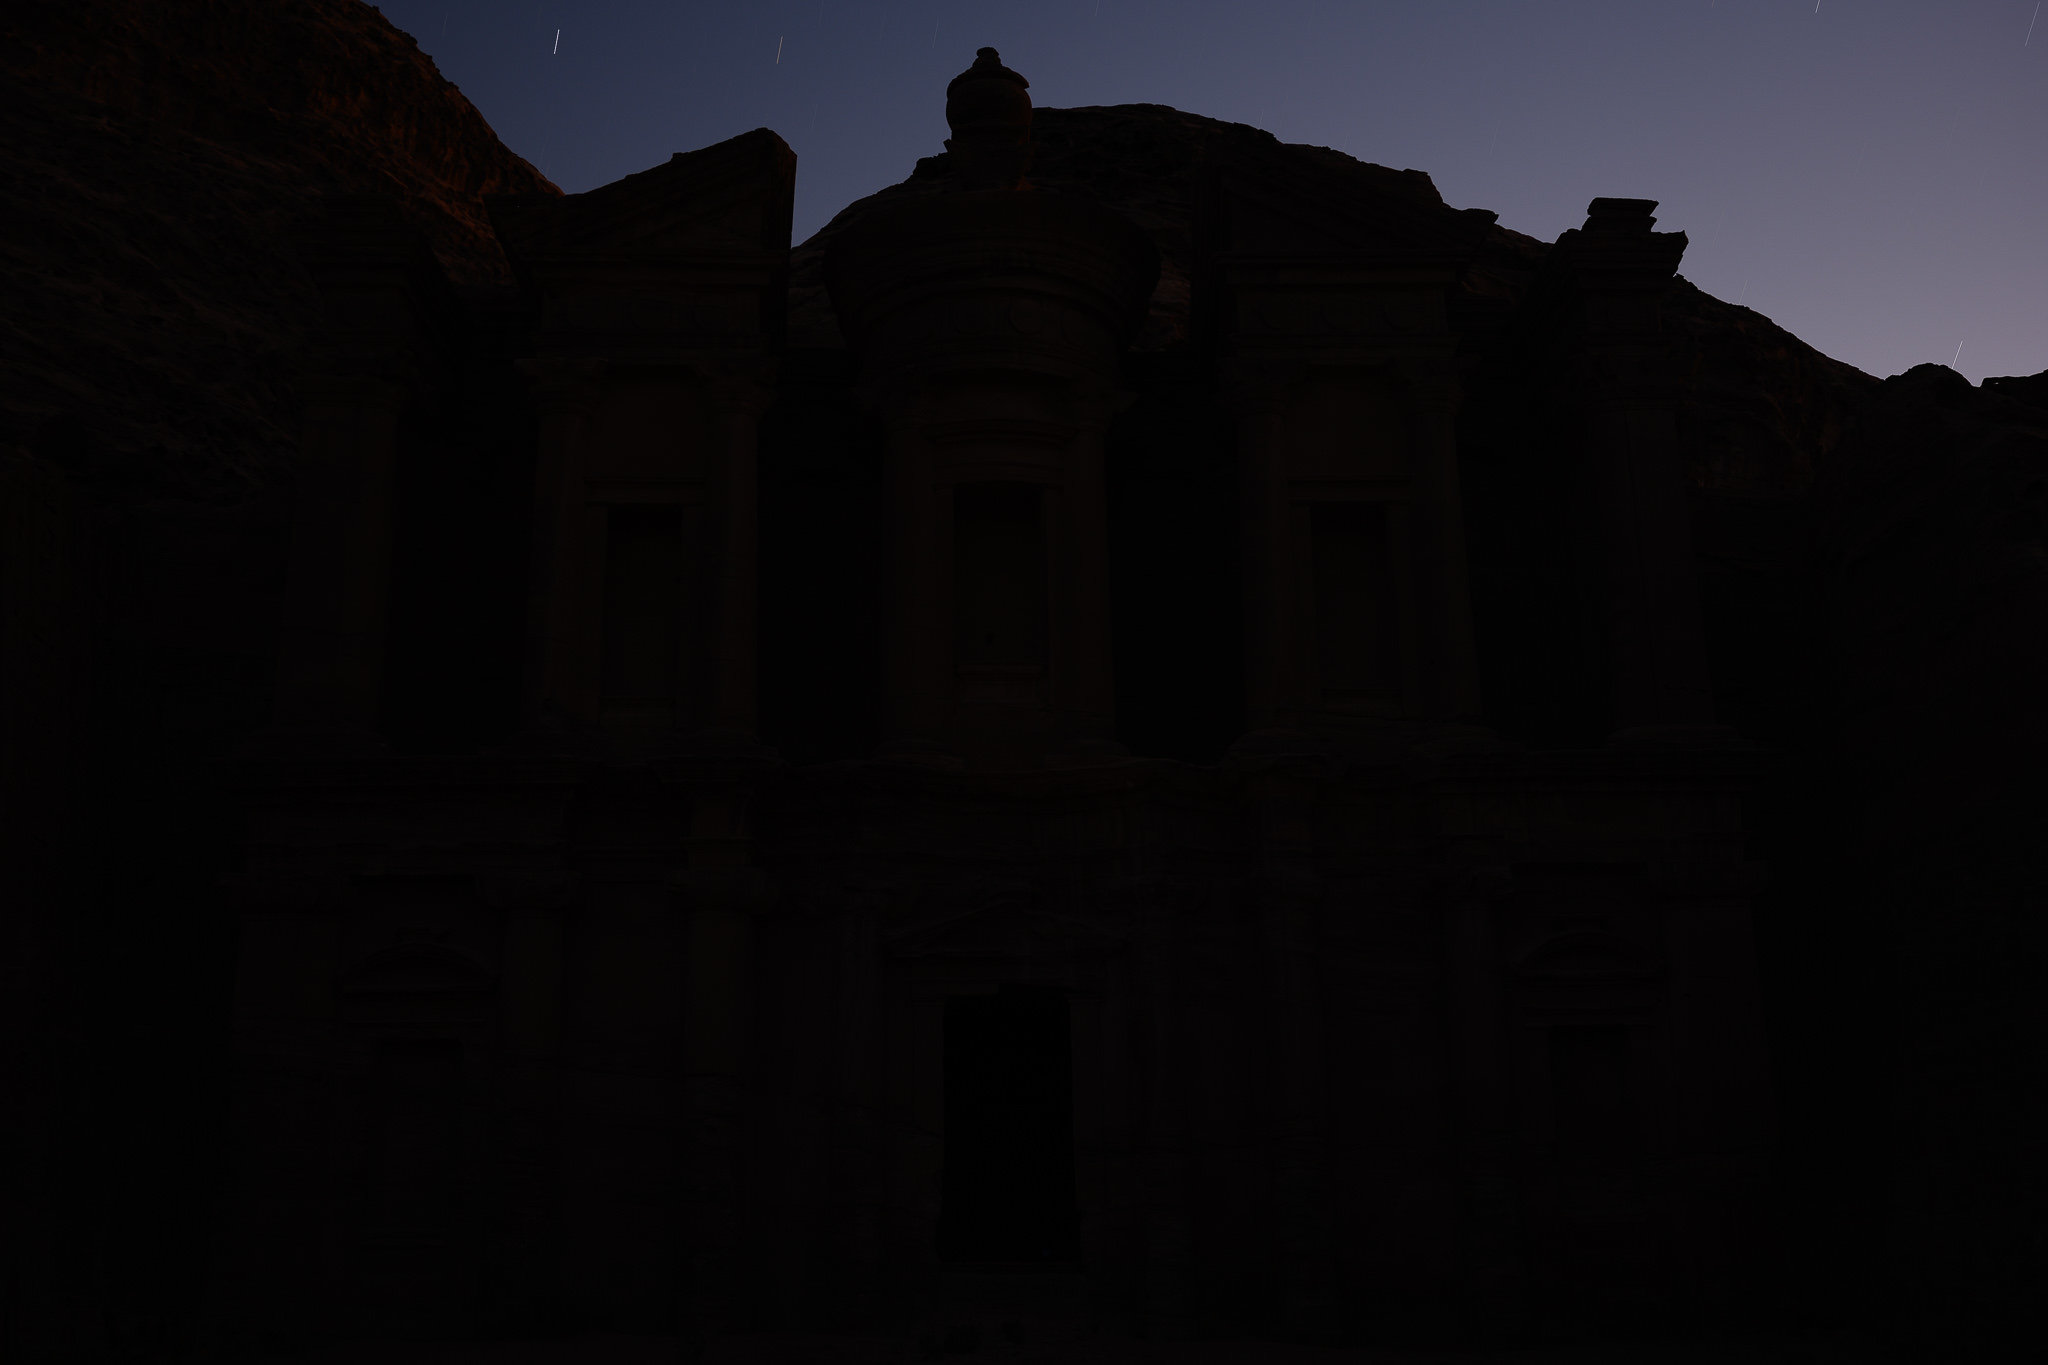
Underexposure
The opposite of overexposure is underexposure. This is when your photo is too dark – often so dark that you need to do extensive shadow recovery to make your image look right.
Unlike overexposure, it is generally possible to brighten dark shadows and recover some usable information. This is true even when the shadows look pitch black out of camera. However, recovering dark shadows inevitably emphasizes noise in the shadow regions as well, harming your image quality.
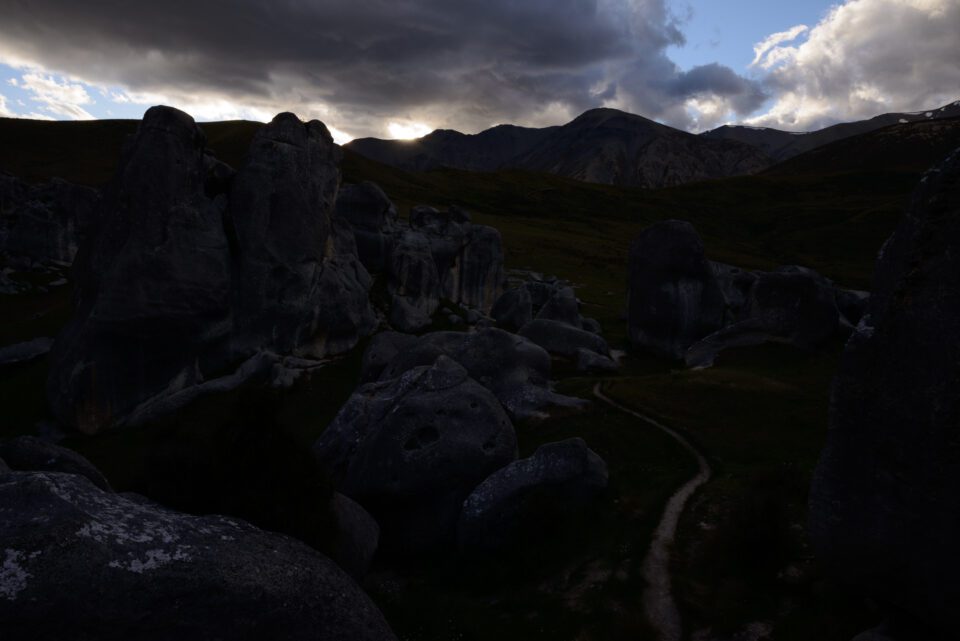
NIKON D800E + 20mm f/1.8 @ 20mm, ISO 100, 1/40, f/16.0
Technically, the best exposure for any RAW photo is the one that is as bright as possible without overexposing important highlights whatsoever. This implies that a bright-looking photo can actually be slightly underexposed, if you could have taken it even brighter without losing the highlights. (This principle is known as Exposing to the Right.)
For most photographers’ purposes, though, that’s not important. The important thing is just to avoid extreme underexposure. If you need to recover massive amounts of shadow detail without good reason, you’re just not capturing the best possible image quality.
Viewfinder
The viewfinder is the “window” on your camera that you can look through to see a representation of the image you’re about to take. Not every advanced camera has a viewfinder, but most do (and all DSLRs do).
In a DSLR, the viewfinder is optical – meaning that the DSLR’s mirror directs light through a prism or mirror system, and you’re looking directly through the lens when you look into the viewfinder.
On most mirrorless cameras, the viewfinder is electronic – simply a small LCD screen feeding data directly from your camera sensor.
Neither optical nor electronic viewfinders are necessarily better than the other. Optical looks more like actually seeing the scene with your eyes, and it takes up much less battery. But electronic can be useful because it gives a more accurate preview of how the image will ultimately look. Photographers have different preferences on this issue, as you would expect.
My one recommendation is to get a camera with a viewfinder – either type – if you can. Not all photographers find them useful, but most will. That’s especially true in bright conditions, or when shooting handheld.
Vignetting
One optical problem that all lenses have to some degree is called vignetting. This is nothing more than a darkening of the corners; on many lenses, you won’t even notice unless you’re photographing a plain gradient (such as the blue sky).
However, some lenses have extremely high levels of vignetting, and it absolutely can interfere with the quality of your photos. Vignetting is easy to correct in post-processing, but extreme corrections will reveal a lot of noise in the corners of your image – a side effect that may not be easy to fix.
NIKON Z 7 + NIKKOR Z 24-70mm f/4 S @ 24mm, ISO 1600, 15 seconds, f/4.0
Vignetting is almost always worse at large apertures like f/1.4, f/2, and f/2.8. However, sometimes you will exaggerate the effects of vignetting by putting a filter on your lens, and you can end up with very dark corners that need to be cropped out even at small apertures like f/8 and f/11.
At the end of the day, vignetting is not something to worry about too much. Some photographers even add it intentionally in post-processing to get a more intense effect. But if you have vignetting in your photos where it doesn’t belong, it can distract viewers and make your photos look lower in quality.
Visualization
One of the most important, overlooked steps in photography is visualization. This is a “planning” step in the field before you actually take a photo. Specifically, visualization is the act of picturing, in your mind’s eye, the best possible final version of the photo you’re taking.
This includes a lot of thinking and conscious decision making in the field. Is the final version of your photo going to be in color or black and white? What emotions will it have? And how can you get there?
If you’re struggling with visualization, start asking yourself questions and analyzing every decision you make in the field. Why are you composing the photo this way and not some other? Is your current focal length the best possible focal length for the message you want to convey? Are you shooting at the optimal time of day, or does the best possible version of your photo actually require different light?
I find that visualization is the critical step that separates almost-great photos from one-in-a-million shots. Think! Photography rewards creativity and problem solving more than shooting the “default” image of a scene.
NIKON D7000 + 24mm f/1.4 @ 24mm, ISO 800, 1/30, f/1.4
Zoom Lens
The alternative to a prime lens (see “prime lens” above) is a zoom. Zoom lenses cover multiple focal lengths, a valuable feature for many photographers.
Indeed, the most popular lenses on the market are “kit” zooms that are included with most cameras, like 18-55mm or 24-105mm lenses. Personally, as much as I love primes, I tend to recommend most photographers start with a zoom in order to better figure out their personal style. (For many, I recommend sticking with a zoom permanently.)
The power of a zoom is measured by its zoom ratio – the longest focal length divided by the shortest. For example, a 24-120mm zoom is exactly a 5× zoom (because 120 divided by 24 = 5.)
You will often see point-and-shoot cameras advertised as “5× zoom” or similar. This specification tells you some useful information, but it’s not everything you need to know. For example, along with the 24-120mm I just mentioned (which is wide-to-telephoto zoom), an 80-400mm lens (telephoto-to-supertelephoto) is also a 5× zoom. But it’s meant for a totally different purpose – distant wildlife/sports rather than everyday usage.
Conclusion – Photography Terms
Hopefully you found this article Photography Terms and the definitions above to be useful! Before wrapping things up, I do want to make it clear that this is not a full dictionary of every photography term you should know. There are plenty of others that I had to skip, especially some more advanced terminology; I’m already nearing the 10,000 word mark and didn’t want to push things too far!
That said, the terminology above is an awesome place to start, or to use as a refresher if you want to remind yourself what some specific words mean in photography.
And as I mentioned in the introduction to this article, we plan to add terms to this glossary over time. So if there is anything you would like me to define, please let me know in the comments section below! Same goes if you have any questions or feedback about these terms and their definitions.

