


“Bokeh” is a term to describe the quality of out-of-focus areas in a photograph, both in the foreground and background. Although some aspects of bokeh are subjective, everyone seems to like creamy, smooth bokeh, whereas the infamous “onion rings” are unwanted in photos and probably better left as a food.

Naturally, photographers want the best bokeh possible. In a general sense, that means out-of-focus areas that are smooth rather than roughly textured, and not attracting undue attention with unusual shapes. Today I’ll cover some of the things that can improve bokeh in your photos, from choosing the right lens to even using software corrections.
1. Choose the Right Lens
Sometimes you can buy your way to fame, and that’s certainly true with getting better bokeh. Let’s say I want a prime in the classic portrait focal length of 85mm. Checking on B&H Photo, I find 21 of them just in Sony E mount, with eight of them having a maximum aperture of f/1.4! However, if you bought all of them, you’d find that not all of them produce the same quality of bokeh. Why is this so?
Pretty much every optical feature of a lens – from aperture blades to special elements – affects bokeh. For example, let’s take a look at how aperture blades can affect specular highlights, which is just one aspect of bokeh:
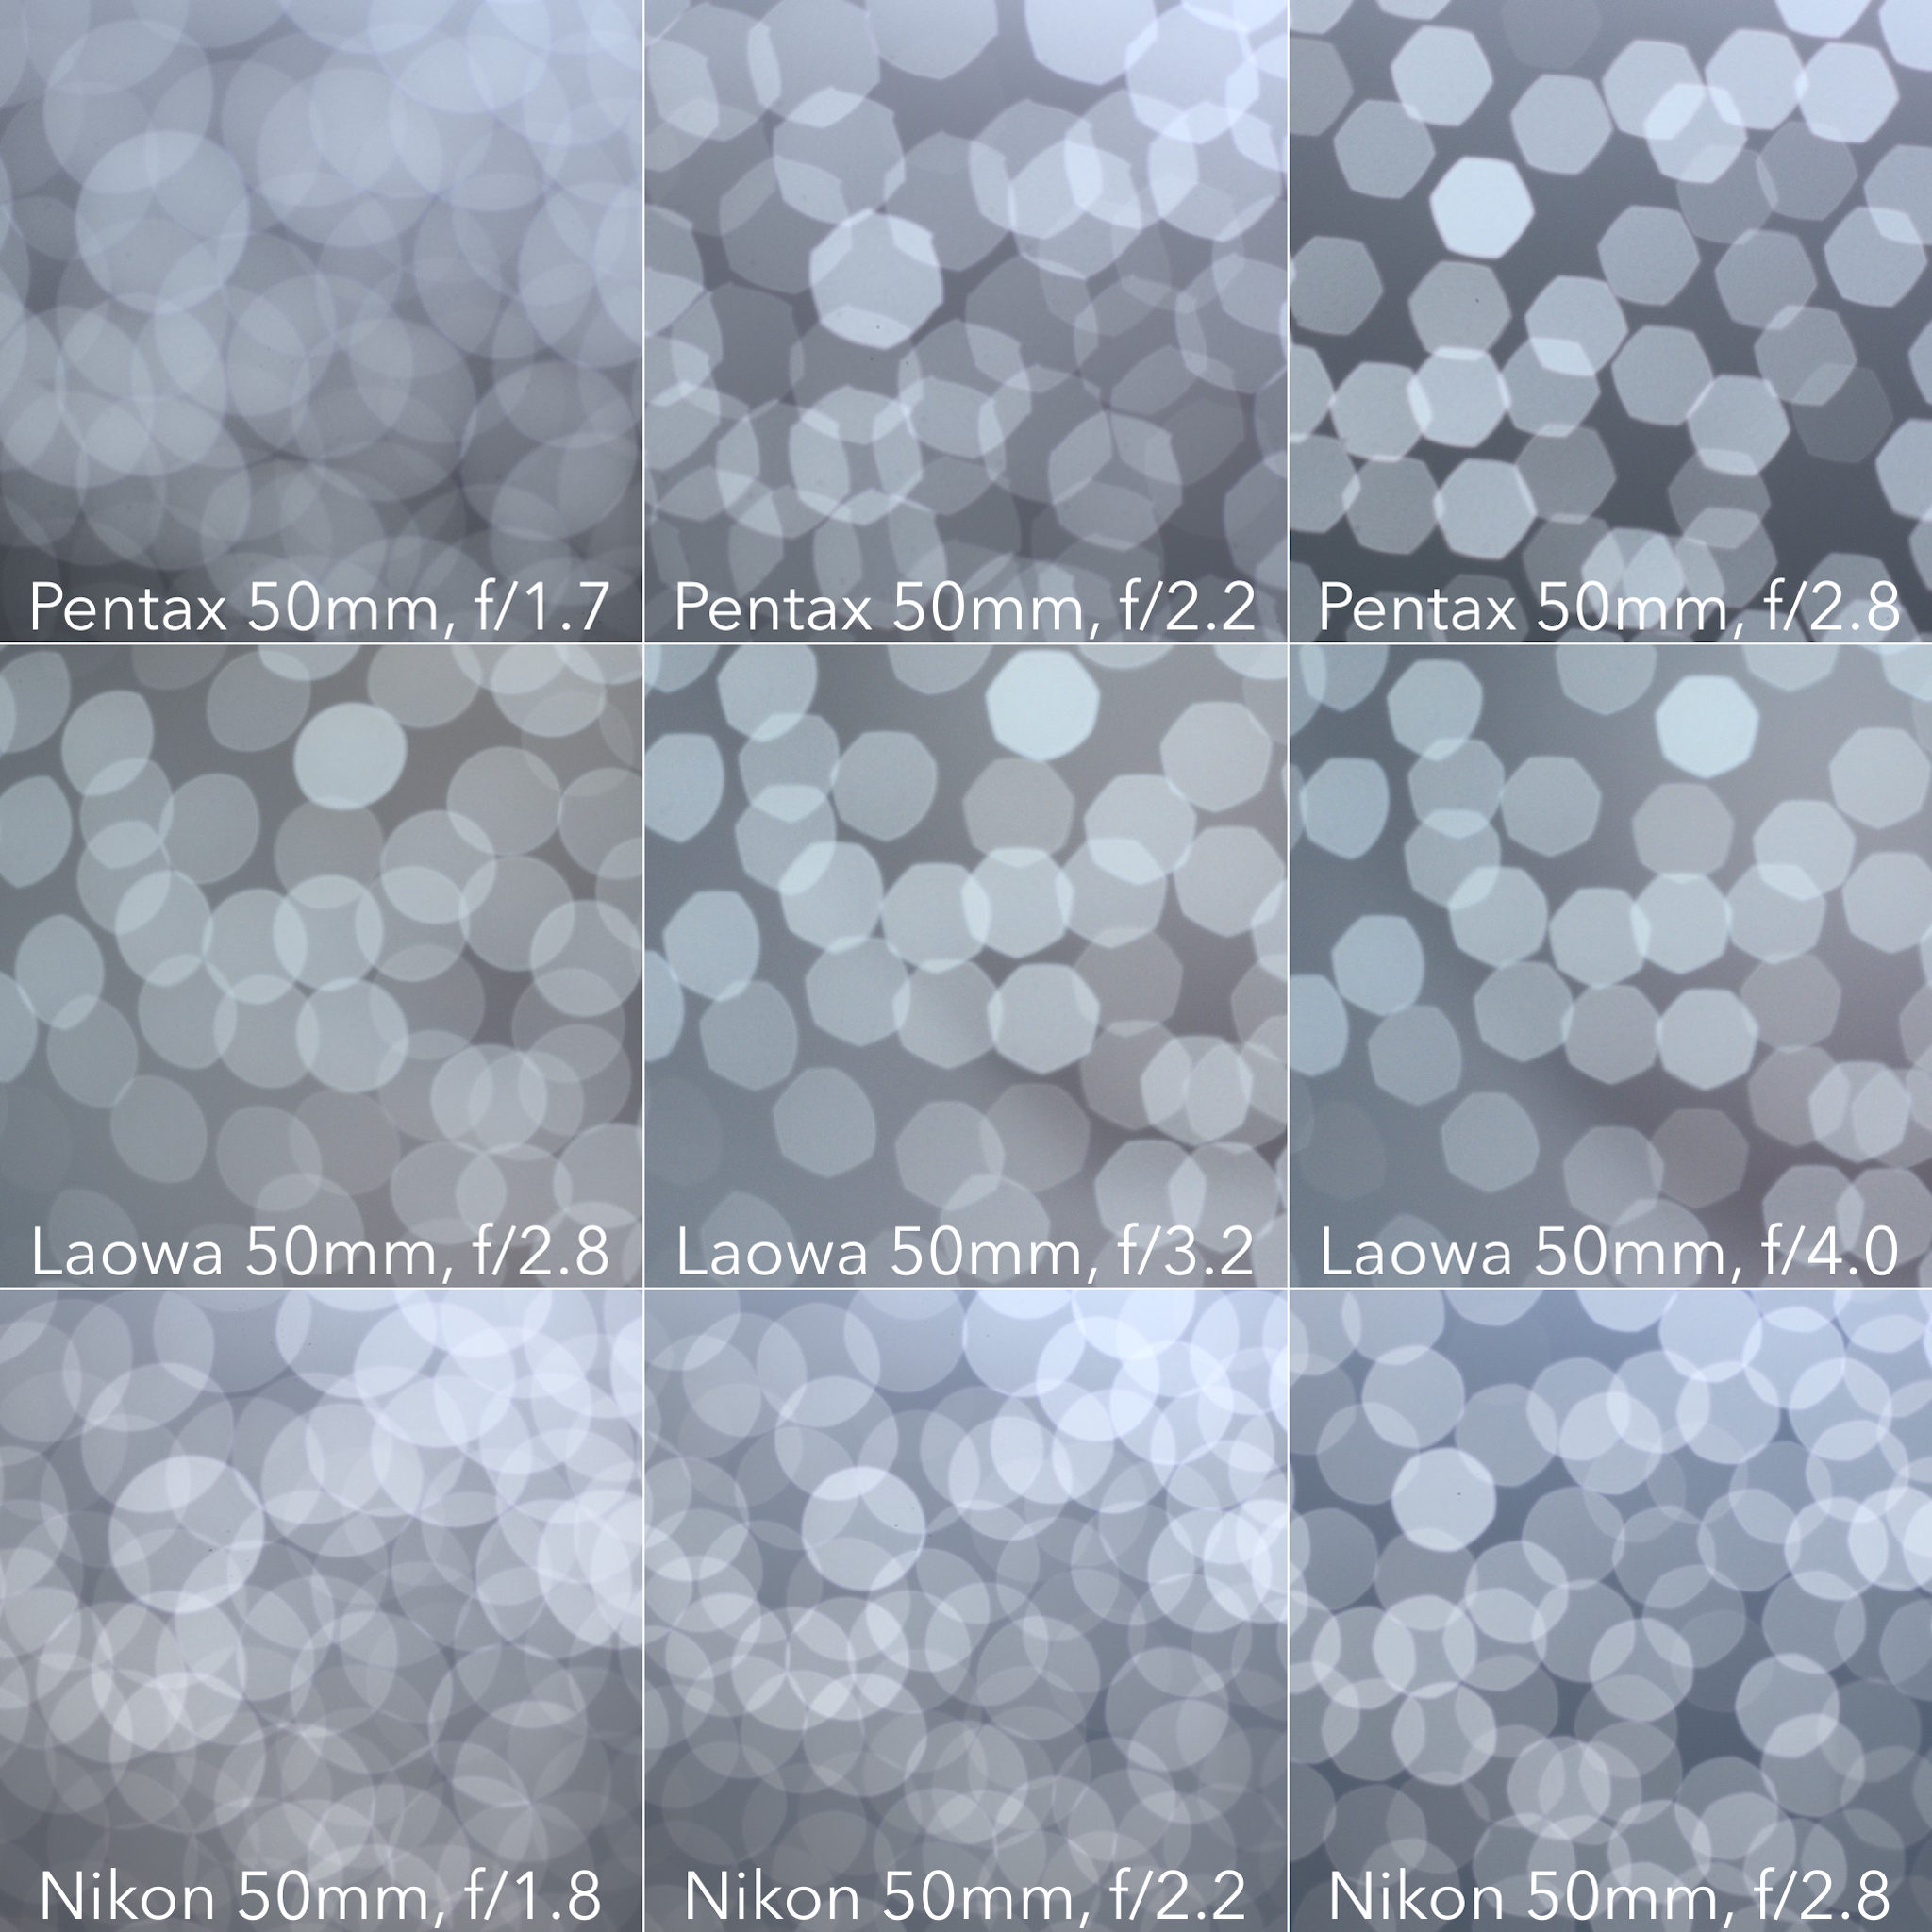
As you can see, the shapes start out large and circular when you’re shooting with your aperture wide open. They shrink and become more jagged as you stop down. However, all three lenses also have very different shapes in the background.
Why are these shapes so different? The answer is that out-of-focus highlights in an image take on the shape of your lens’s aperture blades.
For instance, the top row is the Pentax A 50mm f/1.7 lens. It has six aperture blades, which make the balls turn into hexagons when the lens is stopped down. On this lens, the aperture blades form almost a perfect hexagon when stopped down, giving the background blur sharp protrusions that are especially aggressive.
Such designs are prevalent on older, manual focus lenses. This is important to keep in mind because these lenses have made a bit of a comeback since the rise of lens adapters and mirrorless cameras.
Anyway, moving down to the middle row taken by the more modern Laowa 50mm f/2.8 2X macro, you can see that the aperture blades are better behaved here and never produce the shuriken bokeh of the Pentax. This lens has seven blades rather than six, producing heptagons that are a bit closer to circles.
Finally, we come to the bottom row produced by the Nikon 50mm f/1.8G lens. Unlike the other two lenses, the bokeh balls remain fairly circular even when the lens is stopped down to f/2.8.
Is that because of many more aperture blades? No. In fact, the Nikon still has seven blades like the Laowa. The difference is that they are rounded in the Nikon.
While distinct hexagons may be chic in some circles, if you want rounder bokeh balls, aim for rounded aperture blades. Generally, good modern portrait lenses have many rounded aperture blades, such as the Sony FE 85mm f/1.4, which has 11!

Is the number of blades and their roundedness the only thing to look for in a lens? Not exactly. Unfortunately, lenses can have a variety of other problems like chromatic aberration, coma, and distortion, all of which can affect bokeh.
2. Choose the Right Apertures
You already saw that you can change the bokeh in a photo by changing the aperture. You also saw that if a lens is shot wide open, specular highlights are often a lot rounder than when you stop down.
Does that mean you should always shoot wide open to get the best bokeh? Not necessarily. Sometimes, lenses produce deformed bokeh circles near the edge of the frame with wider apertures. For example, check out this comparison between a wide open shot at f/1.8 and one at f/2.2 using the Nikon 50mm f/1.8G:

Wide open at f/1.8, you can see that the bokeh balls look sort of like the pupil of a cat’s eye. I don’t mind a bit of cat’s-eye bokeh, but I know it annoys some people. Stopping down slightly to f/2.2 almost entirely removes this effect on the 50mm f/1.8G. So, if your lens has rounded aperture blades, you’ll often get better circles by stopping down a little.
3. Avoid Specular Highlights
With a lens designed to produce pleasing bokeh, your out-of-focus specular highlights can be an attractive part of your photo. However, some lenses don’t do well with very strong specular highlights. This is especially true of lenses outside the portrait range, where such a feature is not as in demand, or with lenses that use unusual elements like fresnel lenses. For example, the following image is a worst case scenario for the Nikon 500mm f/5.6 PF:

If you take a look at a tight crop of the foreground…

…You’ll see that the bokeh is pretty horrible. It isn’t even limited just to the specular highlights; even the general area has a harsh, nervous texture. This sort of odd bokeh is partly due to the fresnel element of the 500mm f/5.6 PF lens, which behaves poorly with sparkly surfaces like glistening snow.
That being said, this shot was actually hard to find in my photo library because it doesn’t happen often. Actually, in most cases, this lens does not present problems with generating decent bokeh. The point is to know the situations which are especially troublesome for your lens.
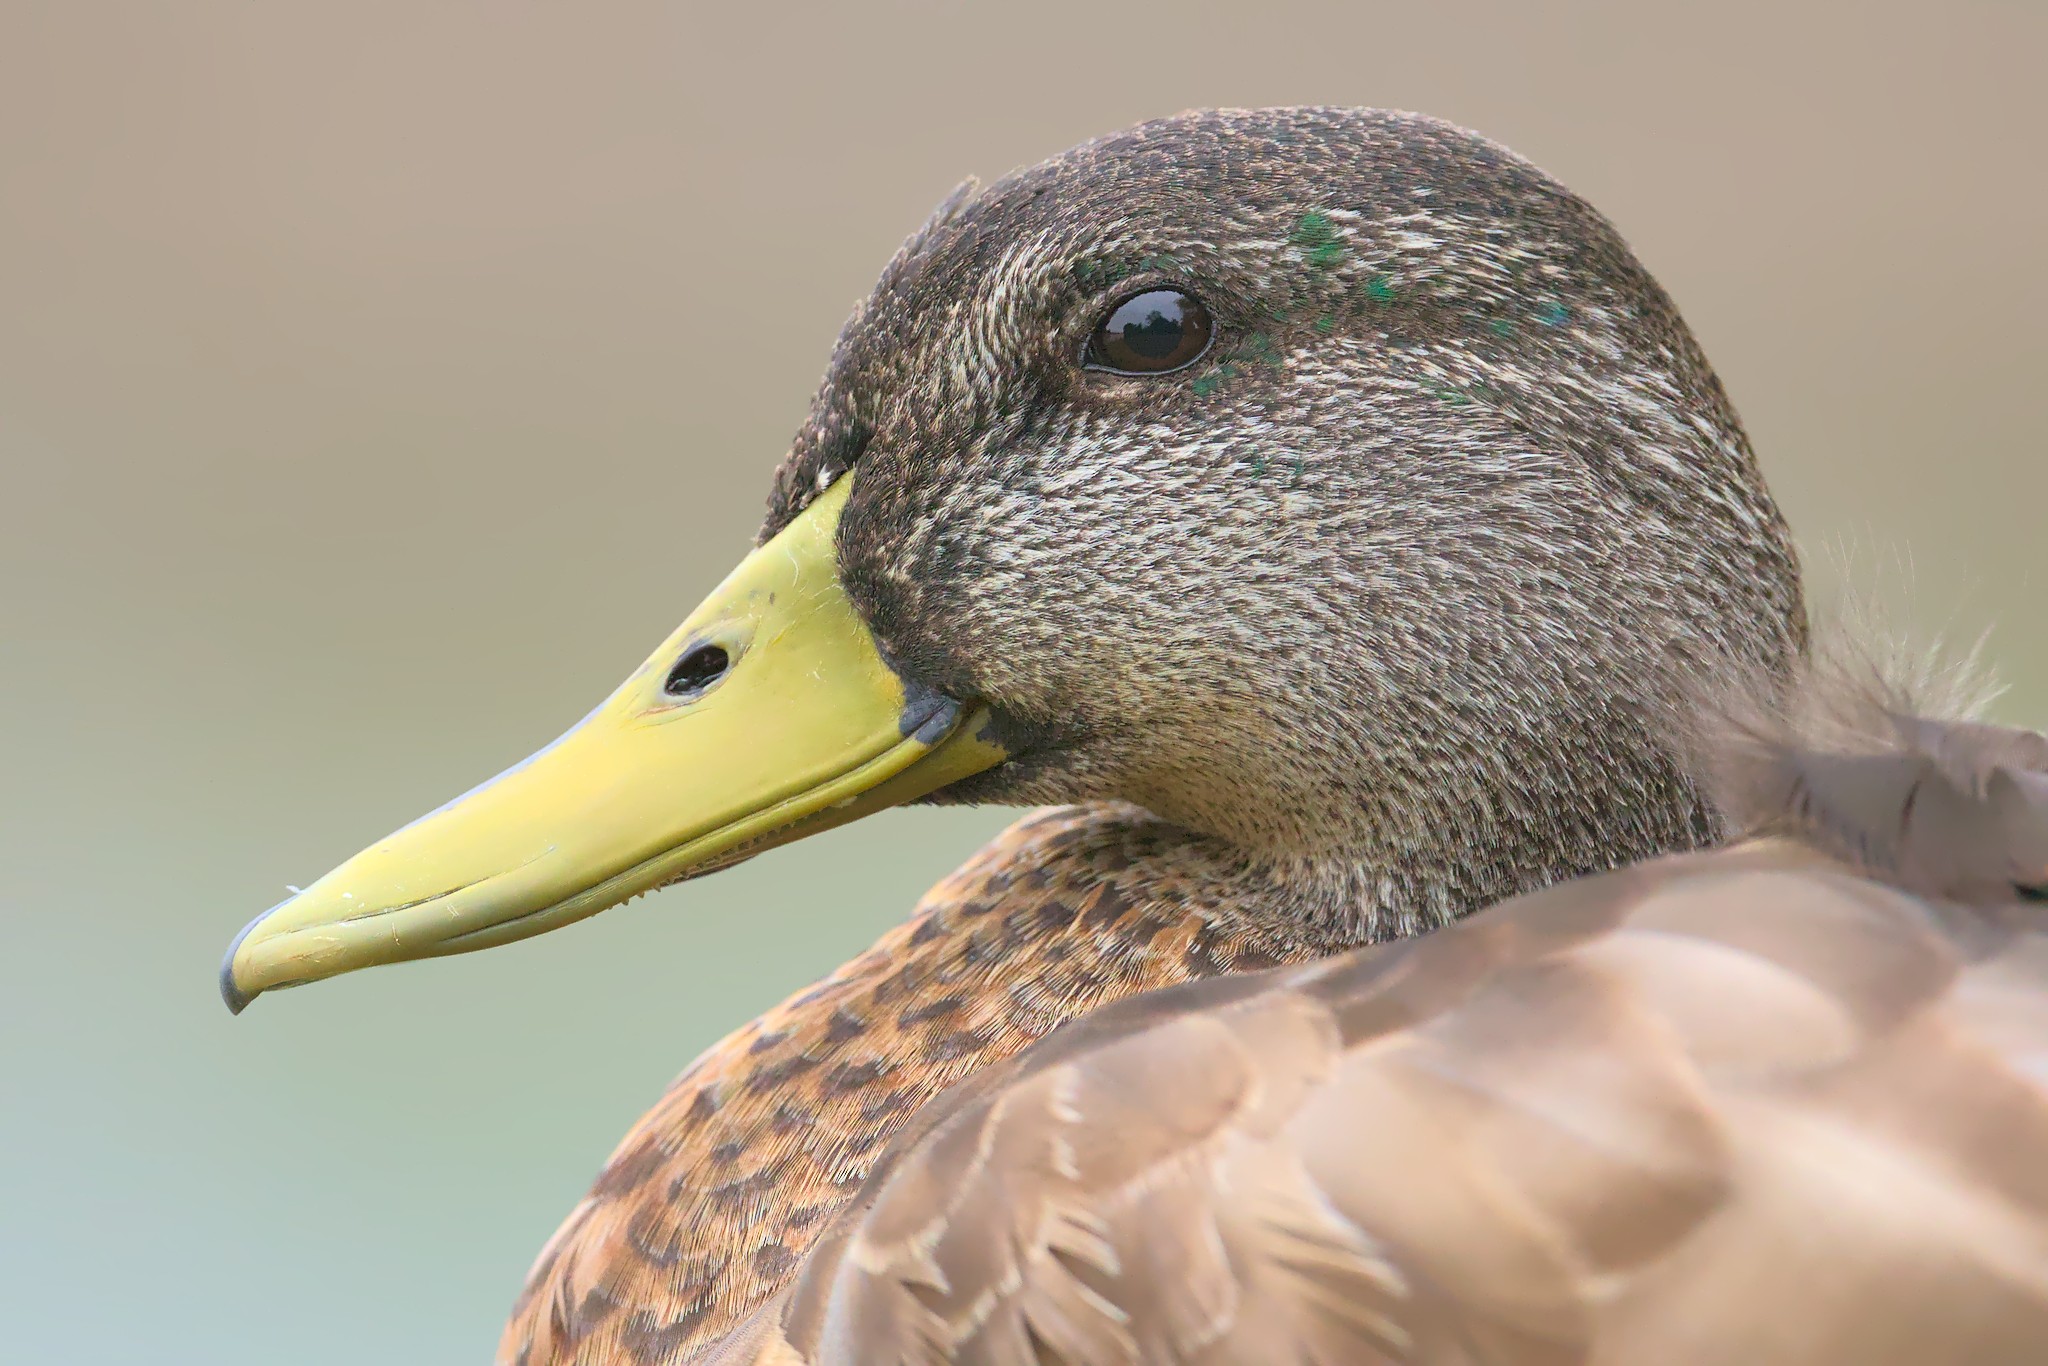
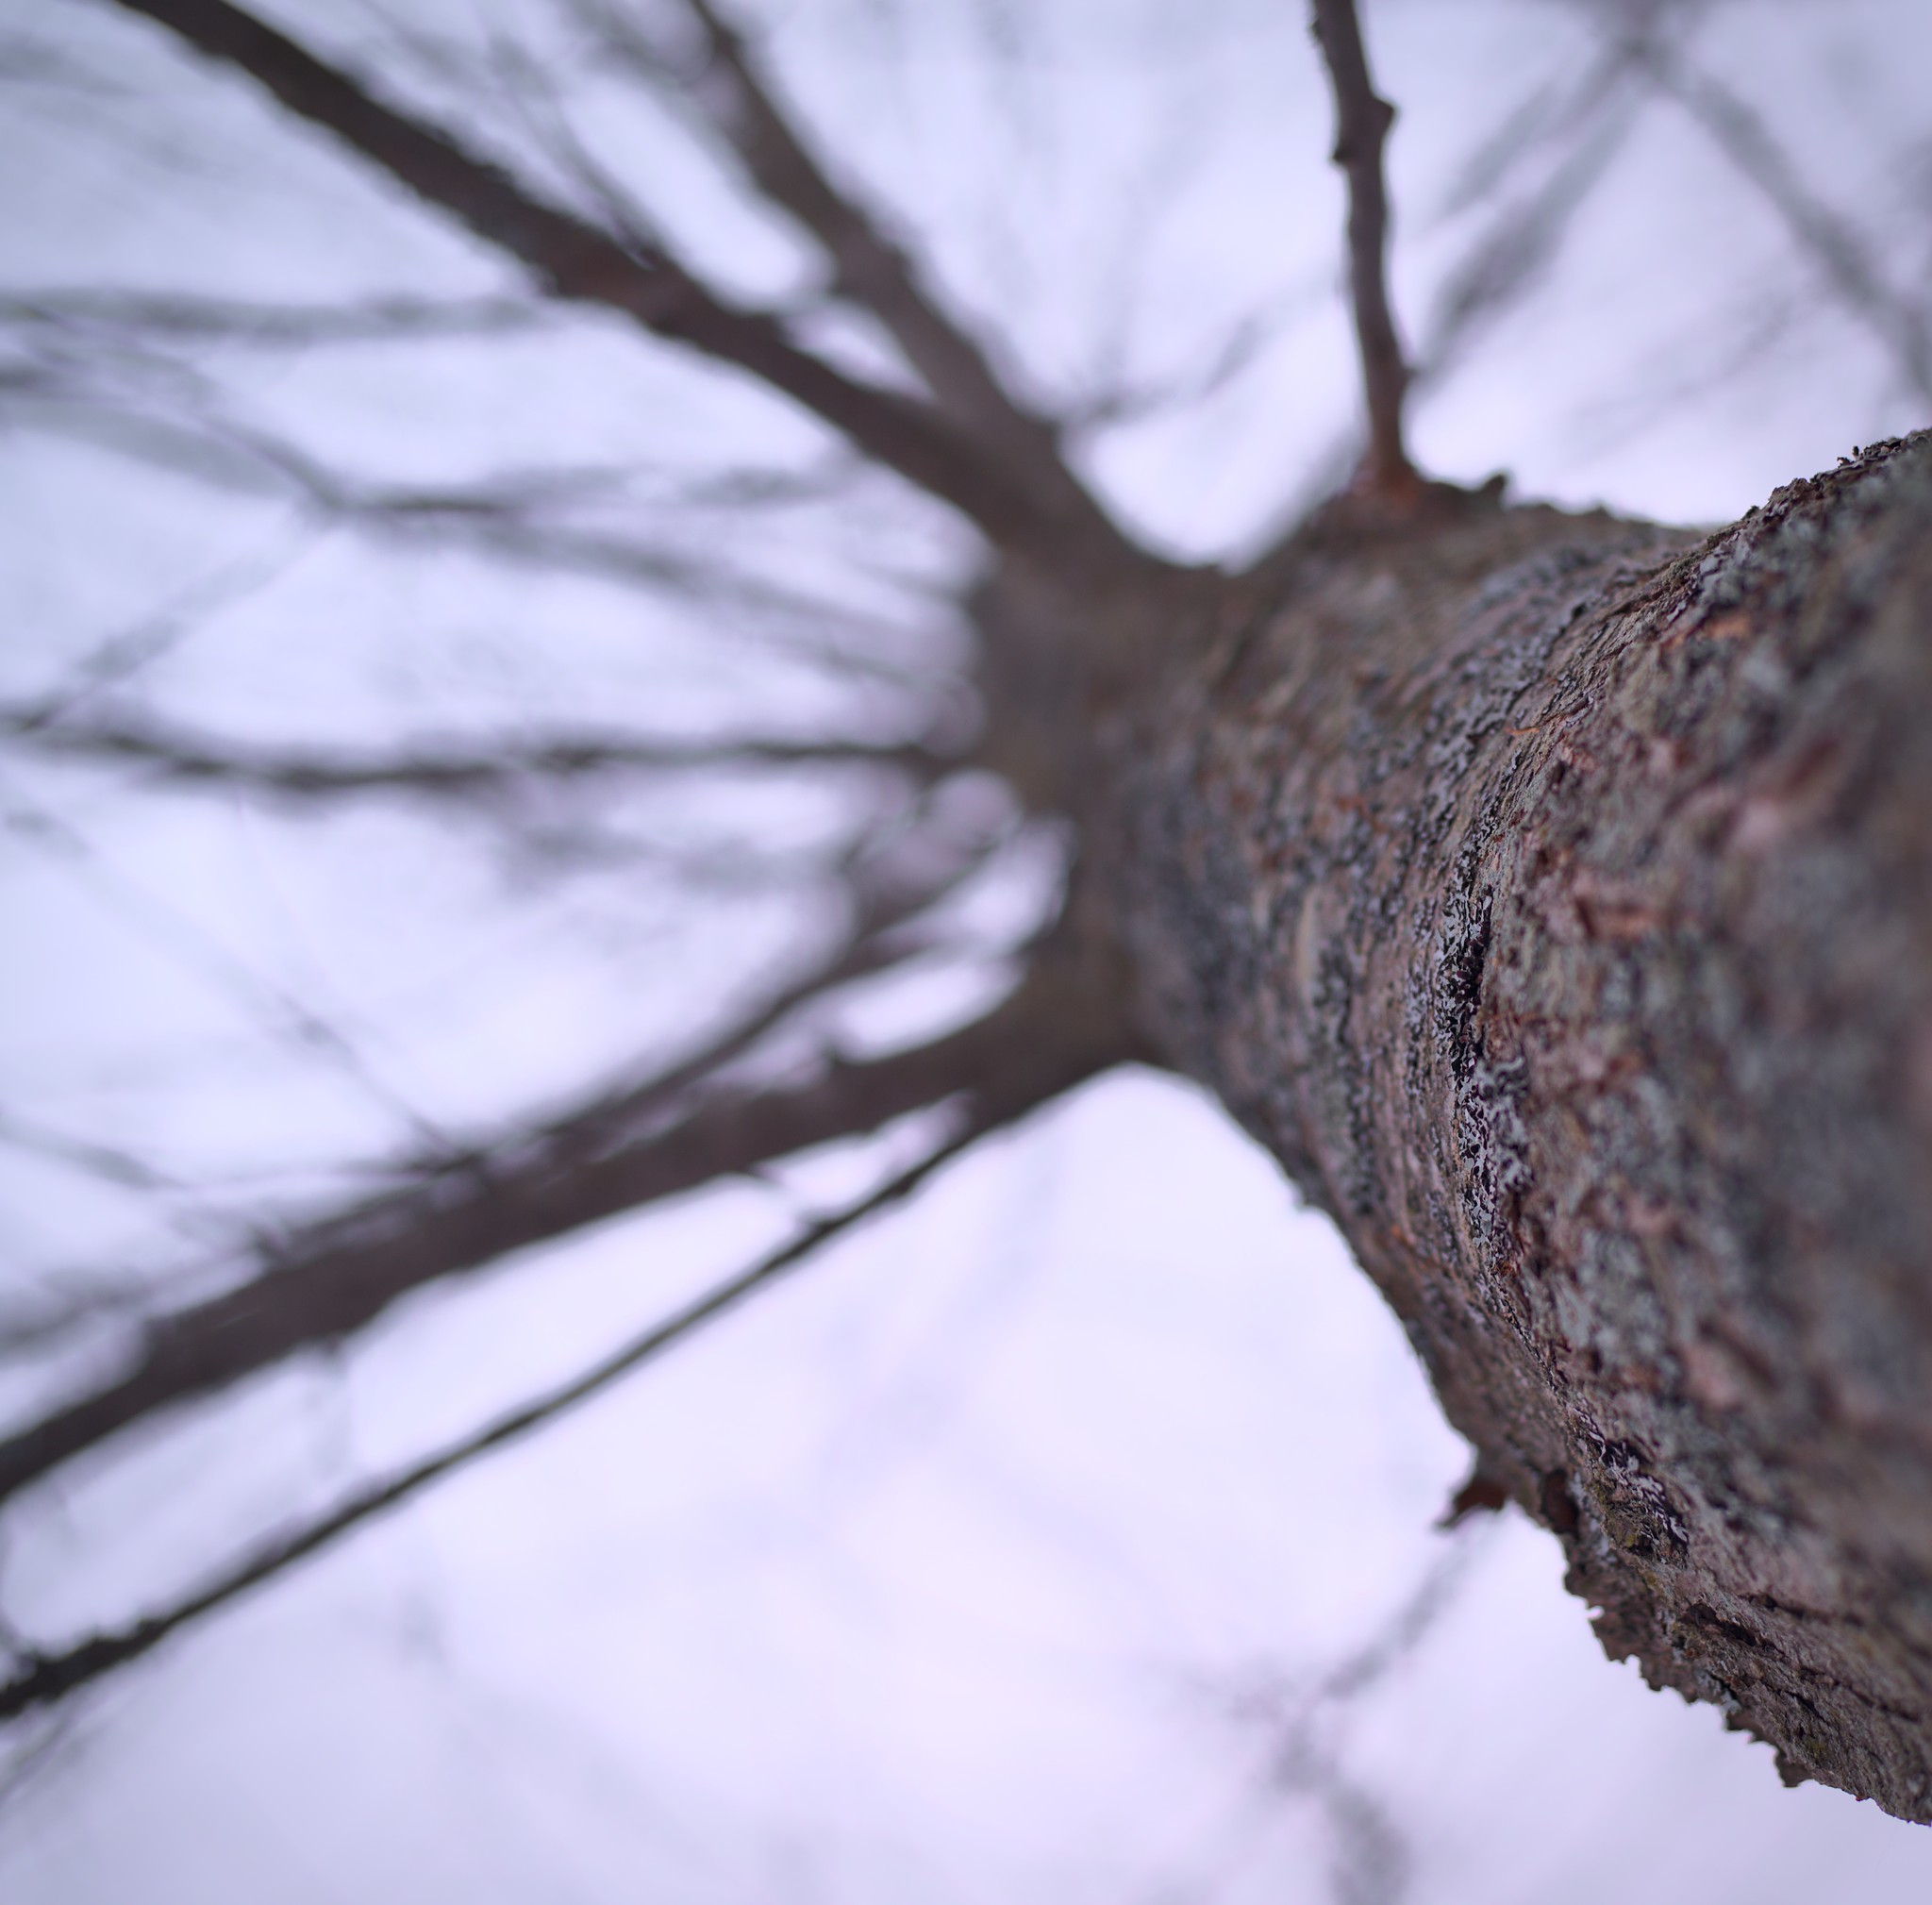
4. Keep the Background Far Away
If you can’t change your lens, change your background! Closer background elements often result in a harsher texture, and not all lenses can handle this equally well. If the background is very far away, it will simply be blown out no matter what lens you’re using.
For example, in the following portrait of a fairly habituated Mallard transitioning to his breeding plumage, the background is very smooth simply because it’s so far away. It was taken with the same 500mm lens as before, but the bokeh in this shot is smooth and pleasant to my eye.
5. Keep Your Lens and Sensor Clean
There are endless reasons to keep your gear clean, and bokeh is one of them. Take a look at these bokeh circles before and after I cleaned the dirty rear element of a lens:

Yes, this rear element was embarrassing. (Don’t worry, it’s not a lens I use, but a broken lens I use for demos like this.) These dust particles showed themselves in the bokeh circles making them look rough.
If the bokeh circles are large and the dust plentiful, then this will easily be visible under ordinary circumstances. Five minutes of maintenance on your lenses and sensor will prevent many nightmares in the wee small hours of the morning.
Although you should keep all your gear clean from top to bottom, as a rule, the closer the dust or dirt is to your sensor, the more it will show up in unwanted spots. Of course, dust and dirt on the sensor itself is the worst, and will appear even in areas that are in focus!
6. Get Rid of Noise
Can anything ruin good bokeh faster than noise? Well, maybe a broken aperture blade could. But although noise doesn’t arise from an optical property of the lens like chromatic aberration does, it still interferes with the enjoyment of good bokeh.
Naturally, noise reduction is the answer. However, there is noise reduction and then there is noise reduction. Typical one-click noise reduction doesn’t always yield ideal results. For example, consider the following image of a Song Sparrow:
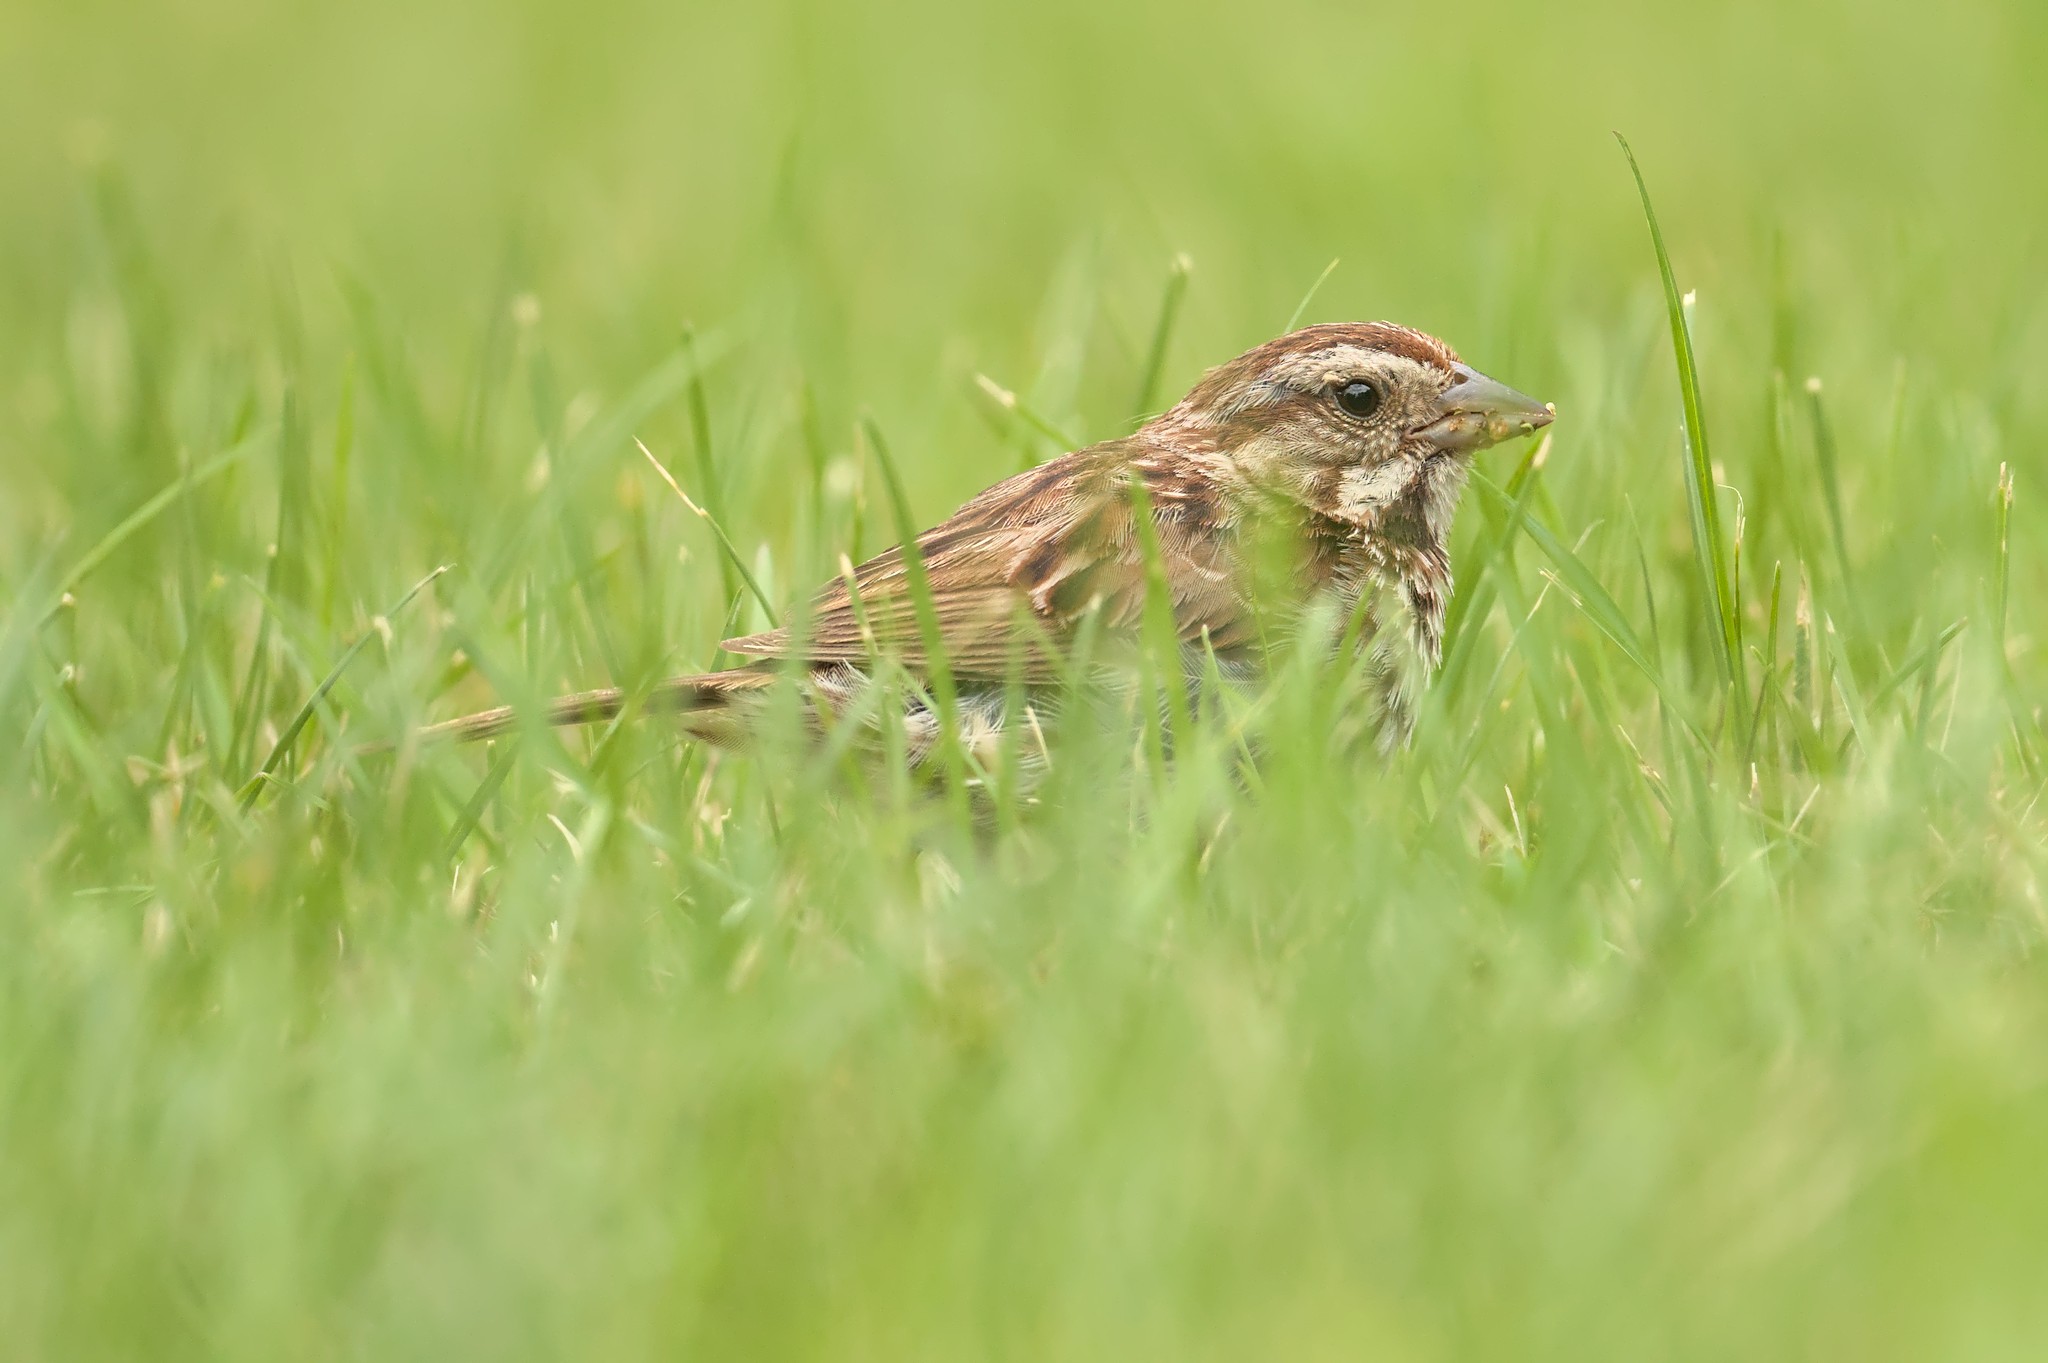
I love the way the grass quickly melts into a sea of greens. However, in the original image there was a bit of roughness in the background due to noise:
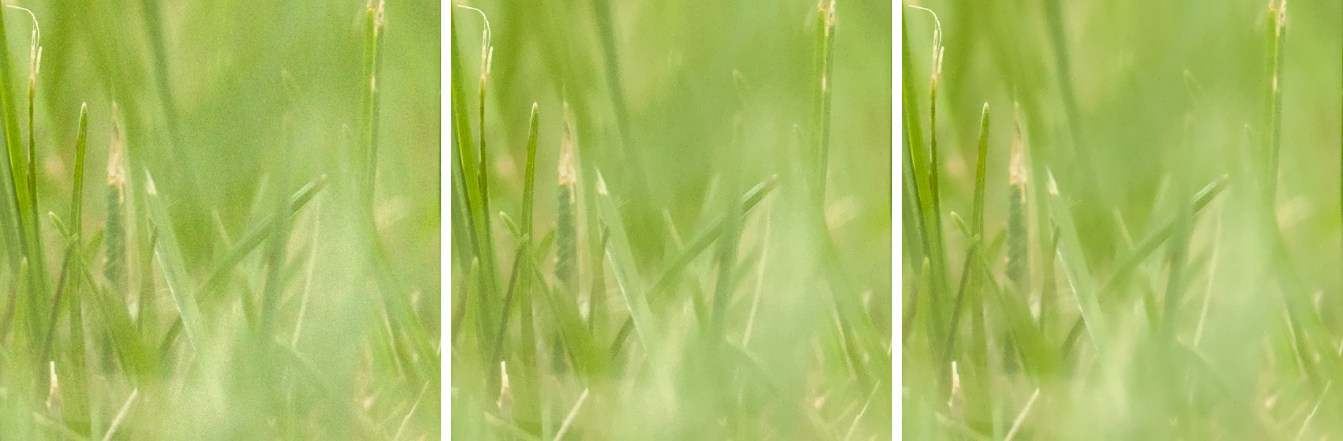
The first square is from the image before denoising. The second is the result after applying regular denoising. As improved as it is, there is still a little bit of splotchy roughness that would keep me awake at night if I couldn’t get rid of it. Therefore, I selectively applied a bit of smoothing to the green part of the image, which results in the final square.
The final effect may be a bit more subtle, but I did it for two reasons. First, the result is very noticeable to me on a 4k monitor or in a print, even as small as 8×10. And second, I truly feel that the minor details, even if they aren’t immediately noticeable to everyone, add up and contribute to a subconscious enjoyment of an image.
In fact, I apply a denoising strategy unique to each high ISO image to make sure that the nice bokeh from the lens is not hindered by unwanted roughness from noise. Since several Raw developer programs now include the ability to do local edits, there’s no reason not to go the extra step and make your out-of-focus areas look a little better.
7. Use Software
Several image editing software packages now have algorithms to simulate lens blur, which is more realistic than simple Gaussian blurring. For example, Adobe Photoshop has a lens blur tool. However, you can also use such a tool to remove odd bokeh elements like the strange specular highlights that sometimes occur with some lenses. For instance, once at a local park I found geese queueing in a lineup to jump into a river:

Incidentally, I found their behavior of jumping in one at a time rather amusing. But the day was virtually cloudless, and so the catchlights in the eyes of the out-of-focus geese produced slightly odd bokeh. By applying a local edit in Darktable – specifically, the lens blur tool – I eliminated the odd effect in the catchlights, narrowly averting a disaster. (Okay, perhaps it wouldn’t be a disaster but the effect certainly would show up in a large print.) Let’s take a look at an extreme crop before and after applying the lens blur tool:

8. Use Special Lens Designs
Some manufacturers have gone above and beyond in the quest for perfect bokeh. Venus Laowa has a 105mm f/2 Smooth Trans Focus Lens that has two diaphragms and an apodization element that basically allows the user to soften bokeh into something that looks a little more like Gaussian blur. In short, the hard edges in highlights can be made softer.
Canon also came out with a little surprise on their new RF 100mm f/2.8L IS USM macro lens. Aside from being the first first-party general purpose macro to achieve 1.4:1 magnification instead of the usual 1:1 magnification on macro lenses, it also has a spherical aberration control ring that allows some control over bokeh. They also have a version of their 85mm f/1.2 RF lens with a lens coating that softens the sharp edge on round specular highlights.
9. Convert to Black and White
Some lenses produce longitudinal chromatic aberrations, which shows up as purple and green fringing in out-of-focus areas. This is easy enough to remove in some cases, but if the effect is strong enough, it can be quite stubborn.
In this example, there was a fair amount of green fringing in the tree branches, especially at the top right. Turning the image to black and white obviously removes the issue.
Although I prefer to decide on whether an image will be black and white based on other factors, sometimes it can be preferable to an image with a lot of fringing, especially if you’re using older lenses that don’t have much chromatic aberration correction. In some cases though, green fringing could actually produce a unique atmosphere, so think carefully before removing it or hiding it.
10. Watch out for Blown Color Channels
Of course, you should watch out for overexposure as you shoot. However, there’s another problem that can arise in editing: overexposure of a color channel. With some very colorful subjects, one color might overexpose very quickly once you start to push highlights through a tone curve or other tool.
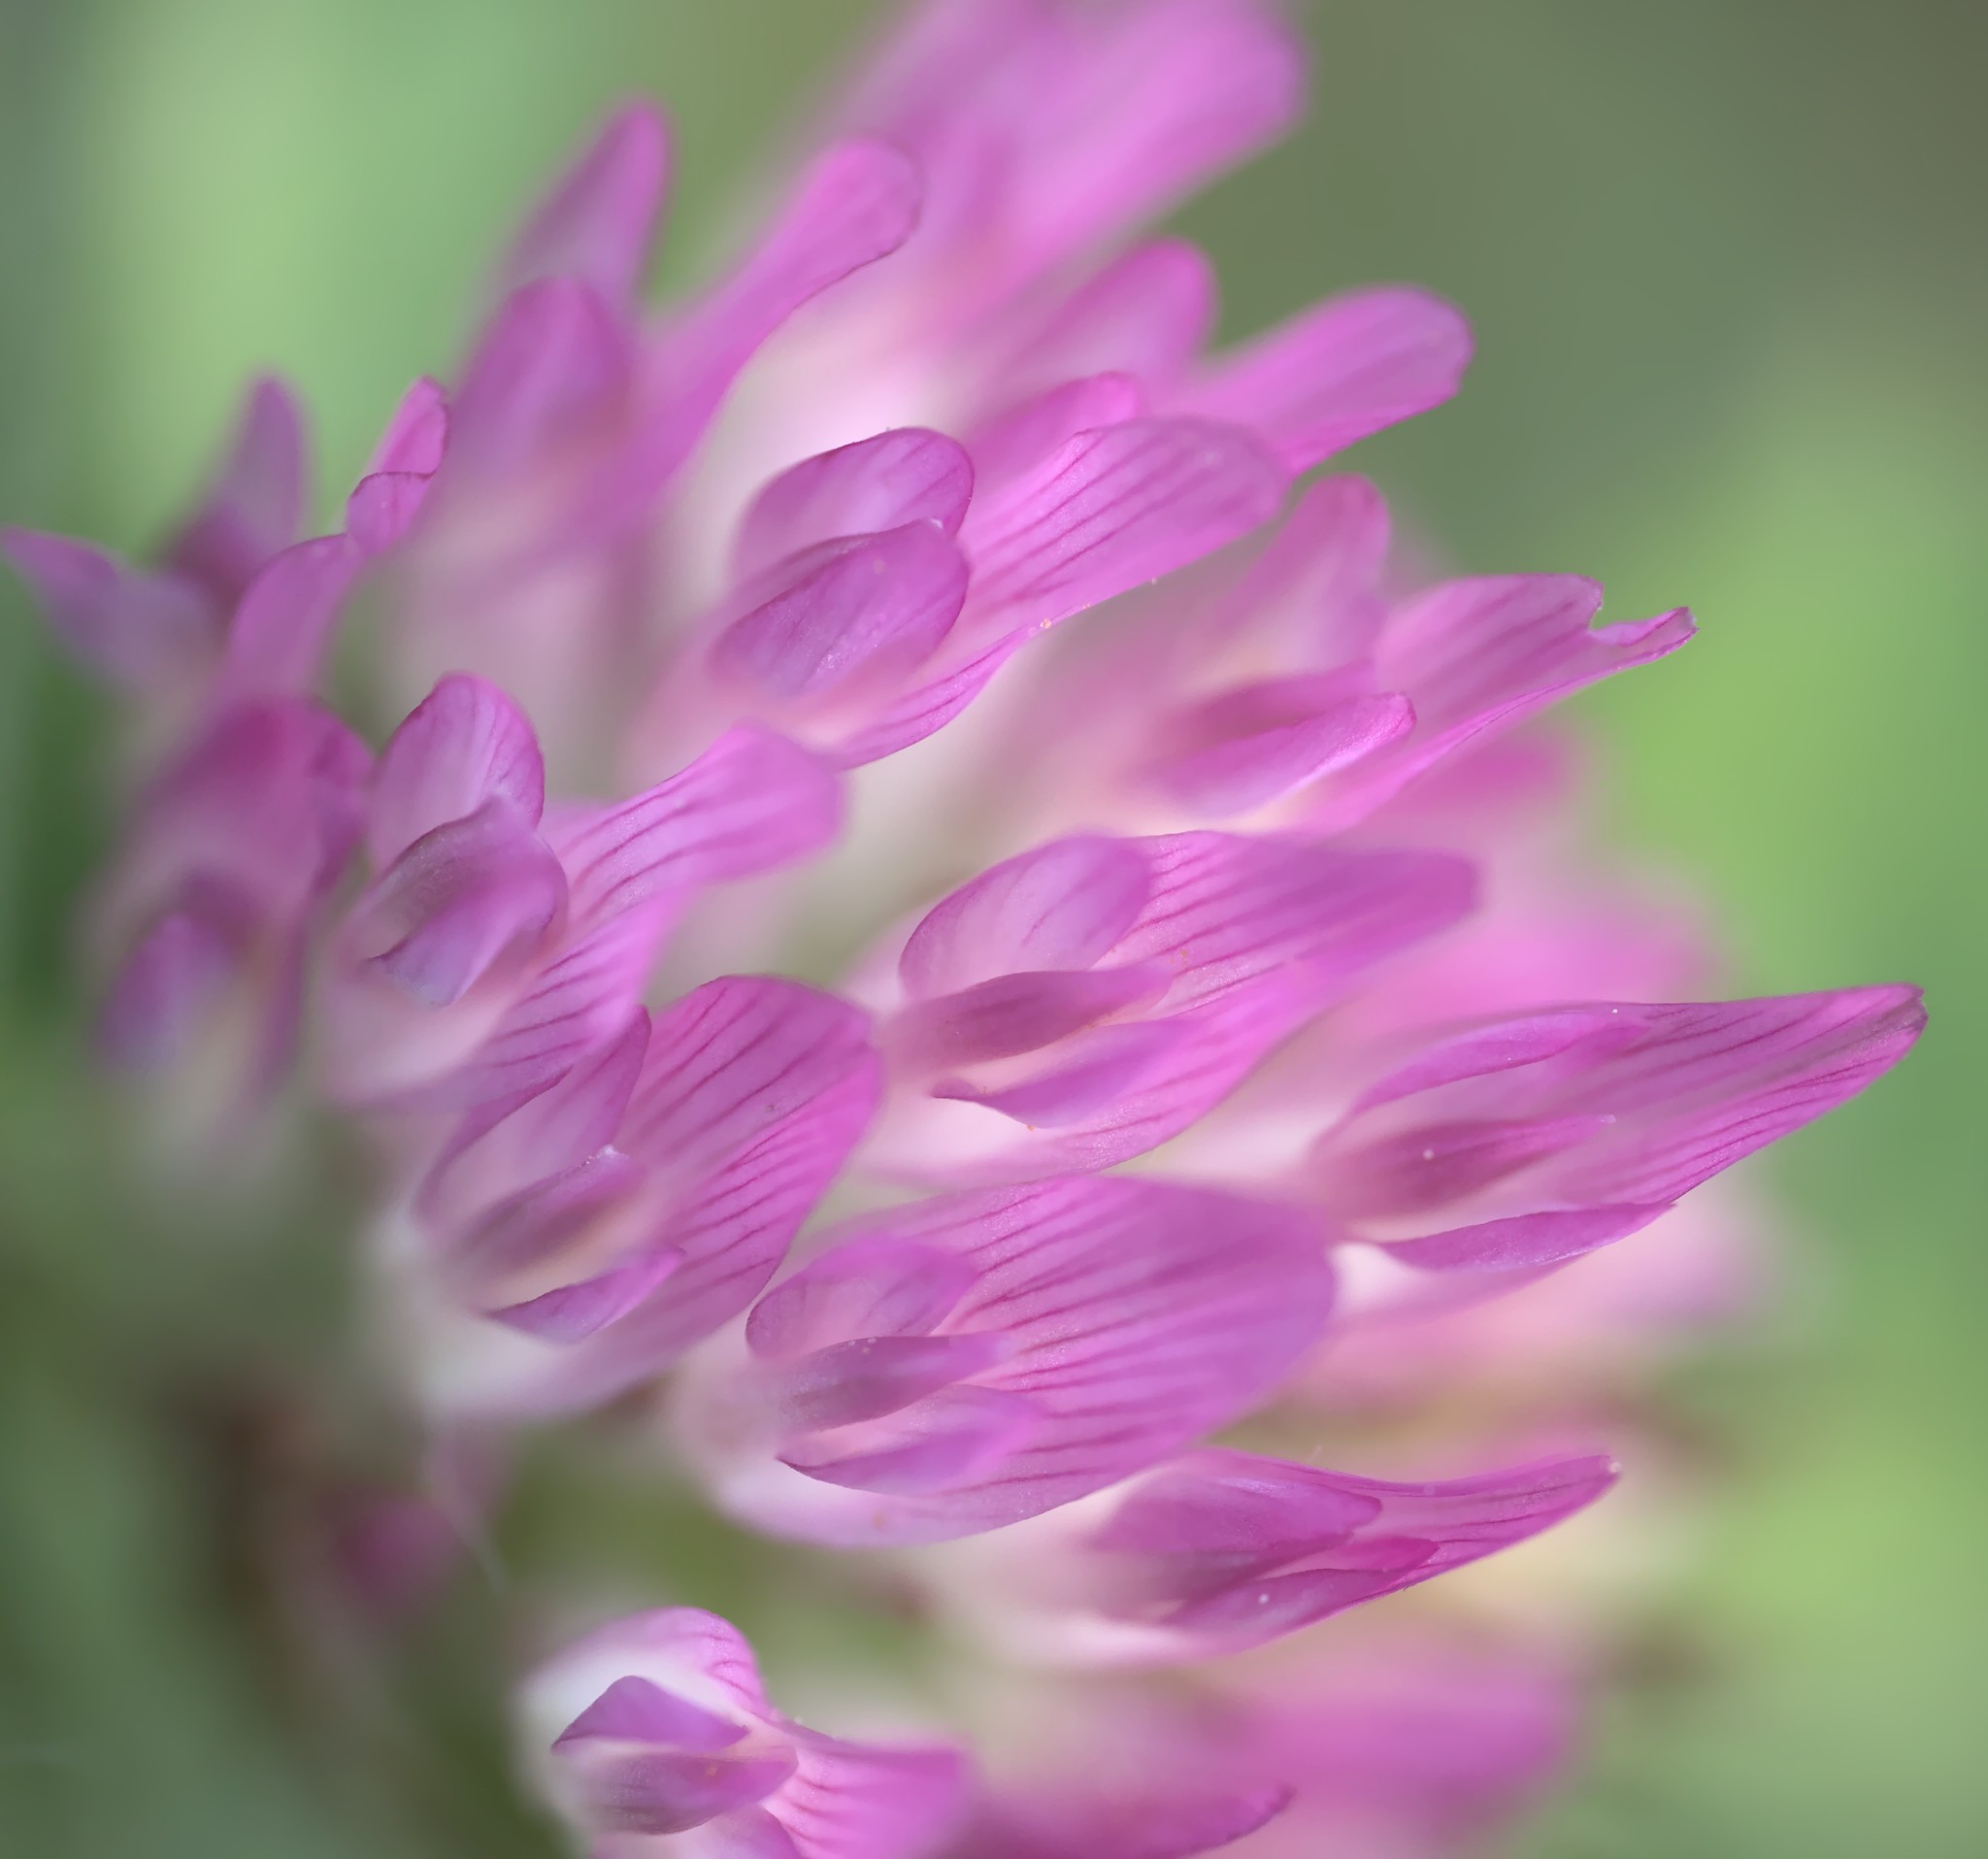
The reason why I’m even talking about this is because it often shows up in out of focus areas first, ruining smooth bokeh. Of course, it can cause problems for the in-focus areas too, but the additional contrast of a sharp subject sometimes hides this phenomenon. To understand this, let’s take a look at a lovely bright pink clover:
If you look at the histogram, you can see what the problem could be:

Without care, I could easily have pushed the exposure, blowing out the pink. And where would that show up first as a problem? In the out of focus area:
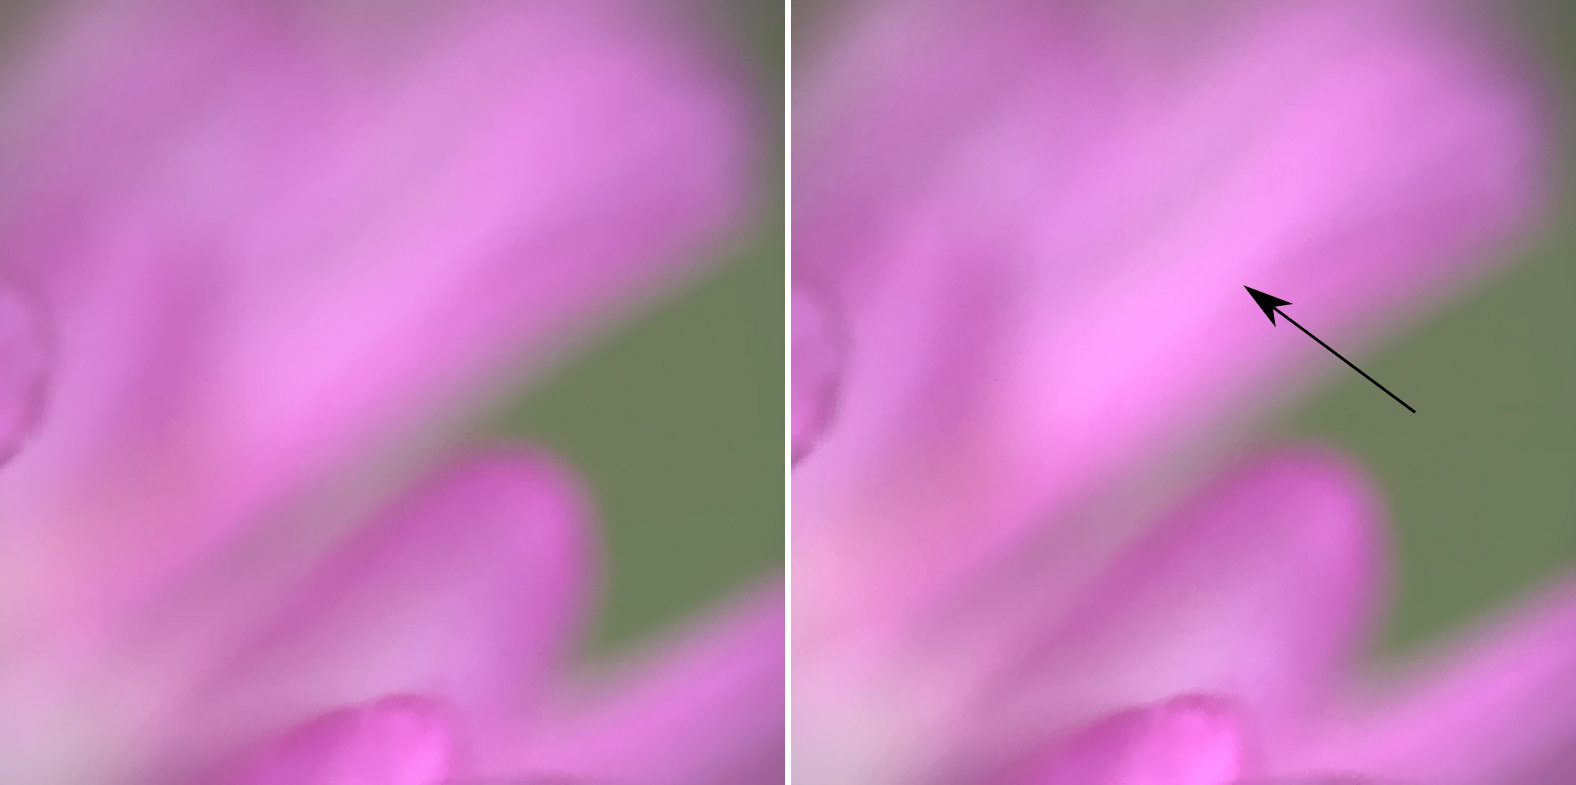
The left square is from the large image, and the right is a careless pushing of the highlights too far which results in posterization. Yes, I’m sad I even had to publish that right square.
Does VR Produce Bad Bokeh?
I have heard some people claim that VR can produce bad bokeh in certain circumstances. This is certainly plausible because VR moves lens elements to compensate for chaotic motion.
I tried testing this with my 500mm PF. I took a variety of shots on a tripod of my scientific “bokeh circle generator” (i.e. a piece of cardboard with holes punched in it using a nail and pliers). I tried all sorts of things, like moving the lens rapidly so that the VR would work harder, but no matter what VR mode I used, I could not produce worse looking bokeh with VR as opposed to without.
If there were problems, my pixel-peeping eye failed to discern them on this lens, nor have I seen it on any of my other gear in practice over the years. I would not recommend turning VR off just to get better bokeh.
Conclusion
In this article, you’ve seen that there are quite a few ways to improve bokeh in a photograph. Some of these involve either using the right lens or the right settings, while others involve composition and post-processing. Personally, I really enjoy good bokeh and finding new and interesting ways to improve my out-of-focus areas, and I hope you enjoy it too. Moreover, I’d love to hear your thoughts on how obsessive I am about bokeh how to improve your bokeh in the comments section below.

