Many beginner photographers often wonder what camera settings they should use to get the best possible results with their current camera gear. While there is no set rule for camera settings that work well in every shooting environment, I noticed that there are some settings that I personally set on every camera I use, which are universal across all brands of cameras on the market. These are the “base” settings I set initially – once they are done, I rarely ever revisit them. In addition, there are particular camera modes that make the process of capturing images easier or quicker, especially for someone who is just starting out. Let’s go through these common camera settings in more detail!
Camera Setup
First, let’s go over some of the camera settings that should apply to any modern digital camera. You should be able to find all the settings specified below, since they are more or less universal across different camera brands and models:
- Image Quality: RAW
- RAW Recording: Lossless Compressed (if available)
- White Balance: Auto
- Picture Control / Picture Style / Creative Style / Film Simulation: Standard
- Color Space: sRGB
- Long Exposure Noise Reduction: On
- High ISO Noise Reduction: Off
- Active D-Lighting / DRO, HDR, Lens Corrections (Vignette Control, Chromatic Aberration Control, Distortion Control, etc): Off
The above are the most important camera settings. First, you always start out by selecting the proper file format, which is RAW. If there is a setting for selecting RAW compression, always select Lossless Compressed, as explained here, since it reduces the amount of space your RAW files consume. While things like Picture Controls don’t matter for RAW images (they only impact the way the image appears on your camera’s LCD), it is best to stick with a standard profile without tweaking any other settings like Sharpening, Contrast, Saturation, etc, as such settings only matter if you shoot in JPEG format.
The same with color space and white balance – you do not have to worry about them when shooting RAW, since you can change them later. Unless you know what you are doing, I would keep “long exposure noise reduction” turned on, since it does affect your RAW images when shooting long exposures – it works by reducing the amount of noise you will see in your images (although it will also double the amount of time it normally takes to capture an image). All other in-camera lens corrections, dynamic range optimizations and noise reduction options should be turned off as well, since they do nothing to improve your RAW images.
Once you have the above settings set up in your camera, it is time to move on to things that matter when taking pictures.
Best Camera Shooting Mode
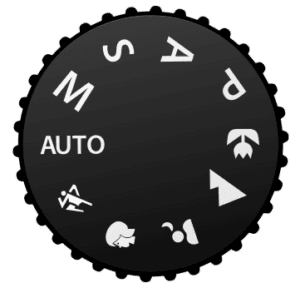
While some photographers argue that it is best to always shoot in Manual Mode to have full control over your camera, I would strongly disagree with that. Considering how amazing modern cameras have gotten when it comes to properly metering a scene and exposing a subject, there is very little reason to actually shoot in Manual Mode, so why not use one of the semi-automated camera modes instead?
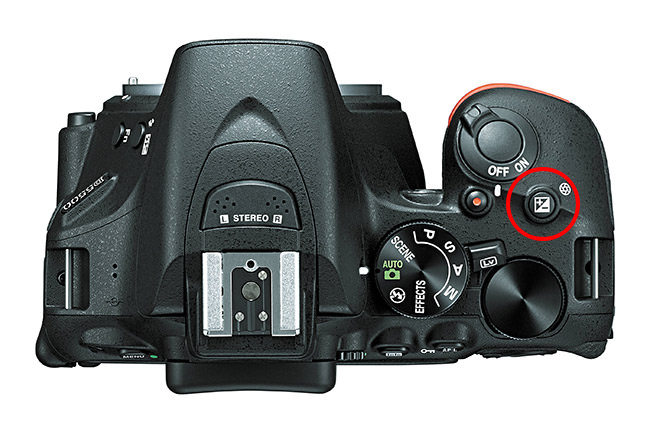
For example, I personally rely on the Aperture Priority mode of my camera 90% of the time, because it does a great job and I have full control not just over my camera aperture, but also over how bright or dark I want an image to appear. If my camera takes a brighter image than I would like it to be, I simply use the Exposure Compensation button to adjust my exposure and I am set:
If you are wondering whether it is good to shoot in any of the “Scene” modes of your camera (such as Macro, Sports, Fireworks, etc), I would discourage the use of these modes for a number of reasons. The main reason is that such modes vary greatly not just between different camera manufacturers, but also different models. So if you learn to always rely on a particular scene mode on one camera and decide to upgrade to a new one in the future, you might not be able to find the same scene mode on a different camera model. It is also important to highlight that most higher-end and professional camera models don’t even come with scene modes in the first place.
Best Autofocus Mode
You should always make sure that you are shooting in the best autofocus mode depending on what you are photographing. For example, if you photograph a still subject, you might want to use Single Area Focus Mode (also known as “Single Area AF”, “One Shot AF” or simply “AF-S”), whereas if the subject you are photographing is continuously moving, you would want to switch to Continuous / AI Servo Focus Mode, since you would probably want your camera to actively track your subject.
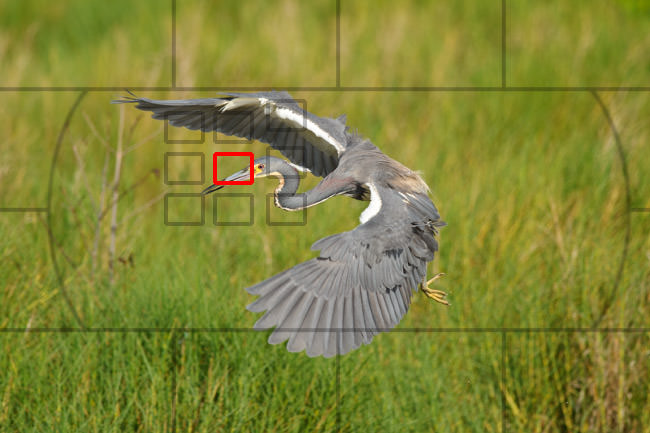
To make it easier for beginners, camera manufacturers sometimes include a hybrid mode that automatically switches between Single Area Focus Mode and Continous / AI Servo Focus Mode depending on whether your subject is still or moving. This hybrid mode, which is known as “AF-A” on Nikon and “AI Focus AF” on Canon cameras, can be a great autofocus mode to default to if you find it difficult to constantly switch between AF-S and AF-C camera modes.
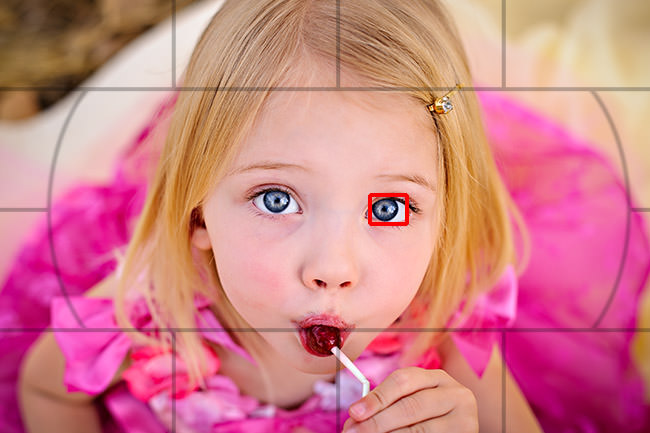
Some cameras also come with an “Auto AF” mode, which looks at the whole scene and tries to focus on either the nearest subject, or a subject the camera thinks is important. I would recommend to avoid using such modes for most beginners, because it is better to have control over exactly where your camera focuses by moving your focus point to the spot your camera should focus on. You can achieve this by switching to the Single-Point AF-Area Mode, as explained in the autofocus modes explained article. Once you have a single point to move around in your viewfinder, you can either move that focus point within your frame on your subject / area of interest, or move your subject to the focus point:
Best Metering Mode
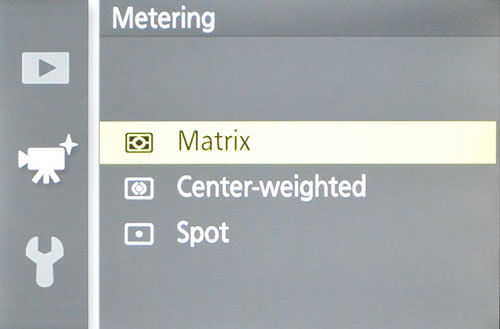
While your camera might have a number of different Metering Modes such as Spot Metering, Center-Weighted Metering and Matrix / Evaluative Metering, for most situations it is best to default to Matrix / Evaluative Metering, because it takes the whole scene into account and typically does a better job at exposing your subjects.
Best Lens Aperture
Lens aperture not only affects how your subject is isolated from the foreground and background, but also impacts how much light actually goes through your lens, so you have to be careful about what aperture you pick in a given situation. In addition, aperture can impact things like image sharpness and depth of field, so it is all about choosing the best aperture for your subject and your shooting environment. If you are taking pictures in low light and you want to avoid introducing camera shake to your images when shooting hand-held, it is best to take pictures with the widest possible aperture your lens can provide, so that your camera can receive as much light as possible. For example, if you shoot with a 35mm f/1.8 lens, you might want to keep that aperture at f/1.8 in such conditions. However, if you are standing at a beautiful overlook and you want to capture a sharp photograph of the whole landscape, stopping down the aperture of your lens to something like f/5.6 will be optimal.

Aperture is often associated with how separated your subject appears from the background, but that’s only one of its many functions. In the example above, you can see how different an image can appear when photographed at a wide aperture like f/2.8 versus a small aperture like f/8.0.
It is important to understand the impact of aperture and what it can do to your photographs, so I highly recommend that you read the linked articles above.
Best Shutter Speed
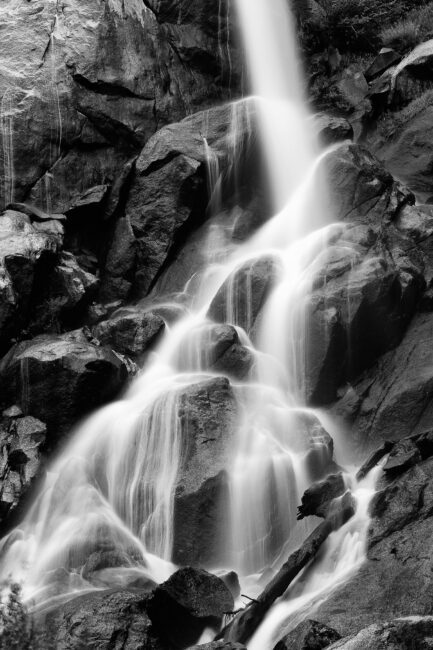
Just like aperture, the choice of the best shutter speed will highly depend on what you are trying to capture. For example, if your goal is to capture a dreamy photograph of a waterfall, you will need to use a slow shutter speed that might last several seconds to make the running water appear blurry:
Whereas if you want to freeze a subject in your scene, you will need to use very fast shutter speeds that are a very small fraction of a second:
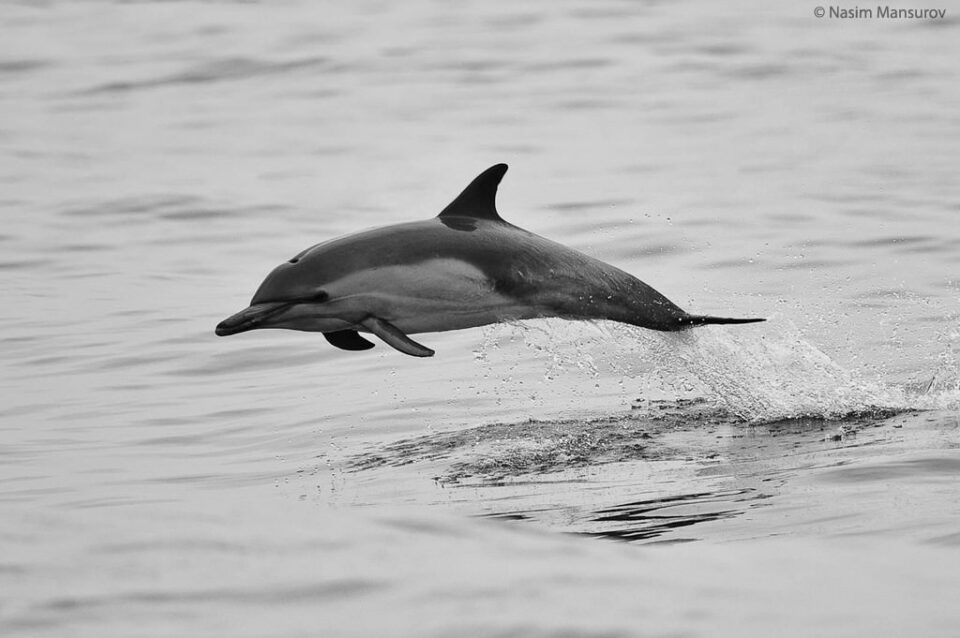
For most situations, however, you are better off using shutter speeds that are fast enough to capture images without introducing camera shake. For that reason, I would recommend that you read our article on reciprocal rule and enable Auto ISO (more on ISO and Auto ISO below).
Best ISO Setting
When it comes to camera ISO, you are always better off shooting with the lowest ISO, because it produces the least amount of noise / grain in your images. The last thing you want is every image looking too noisy because you set your ISO too high. While using noise reduction techniques might help, it is better to avoid noise in the first place.

However, shooting at the lowest ISO is not always practical, especially when photographing in low light environments. In those situations, you will need to increase your camera ISO in order to keep your shutter speed fast enough to avoid blur due to unintentional camera shake.
Remember, photography is always a balancing act between Aperture, Shutter Speed and ISO, also known as the Exposure Triangle. I would recommend to spend some time to understand how the three work and how they are related to each other.
Auto ISO
If you have a modern digital camera, it most likely comes with an Auto ISO feature, which can be a very handy tool for a beginner photographer. Once you have the Auto ISO enabled, your camera will automatically adjust your camera’s ISO depending on how bright your subject and the environment are, trying to keep the shutter speed at the same or higher level than the minimum shutter speed you set within the Auto ISO menu. Take a look at the sample Auto ISO menus from a few different cameras that Elizabeth Gray put together for our readers in her excellent Understanding Auto ISO for Beginners article:
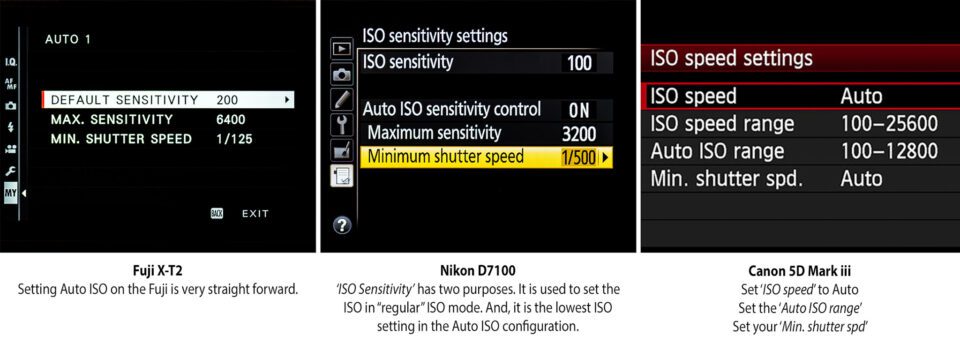
Some cameras from Nikon, Canon and other manufacturers have advanced Auto ISO menus that can take into account the reciprocal rule and allow for an “Auto” configuration for minimum shutter speed, which will take into account the focal length of the lens being used. Such options can be very useful for beginners, because they take away the pain of constantly adjusting camera settings.
Image Stabilization
Lastly, don’t forget to take advantage of image stabilization (also known as SteadyShot, Vibration Reduction or Vibration Compensation) that is offered either by your camera (in-body image stabilization) or your lens. Don’t forget to turn it on when shooting hand-held and turn it off when shooting from a stable tripod. Also, it is always a good idea to half-press the shutter release for a few seconds and let your camera or lens stabilize first, before taking a picture. This will reduce the potential for having blurry images.


