


In October of 2023, Adobe announced that Lightroom would gain support for HDR editing and display. Perhaps confusingly, this is different from Lightroom’s Merge to HDR feature that combines multiple images together – instead, it has to do with the brightness levels that a photo contains and can be displayed on certain monitors. In this guide, I’ll take a look at how Lightroom’s HDR display feature works and whether or not you should consider using it.
What Are HDR Displays?
Some of today’s phones, tablets, and high-end monitors have HDR displays. Just like traditional HDR photography, the acronym stands for High Dynamic Range, but it refers to something different in this case: monitors which are capable of brighter whites and darker blacks than usual, leading to a higher contrast ratio.
If you’ve ever browsed certain apps like Instagram on a newer, higher-end phone, maybe you’ve seen some videos that appear to suddenly brighten your phone’s display (or at least certain zones of the video where it’s the brightest). This is one example of viewing HDR content on an HDR display.
That said, HDR is still a relatively new display technology to see in consumer products. SDR monitors (Standard Dynamic Range) remain much more common.
Understanding HDR-Compatible Photos
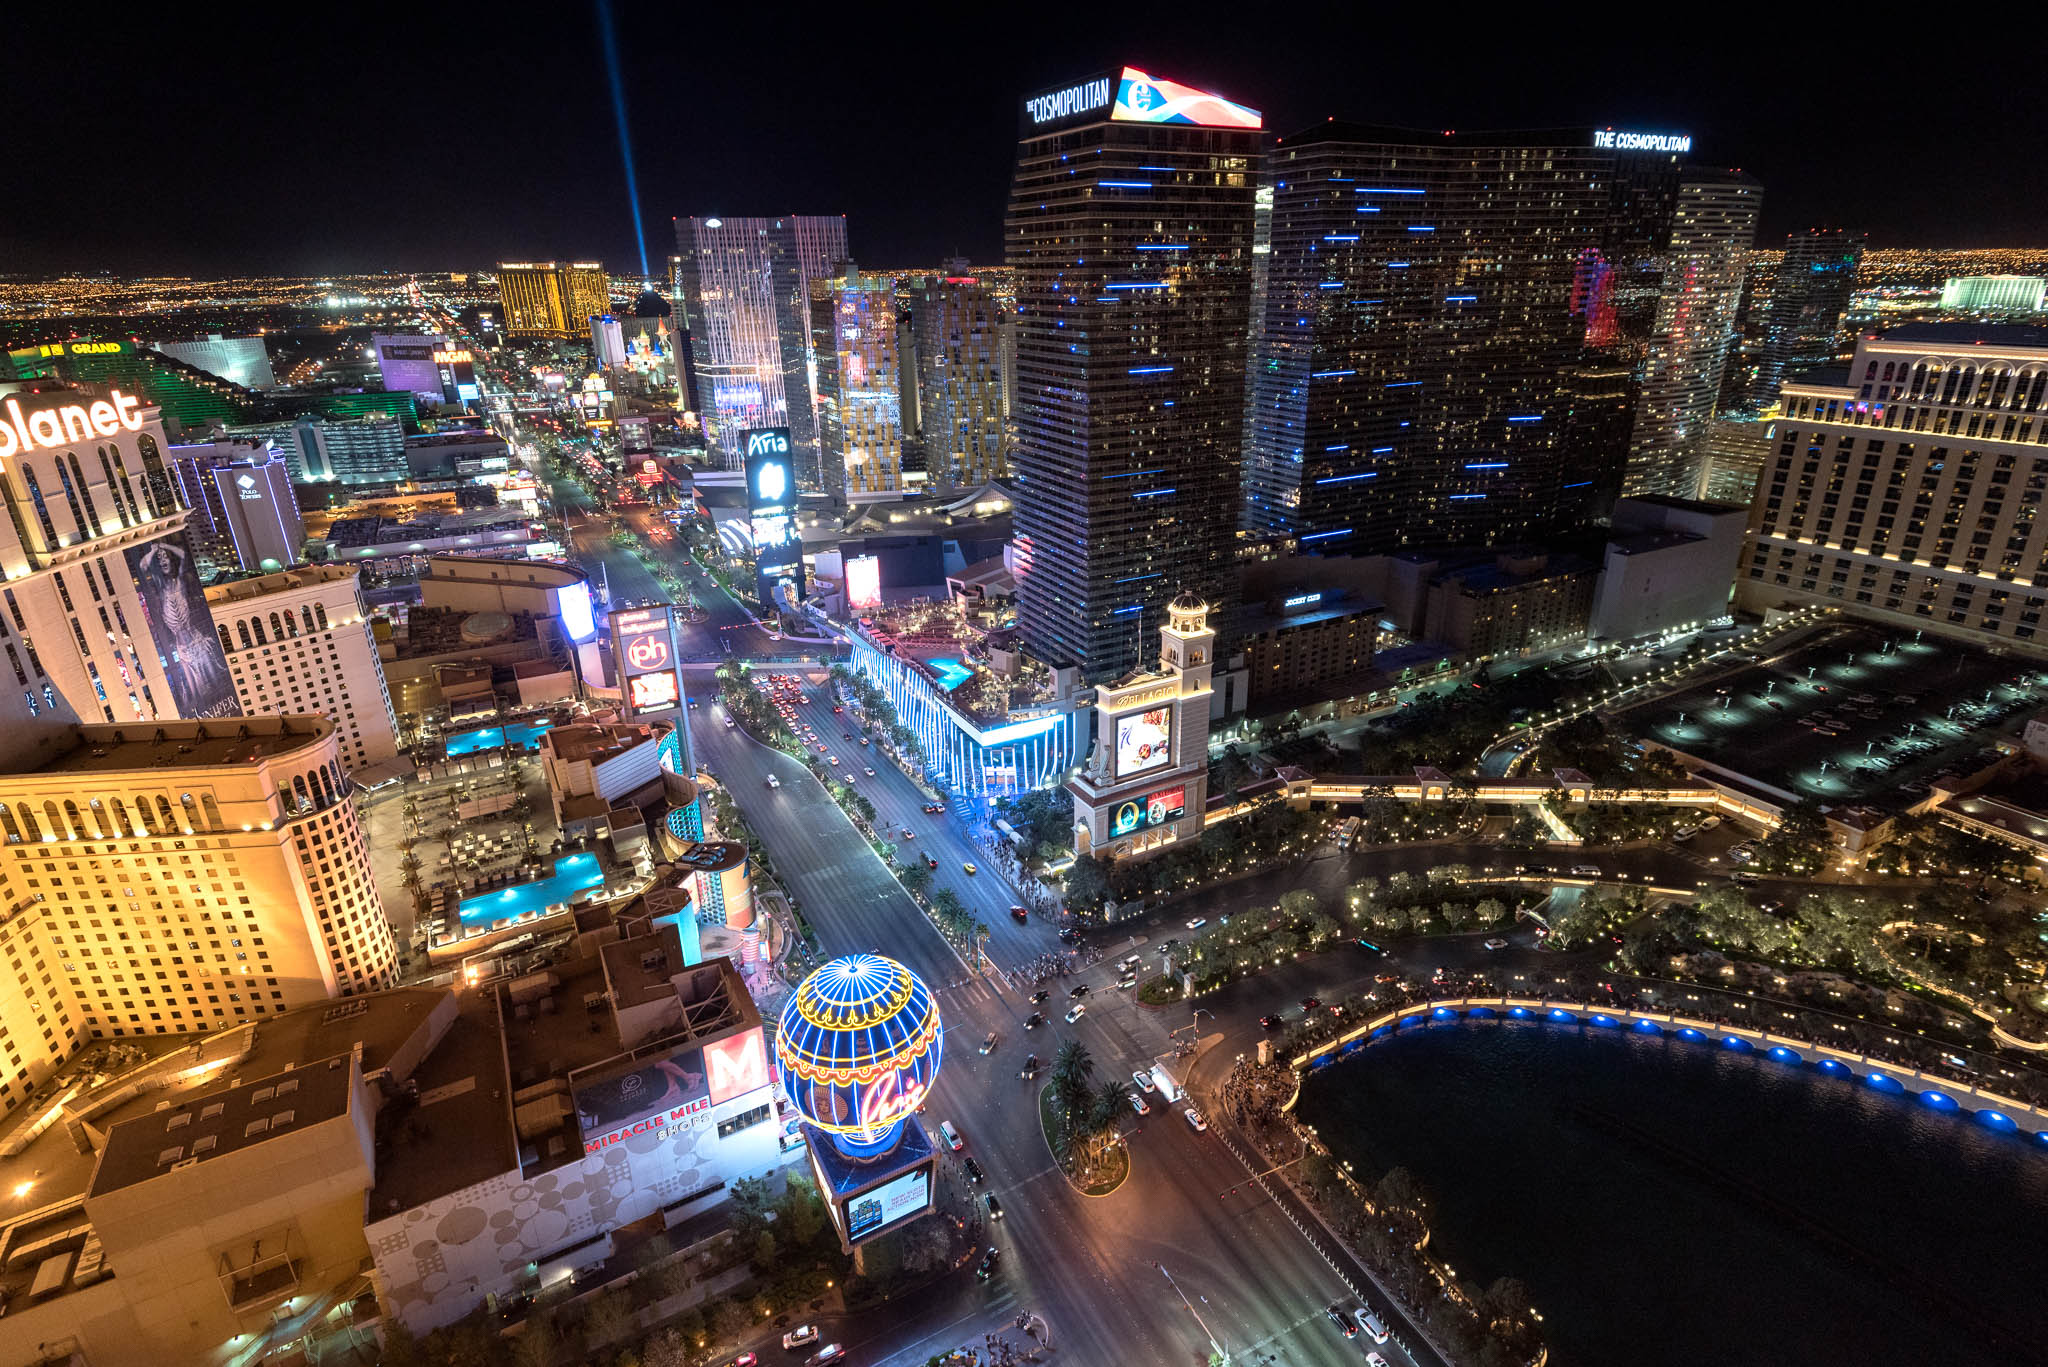
Even if you’re using an HDR display, most photos and videos that you see will not take advantage of the HDR functionality. Instead, photos and videos need to be specifically edited in order to take advantage of the full contrast range of such monitors. You also need to view such photos in applications that support HDR (most don’t right now, including this webpage – the photos in this article are not being displayed in HDR).
Traditional photos are edited to have 256 unique brightness values from 0 to 255. This means that you can’t have a value brighter than 255. With HDR editing in Lightroom, however, you can push your photos up to 4 additional stops brighter than those SDR values. Only if your photo contains such values will it be able to take advantage of an HDR display.

Although it’s niche at the moment, HDR functionality is being added to increasingly more displays and apps, so it’s worth getting ahead of the curve on this concept. I’ll stress again that the topic of this article is not the same as classic HDR photos that are merged from multiple exposures. Whether a photo is a single exposure, or a blend of multiple exposures, has no bearing on whether it can utilize the HDR features of HDR displays.
Lightroom’s Implementation of HDR Editing
Now that Adobe Lightroom supports HDR features (both for displaying and editing photos), you can edit your photos within the expanded range of brighter tones. You can also use the visualization tools that Lightroom’s HDR mode provides in order to see how your HDR-edited photos will look on different monitors.
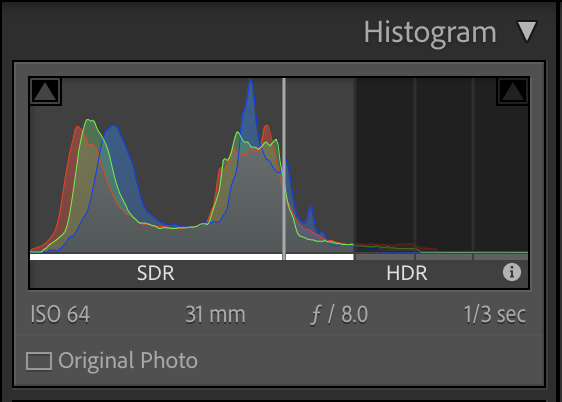
Essentially, when HDR mode is enabled in Lightroom, you can push tones past their previous limit on the right-hand side of the histogram. Working in the HDR range can be done with any photo: just enable HDR mode, increase the brightness enough, and you’ll start to see tones cross the SDR line.
Any photo can be edited with Lightroom’s HDR mode, but you’re more likely to find these features valuable when working with traditional HDR photos (i.e., images created with Lightroom’s Merge to HDR feature). That’s simply because those photos contain lots of tonal information in the highlights that can be difficult to compact into the 0-255 range.
So, even though HDR displays are very different from merged HDR photos, there is some crossover in the types of photos you’ll be working with.
Hardware Requirements for HDR in Lightroom
To get started with Lightroom’s HDR mode, you need to be using an HDR display. In the Mac world, the MacBook Pro 14 and 16” models, are perfect. Their XDR display and the OS’s handling of HDR works very well.
Windows users will need an HDR capable display and a GPU with support for HDR. Adobe recommends monitors that meet the DisplayHDR 1000 certification. Having tried Lightroom HDR on lower-end HDR monitors, I completely agree with this recommendation. You really need a high-performing HDR monitor on Windows to really make it worth the effort. Additionally, Windows users will need to set HDR to On via the Settings panel in Windows. Displays of that caliber don’t come cheap, by the way – expect $1000 minimum, with something like the Asus PA32UCRK being a good option.

Having used both Windows and Mac’s implementations of HDR, I definitely feel that MacOS handles things better. Windows can flicker when switching between HDR and SDR content, and Windows only passes a static HDR headroom range to Lightroom at startup, which can complicate things if you adjust the monitor’s brightness while in use. Lastly, Windows handles the combination of HDR and SDR content poorly. Keeping HDR on while using SDR apps leaves them looking washed-out and odd.
HDR on Mobile Devices
Lightroom on mobile devices also offers HDR support. Both Apple and Android devices offer relatively seamless support for HDR on newer devices in Lightroom. In fact, I’d say that mobile devices will offer the best viewing experience for sharing your HDR pictures with a general audience. More of today’s phones and mobile apps support HDR display compared to desktop environments.

That said, you’ll still find that many popular ways to view content do not support HDR images. For example, Photos on iOS handles them fine, and Instagram supports HDR videos, but Safari doesn’t support any HDR images at the time of this article’s publication. This can make it awkward to easily share and display these images, particularly when sharing them with non-photographers.
How Do You Edit HDR in Lightroom?
Once you’ve gotten the software and driver side setup correctly, Adobe has made editing HDR pretty seamless in Lightroom. By clicking the HDR button near the top of the Basic tab, your image will be switched over to the expanded HDR workspace.
Upon enabling HDR, you should see a few things change. For starters, the Histogram tab will expand to show the HDR range, with a value indicating the range your monitor is capable of displaying. Options for “SDR Rendition Settings” and “HDR Limit” will be added to your Basic Panel. Also, the image itself will usually look different.
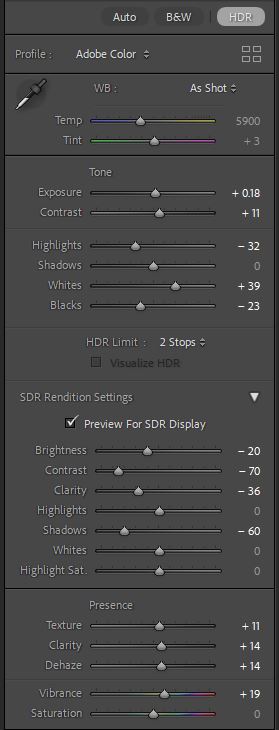
From here, you can edit your images as you normally do, except with the benefit of the expanded range of color and brightness at the upper end of the histogram.
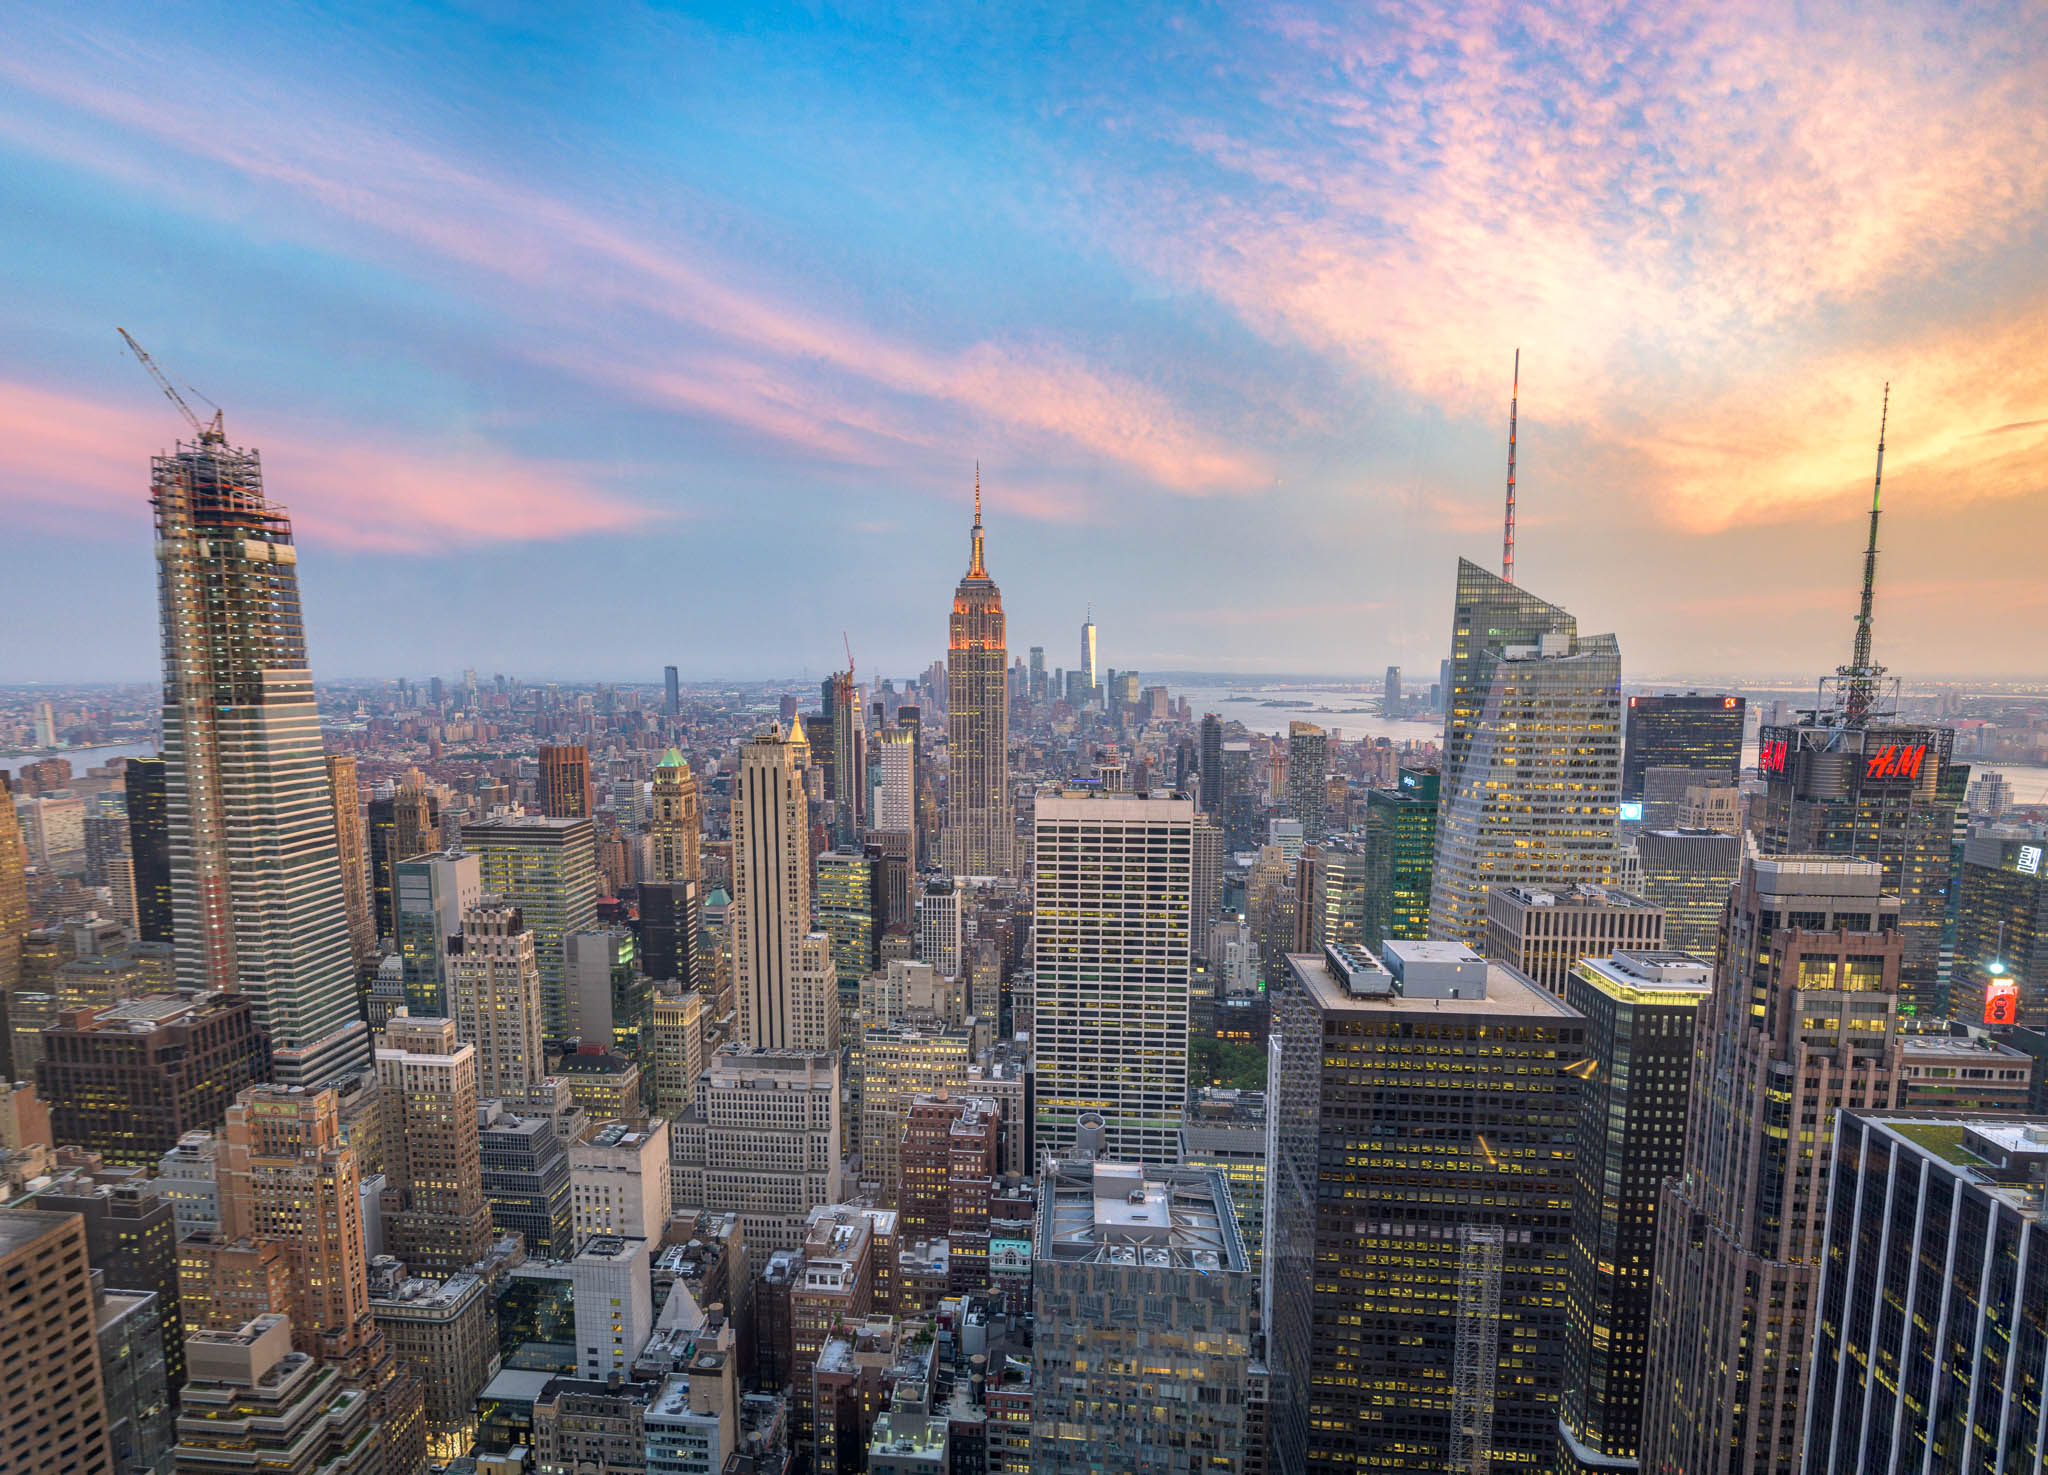
Editing an image like a sunset provides a clear example of HDR’s benefits. A sunset will have a wide range of brightness values, spanning the brightest parts of the sun to deep shadows, and HDR can better represent this difference. Meanwhile, areas that may have been out of gamut, like very bright and saturated reds or blues, will appear more accurate.
An important tool while editing in HDR is the Clipping Warning. Just like in conventional SDR editing, understanding where your image is clipping is very helpful when making basic adjustments. To toggle clipping, just press J while in Develop view.
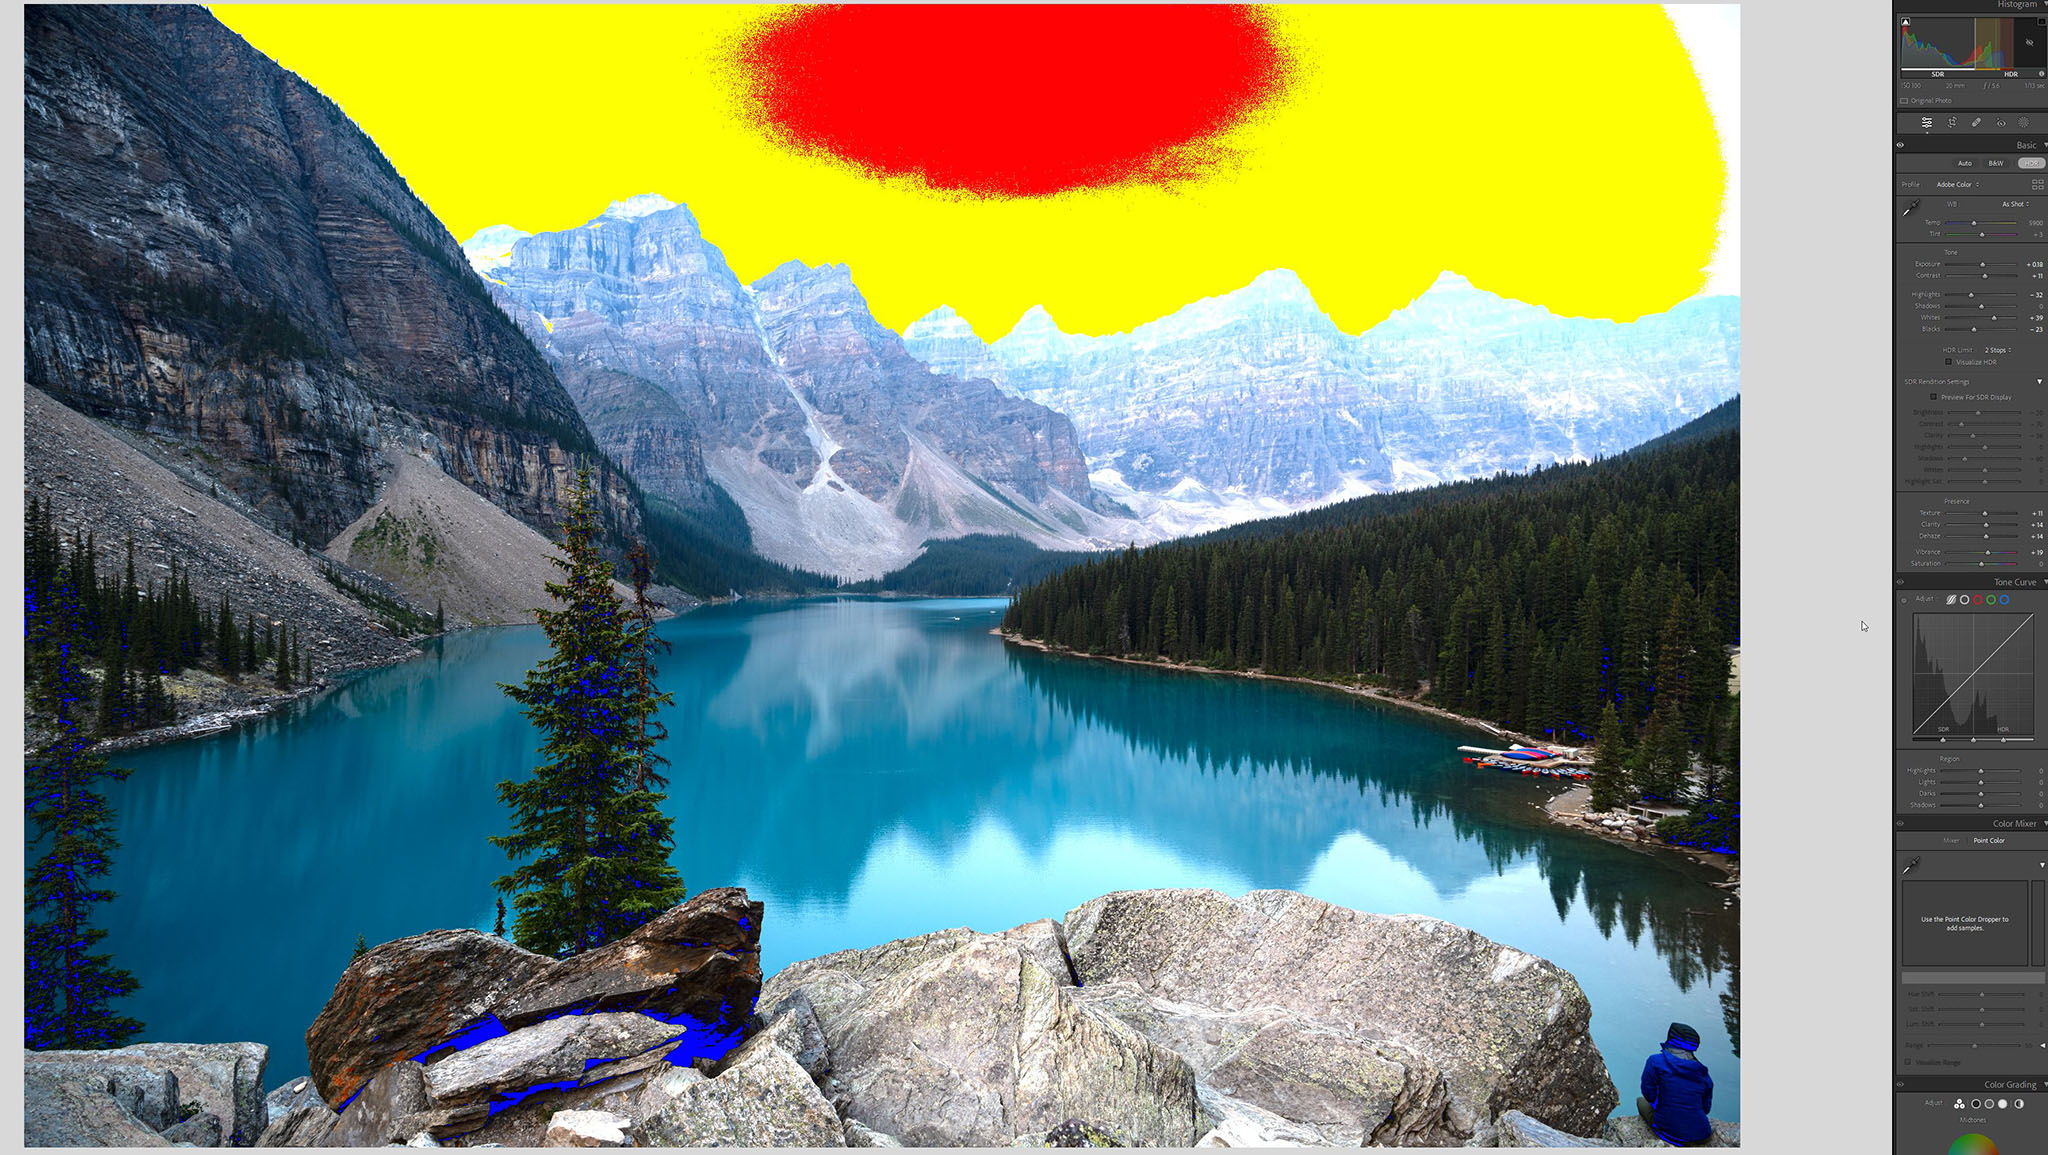
Clipping in HDR works slightly differently from SDR clipping. In Lightroom’s HDR mode, yellow shows the portion of the image that sits above the SDR range, while red shows the portion of the image that is either clipped in the file or clipped relative to your monitor’s maximum brightness. So, if you were thinking that Lightroom’s HDR mode could rescue photos where you blew out the highlights, unfortunately that’s not something it can do – those areas will be blown out and displayed as clipped in red.
While editing, it’s important to understand that viewers with SDR displays (or even users with HDR displays but a broken aspect of the display chain, like an incompatible browser or social media platform) will be seeing something different than you. This is where the SDR Rendition Settings functionality comes into play. Toggling this on will provide controls over how the HDR image is mapped down to the SDR range.
It’s very important to edit these SDR Rendition Settings any time that you are working in HDR, since they control how your image will be seen on SDR monitors and apps (AKA most monitors and apps)! You can’t just edit the photo in HDR and expect the SDR image to look right, too. I’ve found that I often need to make significant tweaks in the SDR Display section in order for the image to look right.
How to Export HDR Images from Lightroom
When a photo in Lightroom is edited in HDR mode, you’ll see a new option upon export called “HDR Output” (under the File Settings tab in the export dialog). Check this box, and you’ll see the Color Space options switch to HDR-compatible color spaces.
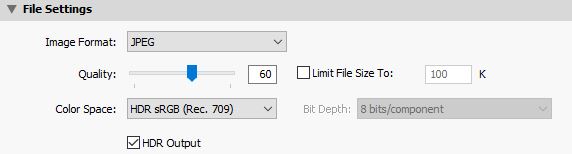
If you’re exporting for web use, a JPG with a gain map is the safest bet, particularly with the Rec 709 colorspace. This allows any SDR display to work with the photo properly, while showing the larger tonal range on HDR-aware platforms and devices.
Should You Use HDR Mode in Lightroom?
I’ve long felt that Lightroom tends to be behind the cutting-edge of new features. It’s taken a long time for basic options like layers and masking to catch up to other apps, for instance. In the case of HDR, however, Lightroom is way out in front.
Lightroom’s implementation of HDR editing being the best I’ve experienced yet. It makes HDR editing surprisingly effortless. To be clear, you can (and should) export HDRs with a gain map created in the SDR Rendition Settings so that you always have a “safe” SDR version to fall back on. So long as you don’t mind this additional work, you shouldn’t run into any serious issues when working with HDR and displaying those photos elsewhere.

That said, editing in HDR is not necessarily something you should start doing right away. While images can look better when shot and edited with HDR display in mind, the reality is that few viewers right now will be able to experience such photos properly, and it adds more post-processing work to every photo.
Not to mention that the Windows implementation of HDR feels very clunky at the moment, with tons of graphical oddities showing up, even on the latest hardware. Mac users on the latest devices have things a bit better, with more competent native handling of HDR, but all this falls apart when you go to share an image with anyone outside the ecosystem.
None of this is Adobe’s fault, however, and Lightroom implements HDR mode in a very convenient way. With that in mind, I’m excited to see the continued development of support for HDR among software and platforms. I also know Lightroom will be the primary tool I’d use for creating and sharing HDR images in the near future.
Let me know in the comments if you have any questions about the HDR tools available in Lightroom, as well as if you’ve tried editing any HDR images yet. This is a very interesting piece of tech, albeit niche. I think the photography community has a lot of exploring to do with it, even though it will take some time before most apps and displays properly support HDR content.

